

About Beth
Beth created one of the first gluten-free companies in the US, wrote books, and now shares 40 years of living well without gluten in her latest book, The Complete Guide to Living Well Gluten Free. She believes no one should go without because of gluten. Through her cookbooks, lifestyle book and essays, she shows us how. Travel, restaurant dining, parties, dating, raising kids – she’s been there and takes celiac disease and the gluten free diet along for the ride. Join her as she answers all your baking and lifestyle questions.A recipe by Beth Hillson
Serves 6 
Comfort food meets gluten free with this thick and hearty potage. Perfect for a winter feast and for feeding a crowd of hungry visitors, this soup is chockfull of vegetables, gluten-free pasta and white cannellini beans. Serve with gluten-free rolls or biscuits. Cook the pasta separately and add to the soup just before serving to prevent it from soaking up all the liquids. Top with parmesan cheese. For more comfort foods, see my article in Gluten Free & More, Feb/Mar 2017.
3 tablespoons extra-virgin olive oil
3 slices turkey bacon, chopped
2 cups finely chopped leeks (about 1 large leek)
2 teaspoons crushed garlic
2 stalks celery, thinly sliced
2 large carrots, peeled and chopped
1 large potato, peeled and diced
1 large diced, unpeeled zucchini (about 1 cup)
1 tablespoon freeze dried or fresh chopped basil
1 teaspoon dried oregano
Salt and freshly ground pepper, to taste
1, 28 -ounce can tomatoes, drained and chopped
6 cups gluten-free chicken broth, more as needed to thin out the soup
1 cup frozen green peas
1, 15 -ounce can cannellini beans, rinsed and drained
1 cup cooked gluten free elbow pasta
1/3 cup finely grated parmesan cheese, divided
2 tablespoons chopped fresh basil, for garnish
Heat the olive oil in a large pot over medium-high heat. Add the turkey bacon and cook until pieces begin to brown, about 2 minutes. Add leeks and cook until leeks are translucent, about 4 minutes. Add the garlic and cook 30 seconds. Add the celery, carrot, and potato, and cook until they begin to soften, about 5 minutes. Stir in the zucchini, basil, oregano, salt, and pepper to taste; cook1 minute.
Add the tomatoes and the chicken broth to the pot and bring to a boil. Reduce the heat to medium low and simmer, covered, 10 minutes. Stir in the peas and beans and cook until the vegetables are fork tender, about 10 minutes. Divide pasta into 6 bowls and ladle soup over the pasta. Top with parmesan and chopped basil. Serve.

A Recipe from Beth Hillson
Makes 36 to 40 cookies 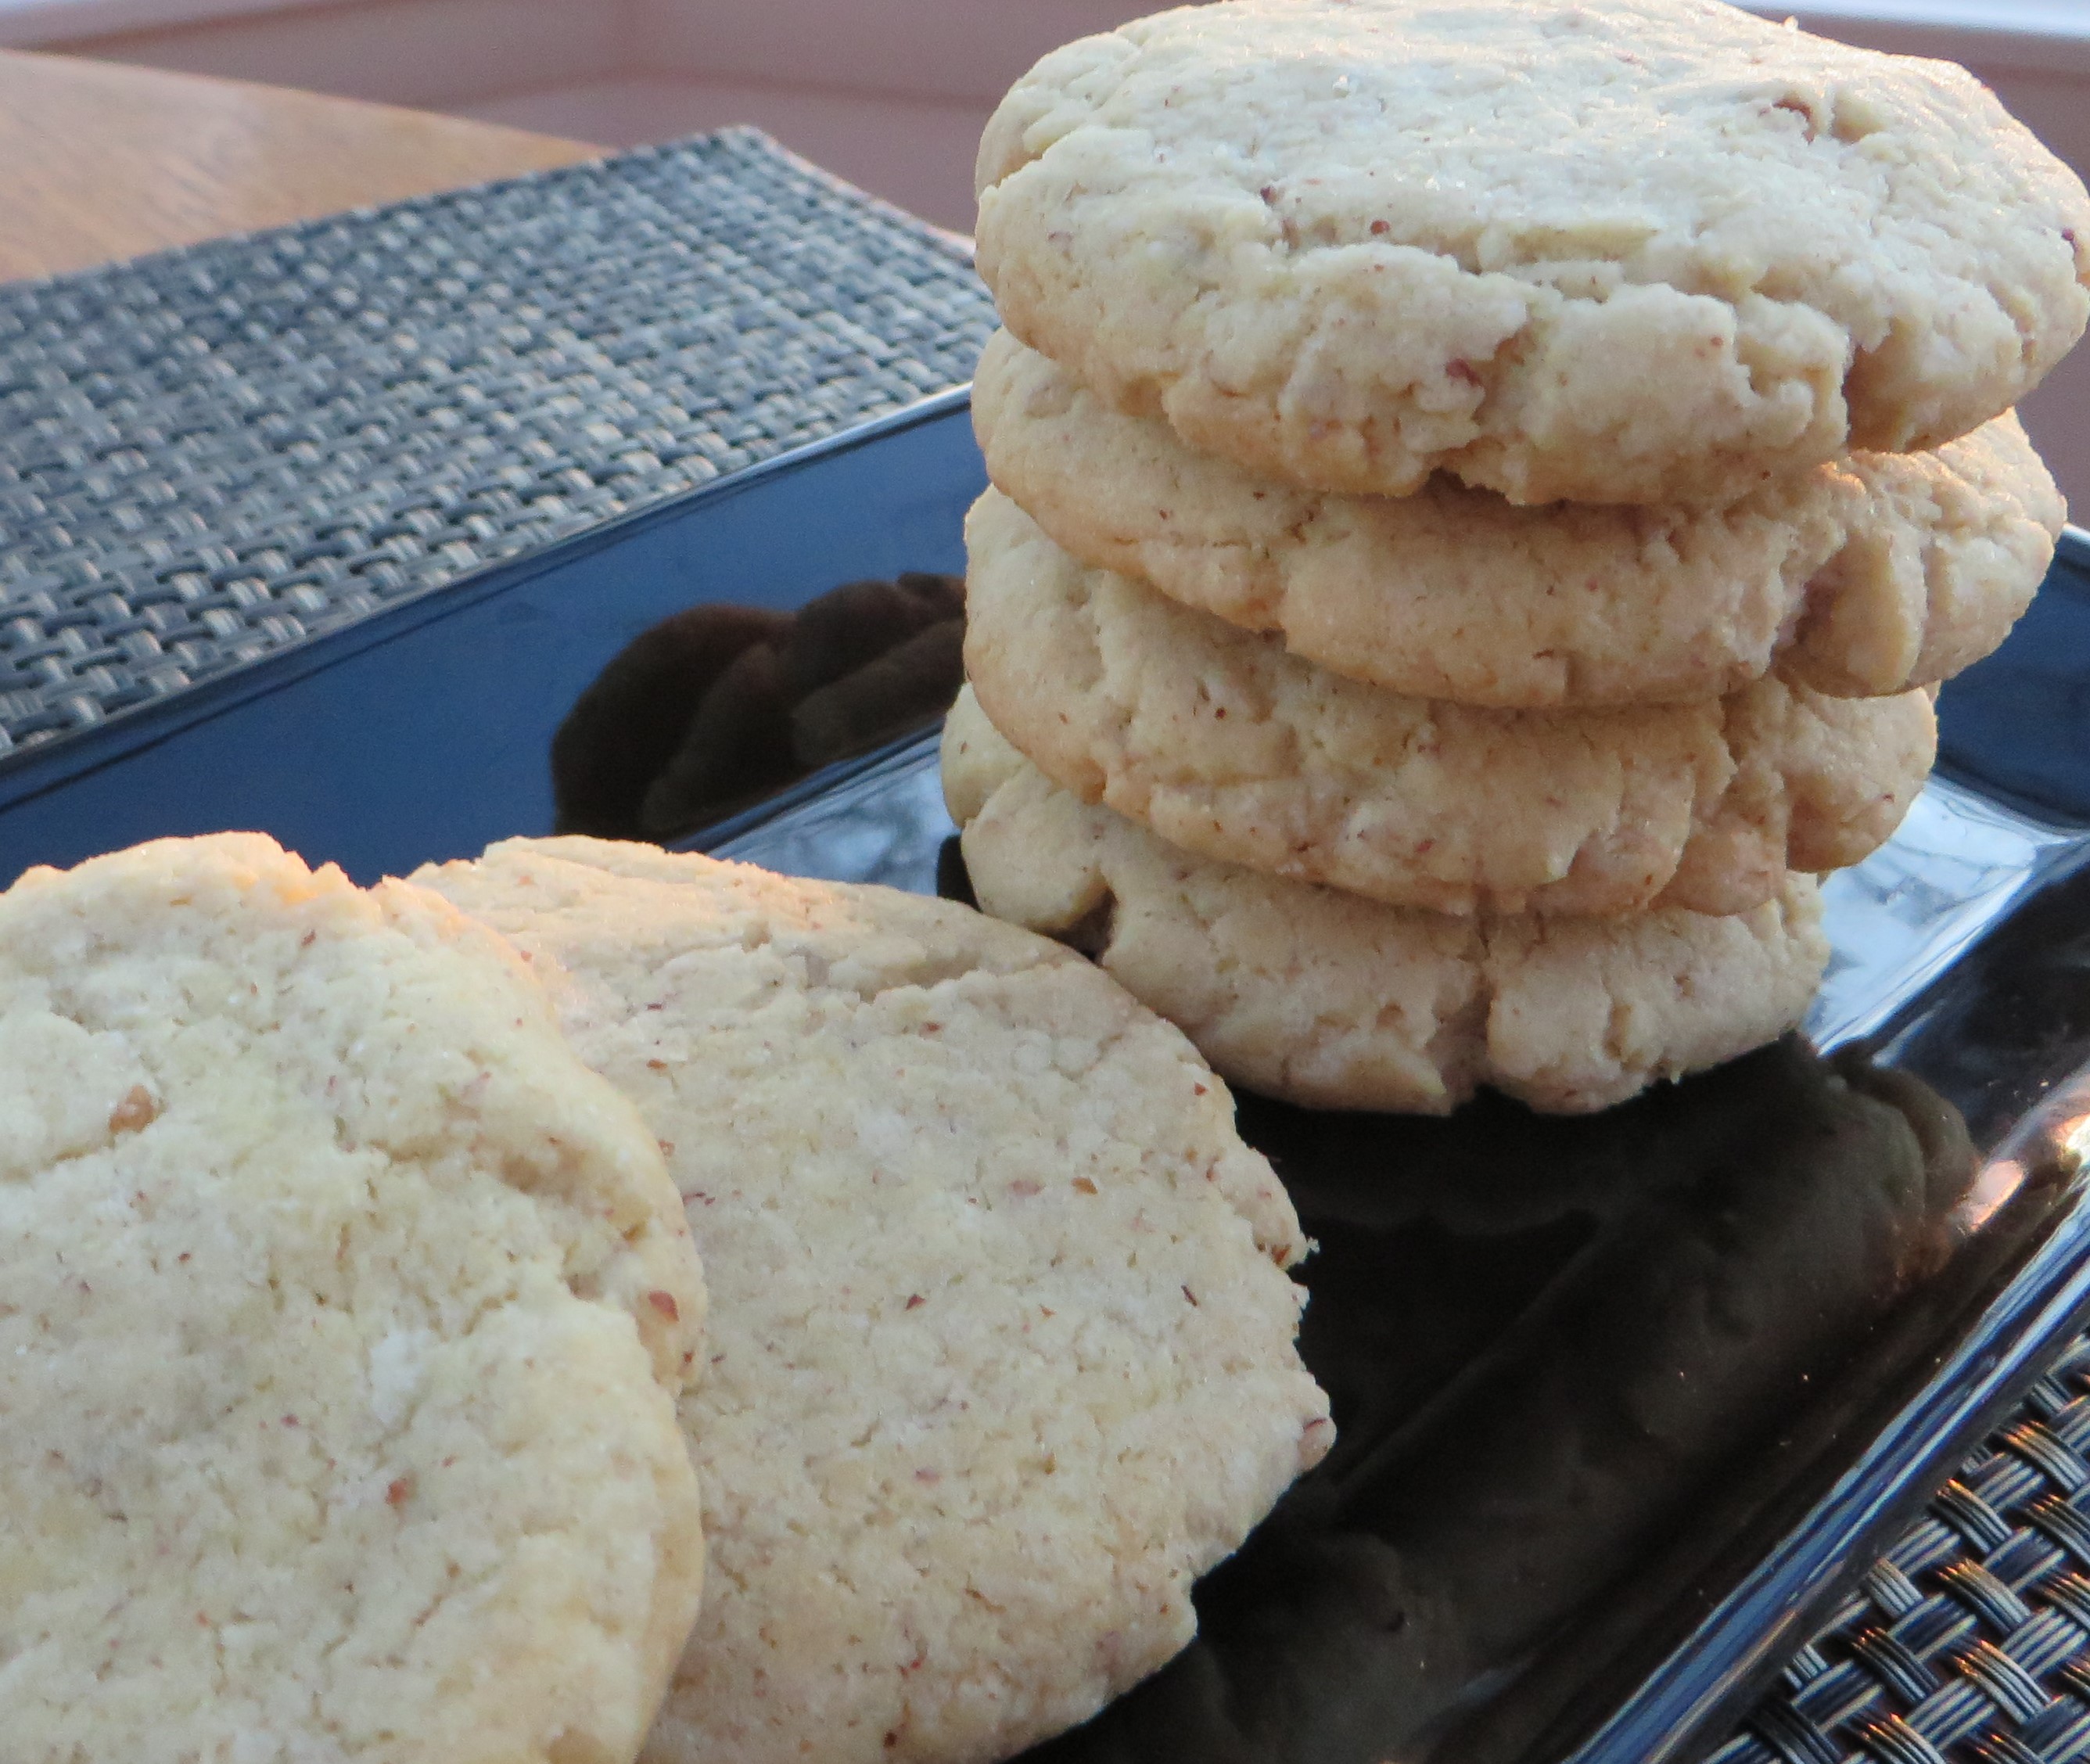
These Pecan Sandies were inspired by Keebler cookies or, perhaps, it’s the other way around. One thing is for sure, these cookies will inspire you. They are a hit with everyone who tries them. Easy to make, they freeze well and can be mailed without breaking. I used RYZE Blue flour blend but you could use another all-purpose gluten-free flour blend, too. I like RYZE because it does not contain gums and I think their Blue blend works well for cookies. If you use another flour blend, add 1 teaspoon xanthan or guar gum and 2 tablespoons additional corn or potato starch.
1 ¾ cups RYZE Blue flour blend
½ teaspoon cream of tarter
½ teaspoon baking soda
½ cup organic non-hydrogenated shortening (like Spectrum)
½ cup granulated sugar
½ cup confectioners’ sugar
2 large eggs, lightly beaten
¼ teaspoon salt
1 teaspoon vanilla extract
½ cup finely chopped pecans
Line 2 cookie sheets with parchment paper. Set aside.
Combine flour, cream of tartar, and baking soda. Mix well.
In a large mixing bowl, beat the shortening and the sugars until fluffy. Add the eggs, salt and vanilla and beat to combine. Add the flour mixture, about 1/3 at a time, beating after each addition. Fold in the pecans.
Chill the dough for 30 minutes. Preheat the oven to 350 degrees.
Roll the dough into walnut-size pieces (about 1-inch balls) and set on cookie sheets. Flatten each until it is about ¼ inch thick. Bake 12 to 14 minutes or until the edges are slightly golden. Cool and enjoy.
These are even better the second day and can be wrapped and stored in the freezer for up to 6 weeks.
Recipe from Beth Hillson
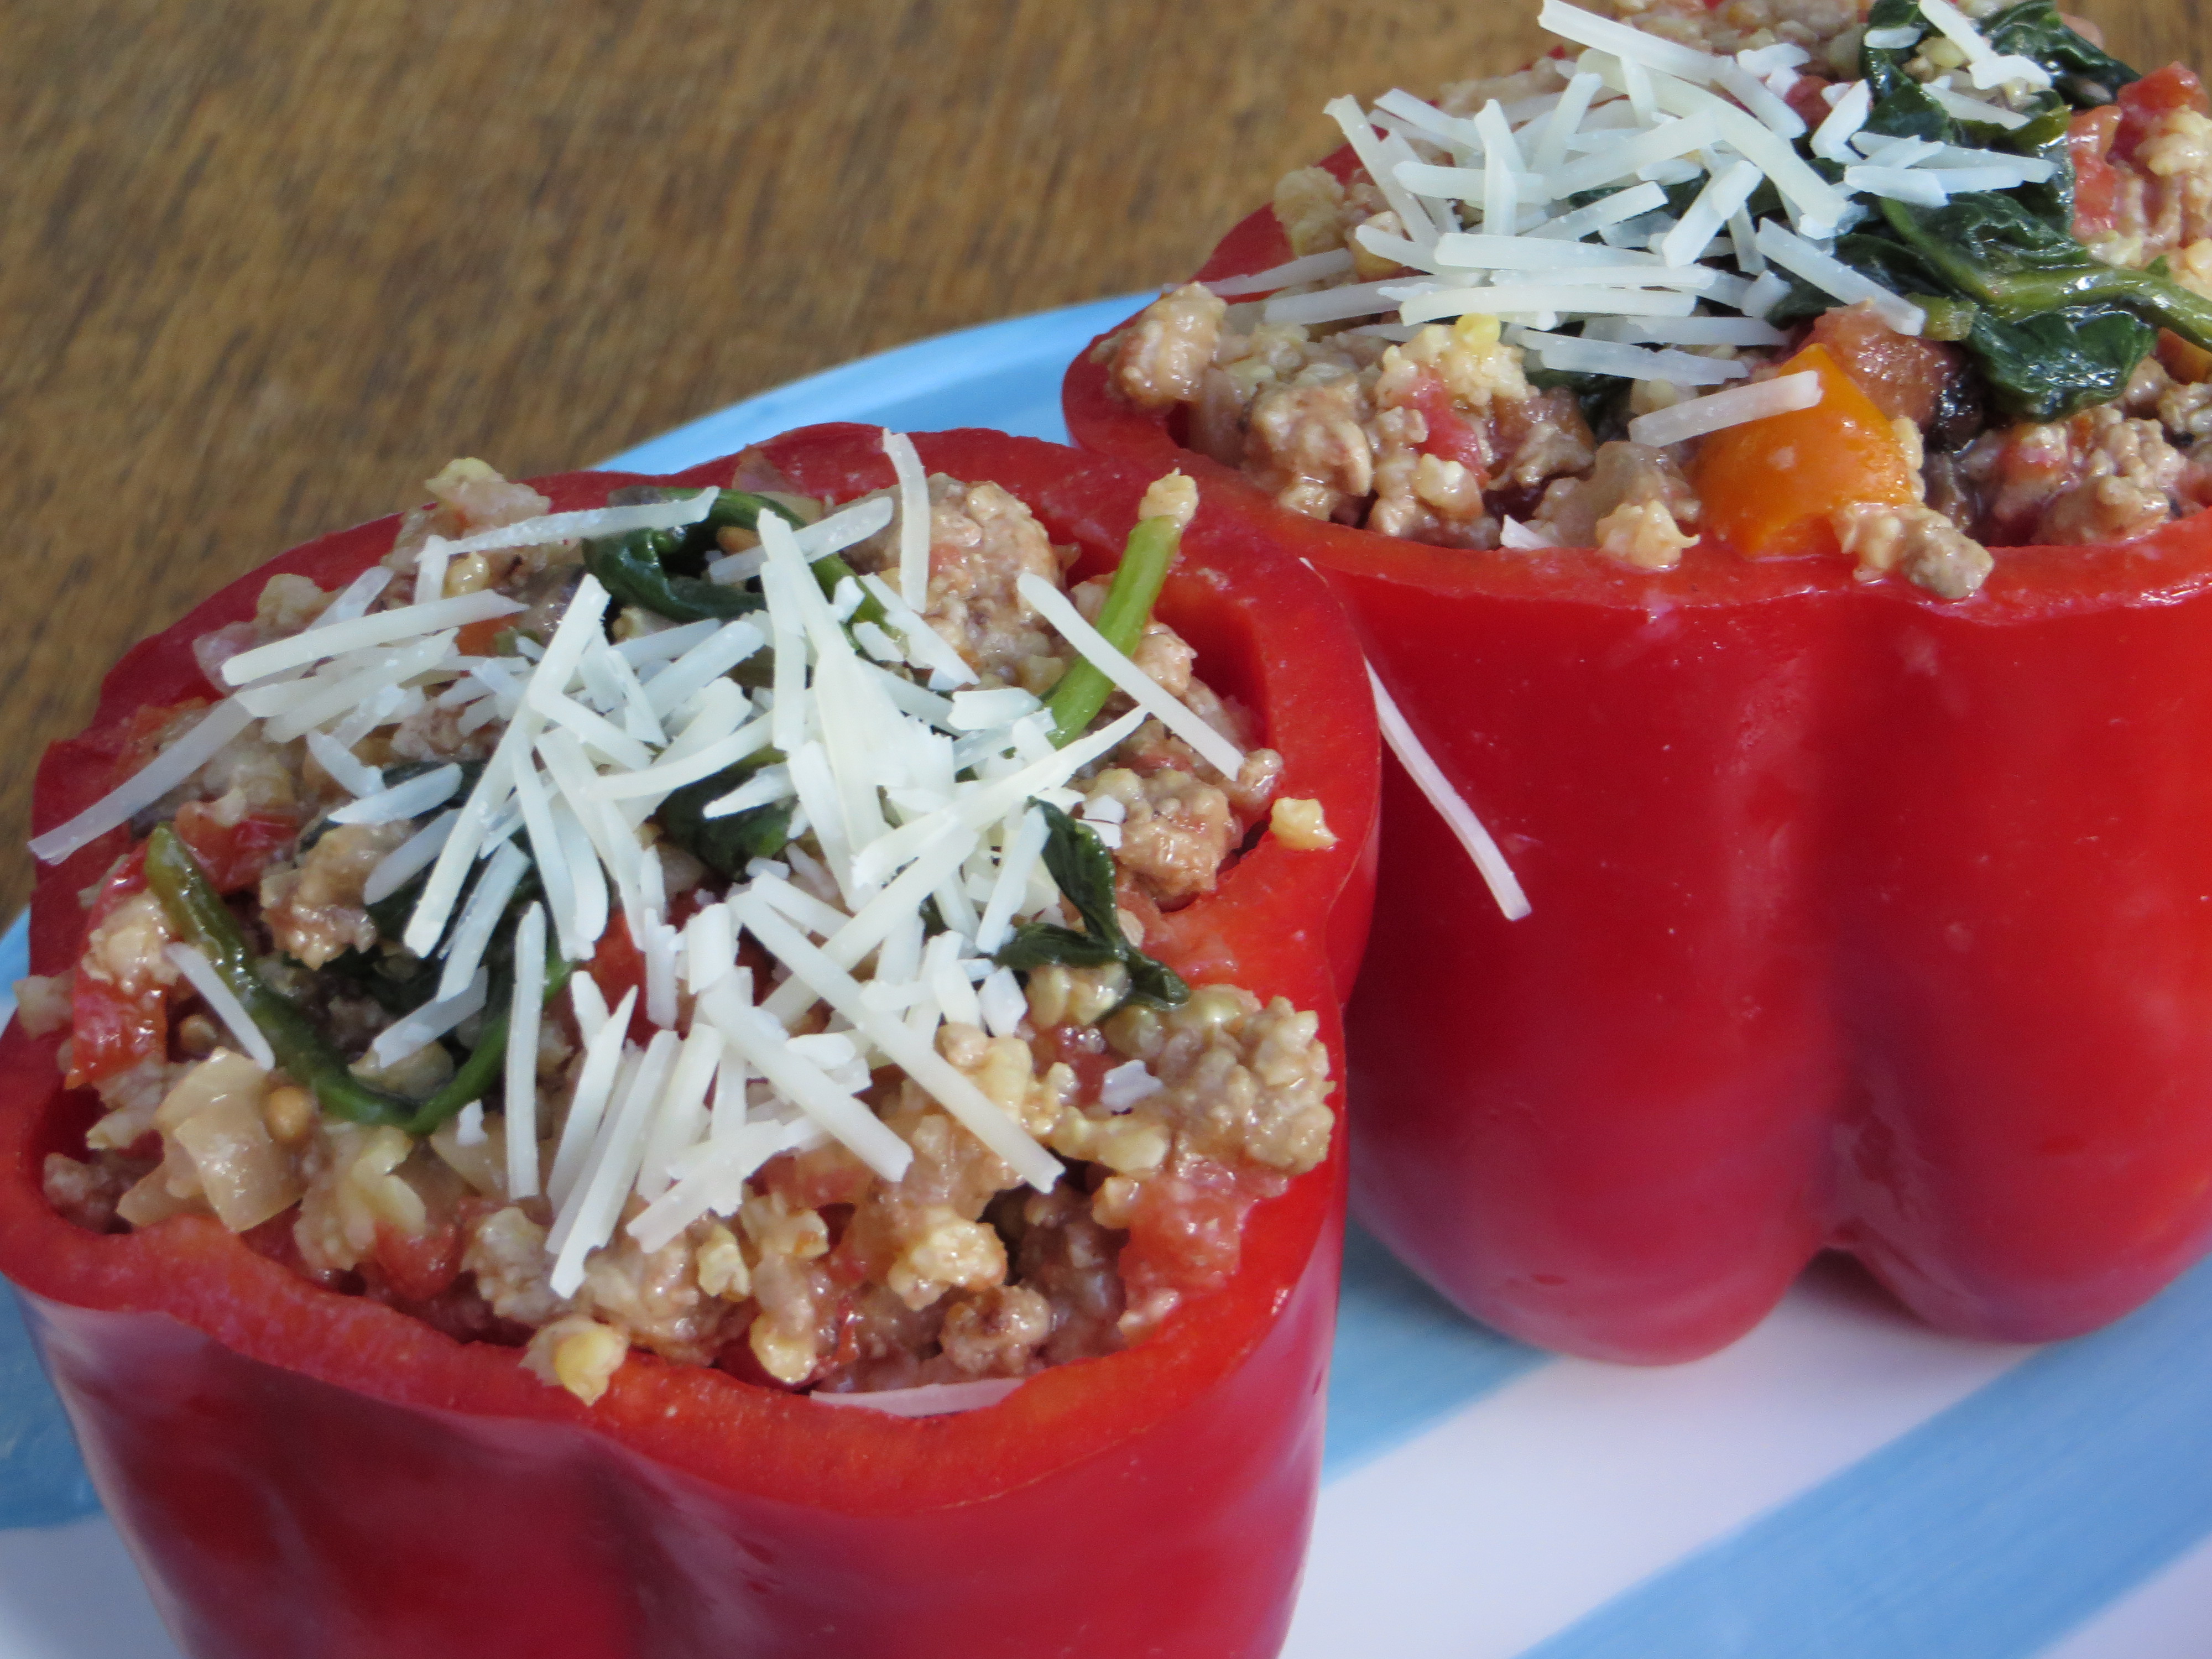
This healthy, flavorful gluten free meal will be a hit with your family as it’s been with mine. The recipe is made with cooked millet, a nutrient-dense gluten-free grain that is high in fiber and protein. It adds a nutty, wholesome taste to this recipe, but you can pick another gluten-free grain if you wish. Quinoa, sorghum or brown rice will work. Store leftover cooked grain in the freezer.
Serves 4 to 6
6 bell peppers, any color
2 tablespoons olive oil
1 onion, finely diced
2 cloves garlic, chopped
¾ pound lean ground turkey
Salt and freshly ground black pepper
 ¼ teaspoon red pepper flakes
1, 15-ounce can petit diced tomatoes, drained
4 ounces baby spinach
4 large crimini mushrooms, coarsely chopped (about ½ cup)
1 cup cooked millet, whole grain sorghum or brown rice
¼ cup grated Parmesan cheese plus 2 tablespoons for topping
Vegetable broth
Preheat the oven to 400 degrees F.
Cut the tops off the peppers. Remove and discard the stems, chop the tops; set aside. Scoop out the seeds and as much of the membrane as you can. Cut a thin slice from the bottom of the peppers so they stay upright in the pan. Place the peppers cut-side up in a baking dish just large enough to hold them.Heat 1 tablespoon of the olive oil in a large skillet over medium-high heat. Add onion and garlic and sauté until onion is translucent. Add the turkey and cook, breaking up the lumps, until the meat is cooked through and just beginning to brown, 8 to 10 minutes.
Drain any liquid that accumulates as the turkey cooks. Season with salt and pepper and red pepper flakes. Transfer to a medium bowl.
Wipe out the skillet and add the remaining tablespoon of olive oil. Add the spinach and mushrooms and cook until spinach begins to wilt. Combine with turkey mixture. Fold in millet and ¼ cup Parmesan cheese.
Add additional salt and pepper as needed.
Fill the peppers with the turkey and millet mixture and top each with a sprinkle of the remaining cheese. Pour a small amount of vegetable stock into the bottom of the baking dish. Cover the dish with foil and bake for 30 minutes. Uncover and bake until the peppers are soft about another 15 minutes.
Categories: Healthy Plate, Recipes | Tags: easy gluten free recipes, easy meals, gluten free dinner recipes, healthy gluten free recipes, main dishes, recipes | No Comments »
Recipe By Beth Hillson
Makes 1 Boule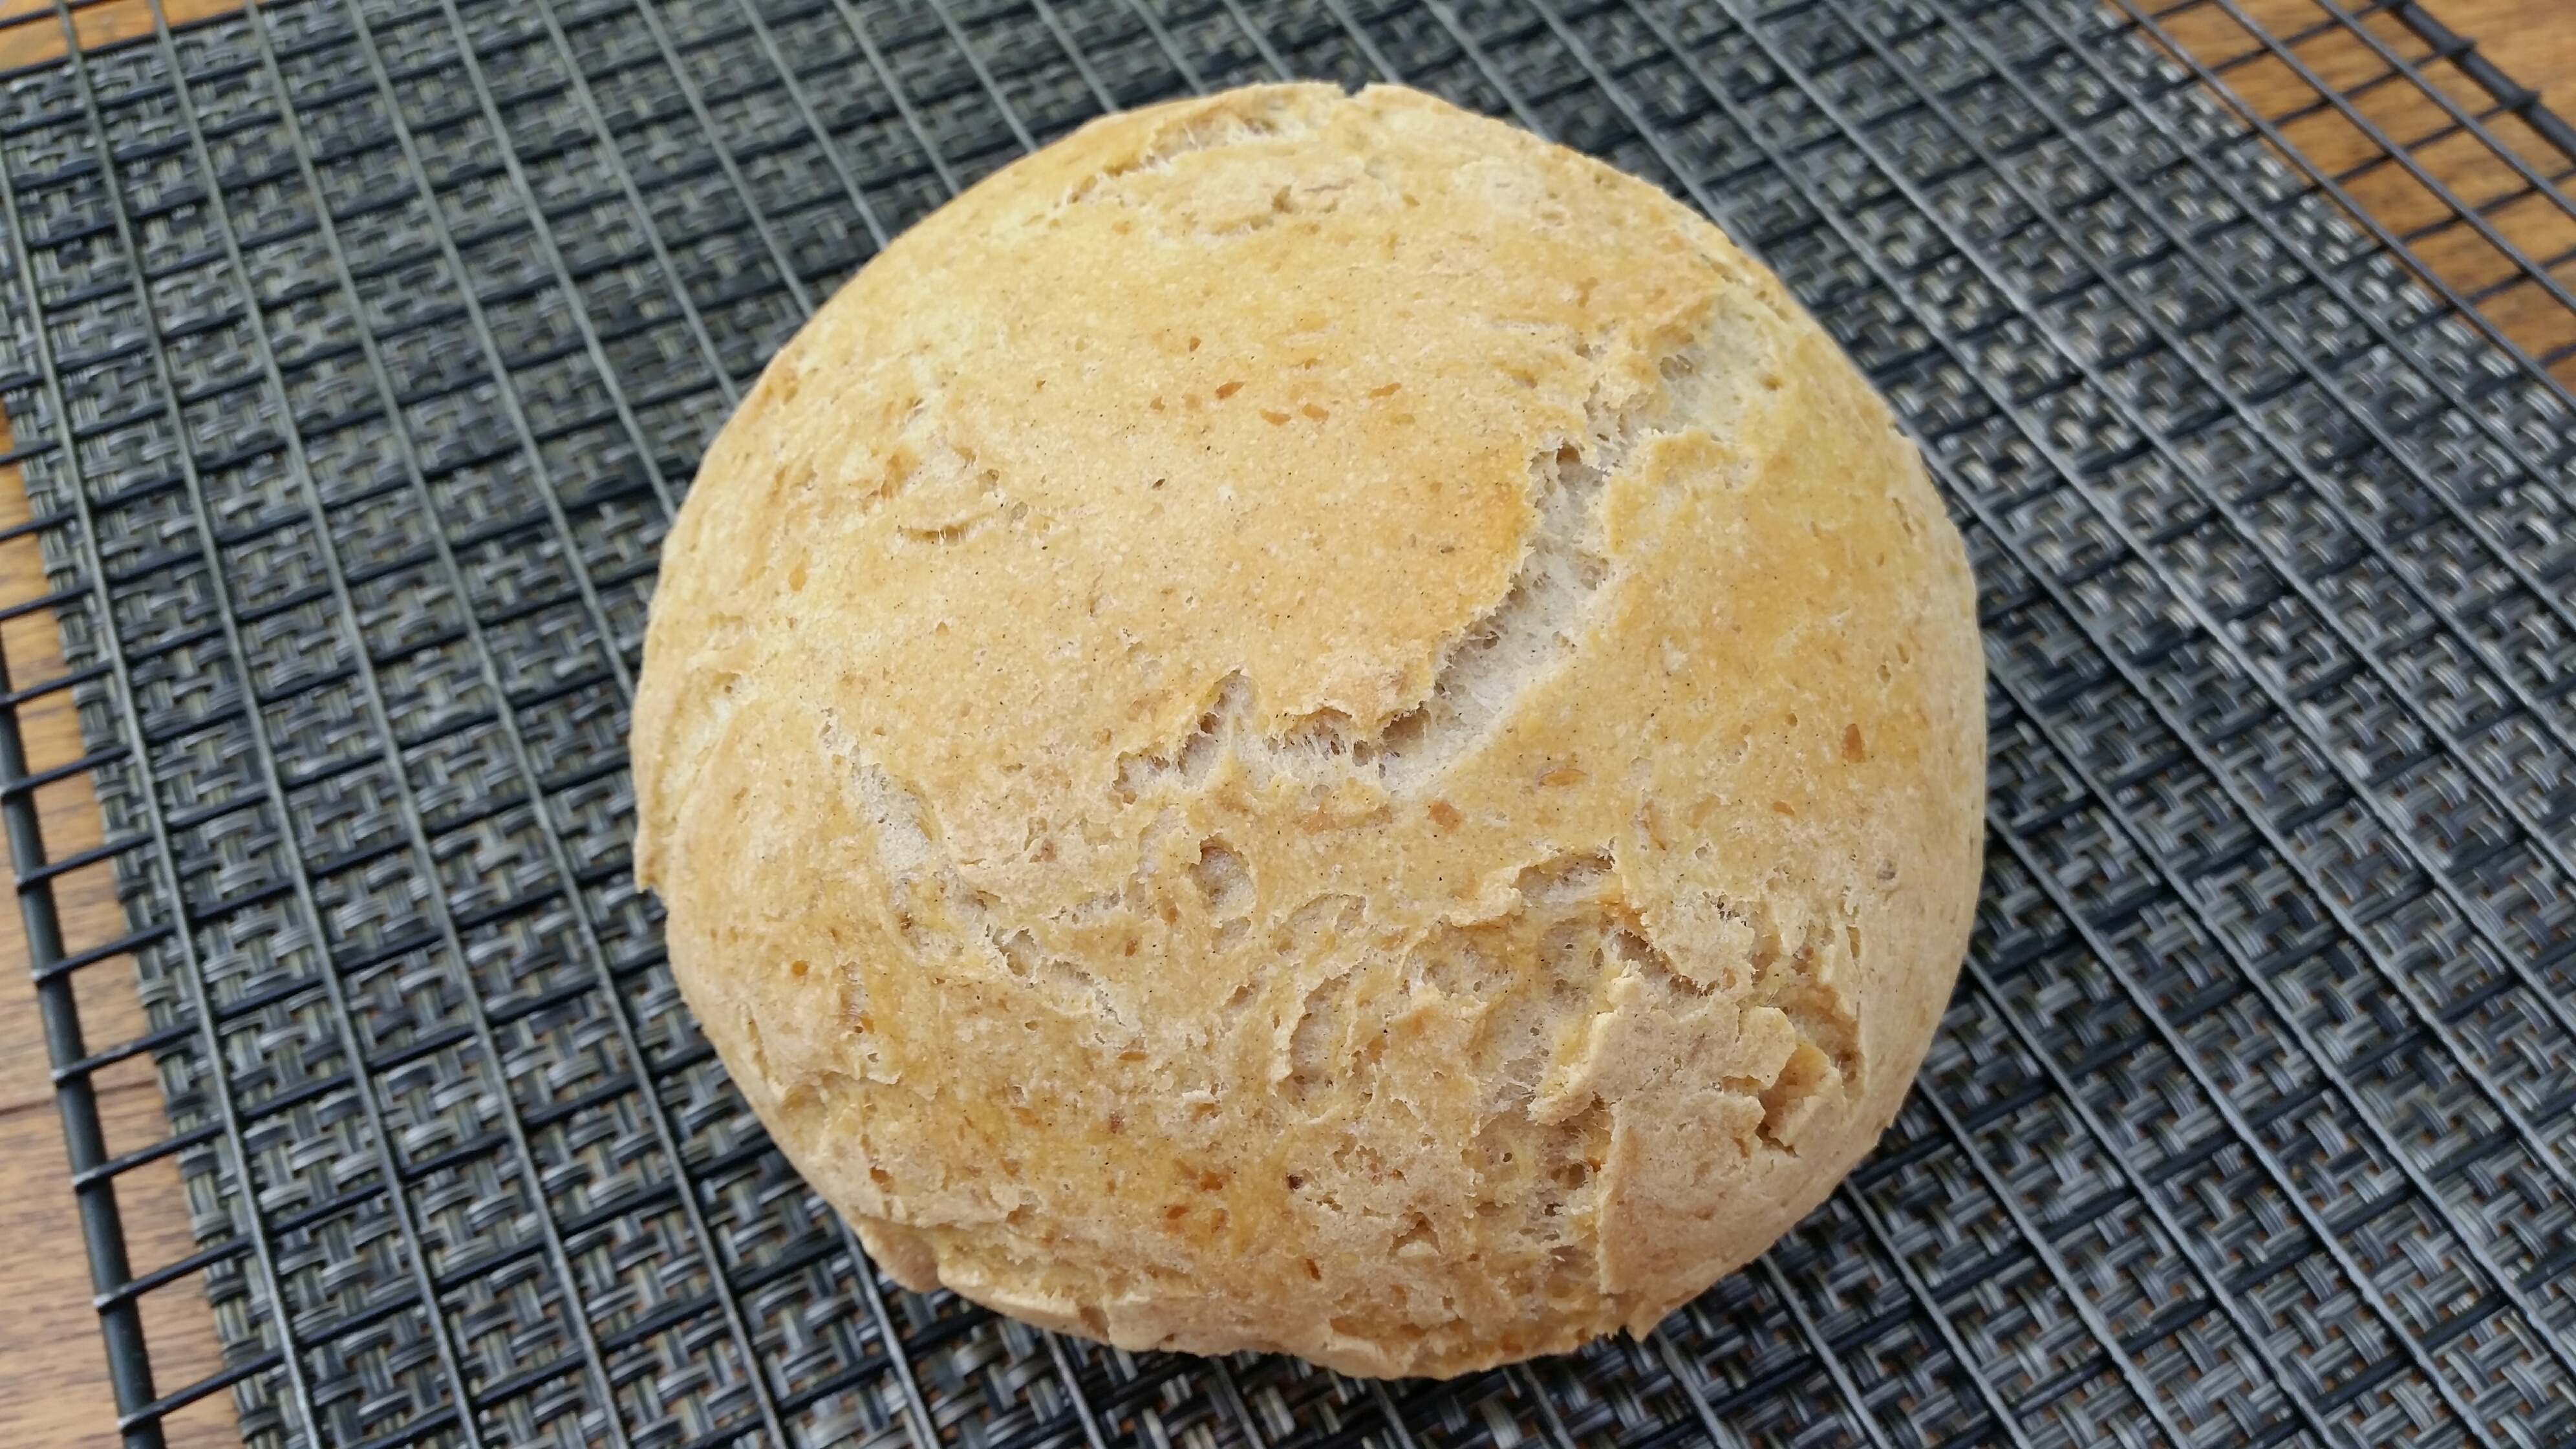
No-Knead Bread seems like an oxymoron to me. Aren’t we all looking for a texture that allows us to touch and knead our gluten free dough? Although you actually can knead the dough in this recipe, it’s not necessary.
This bread is a makeover from the wildly popular no-knead wheat loaf that’s based on a recipe published in the New York Times courtesy of Jim Lahey of Sullivan Street Bakery fame. I know a number of bread bakers who make this regularly. It’s beautiful, tastes terrific, requires no special ingredients and, best of all, it takes virtually no effort to produce a perfect loaf.
When no-knead bread became the rage a couple of years ago for people who bake with wheat flour, it caught my attention. Its popularity was based on an easy prep: Mix it up in a bowl, let it rest on the counter up to 18 hours and stick it in the oven. Voila! Homemade bread.
I used my makeover magic to create this great-tasting, gorgeous loaf, the gluten-free version of Jim Lahey’s recipe. I used flax meal so the structure benefitted from eggs but could rest on the counter overnight. In place of wheat flour, I used a blend of gluten-free flours, starches and xanthan gum.
The amount of water was the tricky part. Too much water made the dough clay-like in texture and produced a hard rather than crusty exterior. Too little resulted in a dry, crumby loaf.
The original recipe called for a tiny bit of yeast. That might work with wheat dough but didn’t produce enough lift for dense, gluten-free dough. I increased the amount of yeast to create a steady fermentation process and a subtle sourdough taste. My loaf did not benefit from a lengthy resting period. The original recipe suggests 18 hours. This dough seems best if you let is rest 8 to 12 hours or overnight.
If you have a Dutch oven, I recommend using it. This produces just enough steam to create a chewy crust. Otherwise, set the boule on a baking stone or baking sheet to bake.
I’ve doubled the recipe and pulled off dough for rolls and breadsticks, too. It’s pretty cool dough and very easy to make.
Note: A version of this recipe appears in the Oct/Nov 2016 issue of Gluten Free & More Magazine.
My Makeover of No-Knead Bread
2 tablespoons flax meal
6 tablespoons hot water
1 ½ cups sorghum flour
¾ cup potato starch
½ cup sweet rice flour
¼ cup tapioca starch flour
2 ½ teaspoons xanthan gum
1 teaspoon salt
2 teaspoons yeast
1 cup warm water, divided, more as needed
2 tablespoons honey
In a medium bowl, combine flax meal with hot water and let sit until thick, about 5 minutes. Meanwhile, mix together sorghum flour, potato starch, sweet rice flour, tapioca starch flour, xanthan gum and salt. Set aside.
Stir yeast, ½ cup warm water and honey into flax gel. Let sit for 15 minutes or until mixture becomes foamy.
Stir mixture into dry ingredients. Add remaining ½ cup warm water, 2 tablespoons at a time, until mixture is smooth and silky to touch but not sticky. It may take the full ½ cup of water. If mixture has dry spots, add 1 tablespoon additional warm water. Dough will be shaggy (not smooth) at this point.
Set in a bowl. Cover with plastic wrap and let the dough sit in a warm spot on the counter for 8 hours or overnight. It should rise, but won’t double in size. As the dough sits, it will give off moisture that will soften the texture.
Coat a sheet of parchment paper with oil. Set the dough on parchment and roll it to coat in the oil. Smooth into a ball. Set it in a 4-quart Dutch oven, cover with the lid and let it rise 1 hour.
Preheat the oven to 450 degrees. After 1 hour, remove the lid and score the top with a sharp knife. Brush with oil or egg wash, if desired. (This will cause the crust to brown.)
Cover and bake for 30 minutes. Remove the lid and bake another 20 to 30 minutes.
Cool completely before cutting.
Categories: Recipes | Tags: gluten free bread, gluten free bread makeover, gluten free quick rise bread, gluten free quick yeast bread | 5 Comments »
Recipe From Beth Hillson
Makes 9 to 12 Patties
Here’s a delicious way to enjoy leftover quinoa. Chickpeas and sweet potato boost the nutritional profile and add flavor and texture. Enjoy these for lunch, dinner or a wholesome snack. You can also serve these on gluten-free rolls or hamburger buns and garnish with lettuce and tomato slices.
Patties will keep 3 to 5 days in the refrigerator. Red Pepper Mayonnaise can be made ahead and stored in a tightly sealed container in the refrigerator for up to a week.
1 cup cooked black and white quinoa
1 cup sweet potato puree or pumpkin puree
1 cup chickpeas, rinsed, drained and mashed
2 teaspoons crushed garlic
2 teaspoons crushed ginger
¼ cup quinoa flour
4 scallions, green part removed, white part chopped
2 large eggs
Salt and pepper, to taste
1-1½ cups gluten-free panko crumbs
1 tablespoon olive oil, more as needed
Red Pepper Mayonnaise (Below)
To make the patties, place quinoa, sweet potato puree, mashed chickpeas, garlic, ginger, quinoa flour, chopped scallions, eggs, salt and pepper in a bowl. Mix together until well combined.
Spread panko crumbs over a medium plate.
Scoop out a heaping 1/4 cup of quinoa mixture and pat into a patty about 3 to 4 inches in diameter. Dredge in panko crumbs on both sides. Repeat with remaining quinoa mixture.
Place olive oil in a heavy skillet and heat over medium heat. Sauté patties in olive oil, about 2 minutes a side. Remove from pan and let cool. (Patties can be refrigerated at this point and baked later.)
Preheat oven to 350°F. Line a baking sheet with parchment paper or aluminum foil.
Set patties on prepared baking sheet in a single layer. Place in preheated oven and bake 10 minutes. Serve warm with Red Pepper Mayonnaise.
Red Pepper Mayonnaise
Makes 1¼ cups
¾ cup packed jarred roasted red peppers, without liquid
½ cup lite mayonnaise
1 tablespoon honey
½ teaspoon cayenne pepper, optional
Place roasted red peppers, mayonnaise, honey and cayenne pepper (if using) in the bowl of a food processor fitted with the blade. Blend until smooth.
Recipe by Beth Hillson
Serves 6
Gluten-Free whole-grain sorghum is a newcomer to our great grain choices. A powerhouse of nutrients, vitamins and fiber, sorghum is rich in B vitamins and minerals, it promotes digestion, lowers blood sugar levels and reduces cholesterol. Whole-grain sorghum takes an hour to cook. Pearled sorghum contains fewer nutrients and less fiber but cooks in less time (about 40 minutes). Either way, prepare sorghum a day ahead and refrigerated until ready to use. Add delicious veggies like corn, tomatoes and kale and you’ve got a full meal.
This recipe is part of my Healthy Plate Project, a wellness program to make life healthier one meal at a time.

3 cups water
1 cup uncooked sorghum or pearled sorghum
½ teaspoon salt
6 teaspoons olive oil
1 tablespoon fresh tarragon
2 tablespoons white balsamic vinegar
2 teaspoons sugar, optional
2 teaspoons Dijon mustard
2 teaspoons crushed garlic
½ teaspoon kosher salt
¼ teaspoon black pepper
2-3 cups lightly sautéed chopped kale or baby kale
2 cups halved cherry tomatoes
1 ½ cups fresh corn kernels*
Combine water, sorghum, and ½ teaspoon salt in a medium saucepan. Bring to a boil; cover, reduce heat to low, and simmer 1 hour or until. tender. Drain; cool.
Combine olive oil, tarragon, vinegar, mustard, garlic, salt, and pepper in a large bowl. Whisk well . Add cooked sorghum, kale, tomatoes, and corn kernels; toss.
*Grill corn on the cob. Cool and scrape the kernels off the cob.
Recipe from Beth Hillson
Kale has been the darling of the super food movement for several years. High in nutrients and fiber, filling and versatile, kale is one of my favorites, too. This year, we planted kale in the garden. The plants produce delicate leaves that are not woody like some of the more mature kale you buy in supermarkets. However, you’ll want to make this year round so buy the mature stalks in the produce section and trim the woody stems from the leaves before preparing. It’s best if you can buy organic kale. The convention version is one of the Dirty Dozen, meaning it is a sponge for pesticides.
This recipe is part of my Healthy Plate Project, a wellness program to make life healthier one meal at a time.
Check out my crop of homegrown kale. 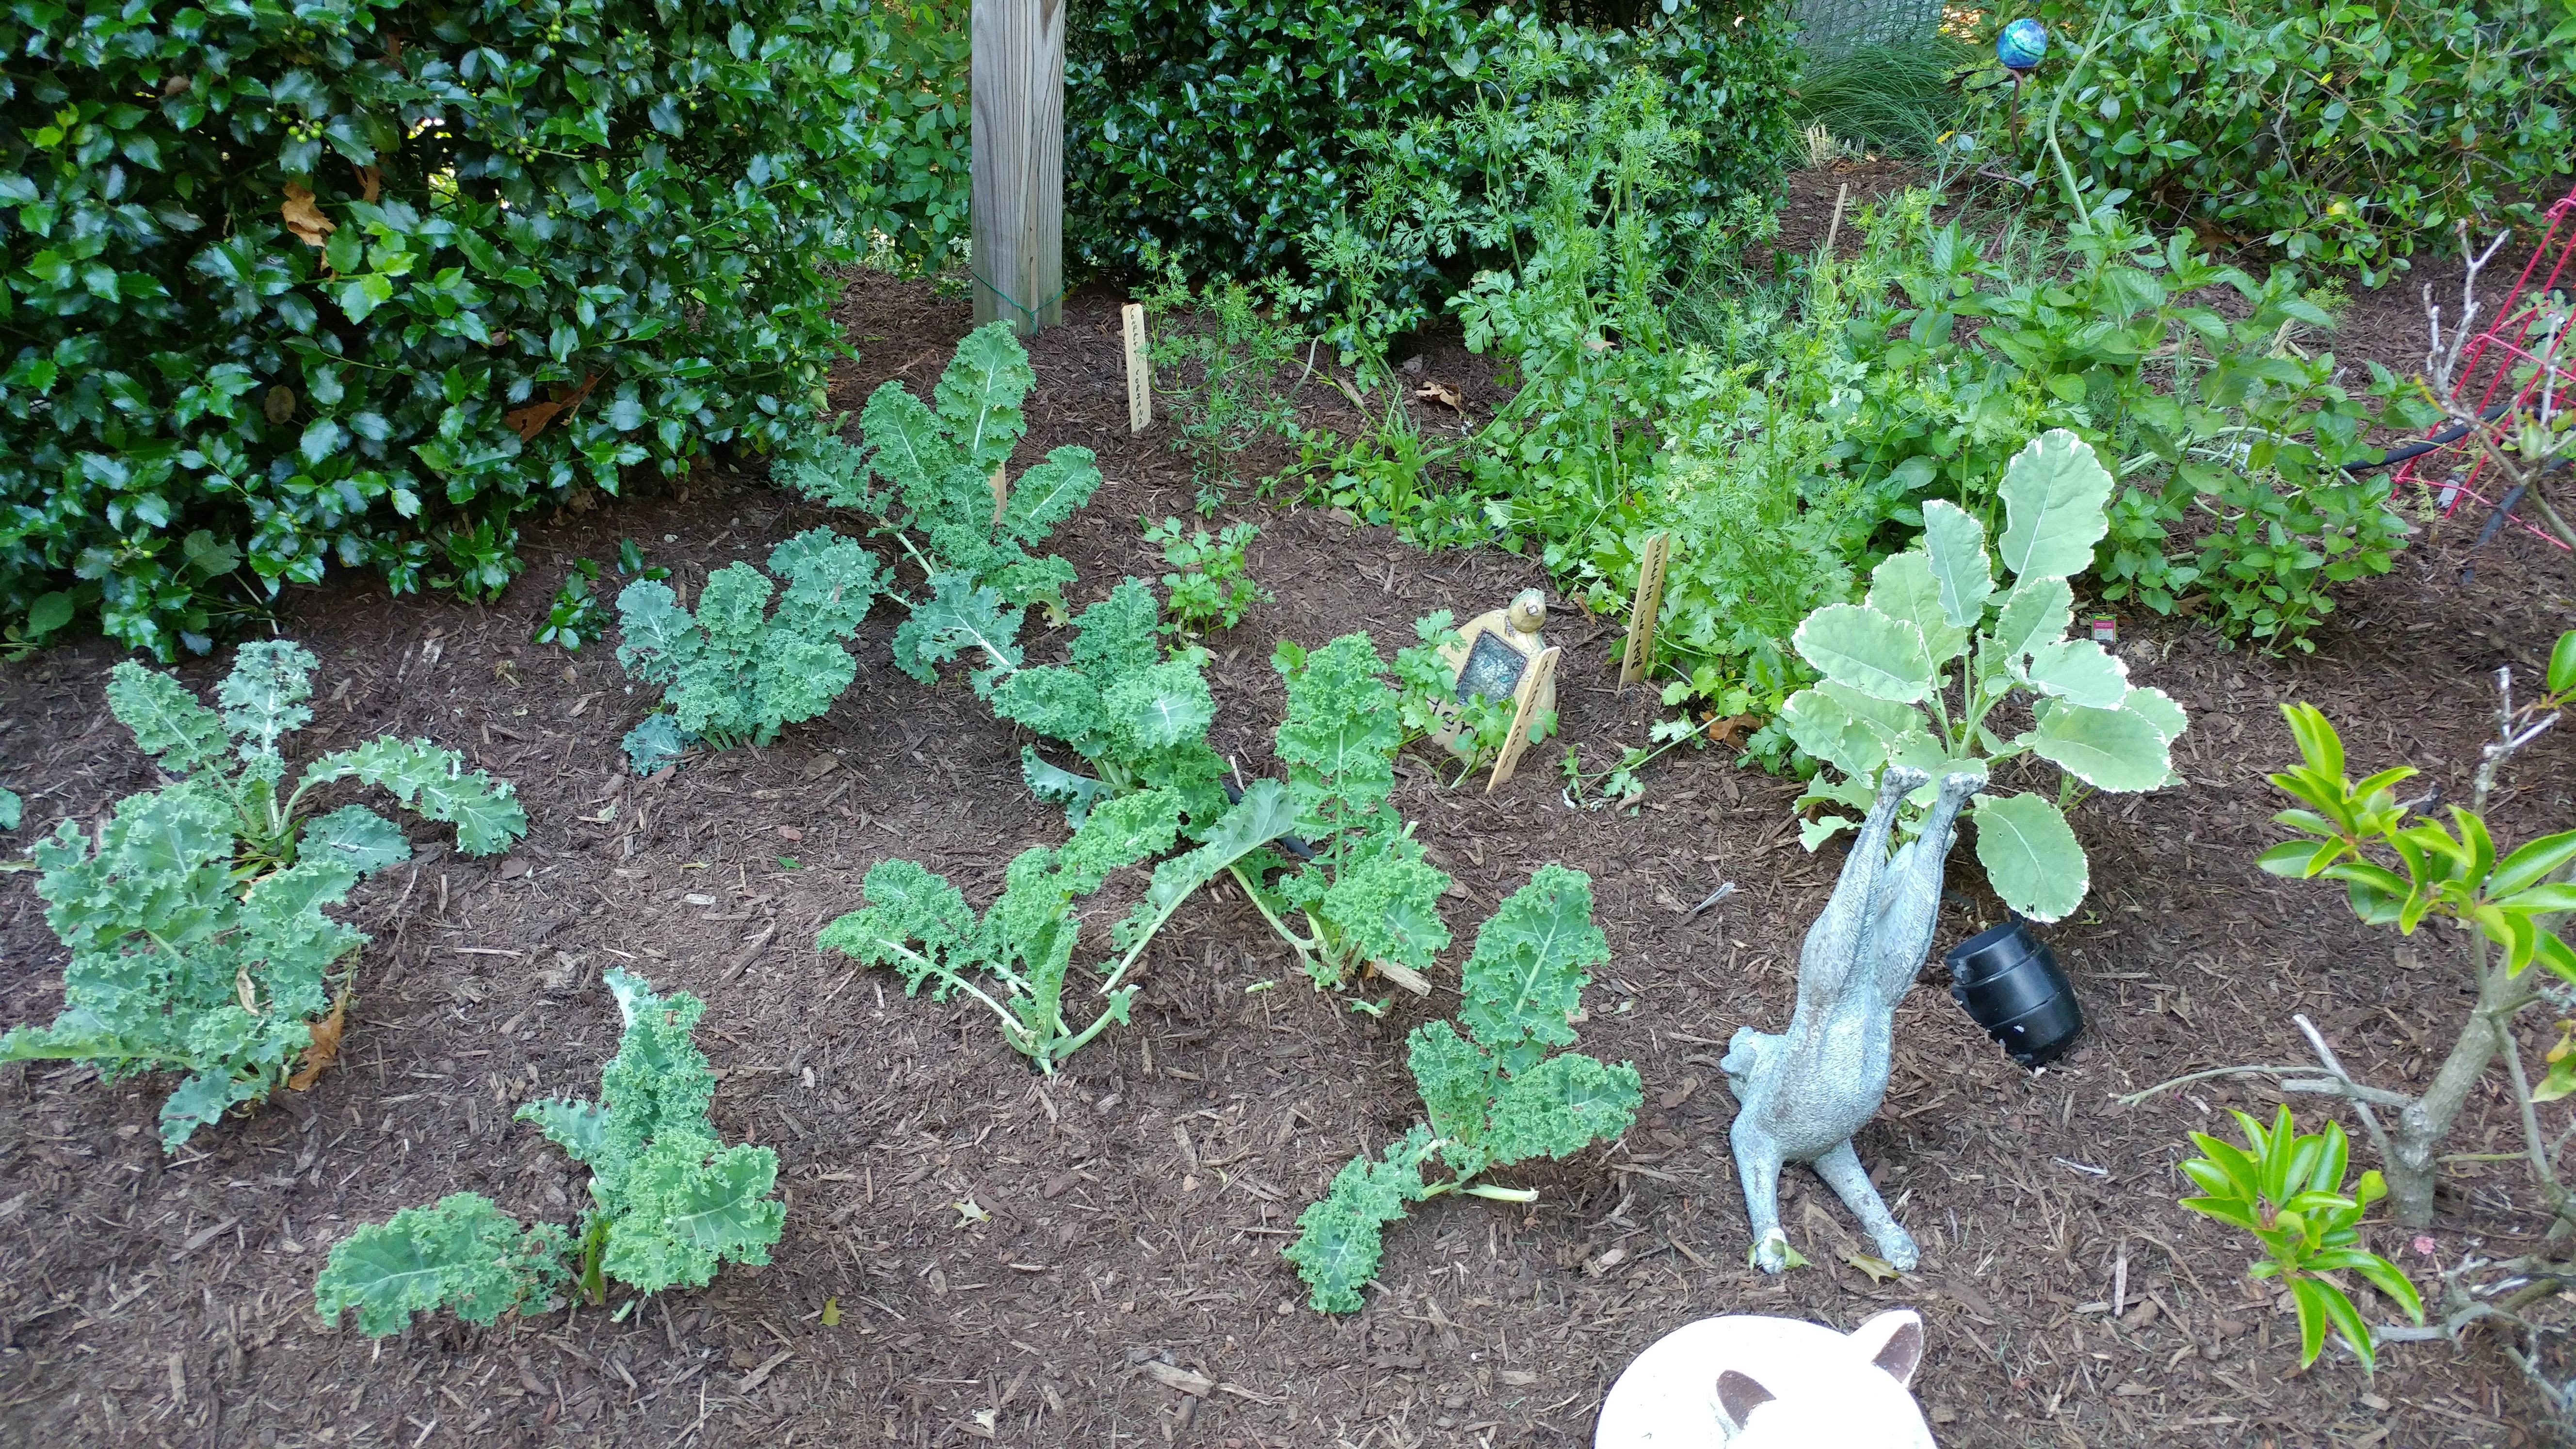 The Salad
Serves 6
3 red or golden beets, peeled and cubed
3 tablespoons olive oil, divided
Sea salt, as needed
2 bunches curly kale (about 10 cups)
3 peaches, cut in slices or frozen peach slices, thawed
2 large plum tomatoes, cut into slices from top to bottom
6 – 8 ounces feta or goat cheese
1/3 cup pistachios 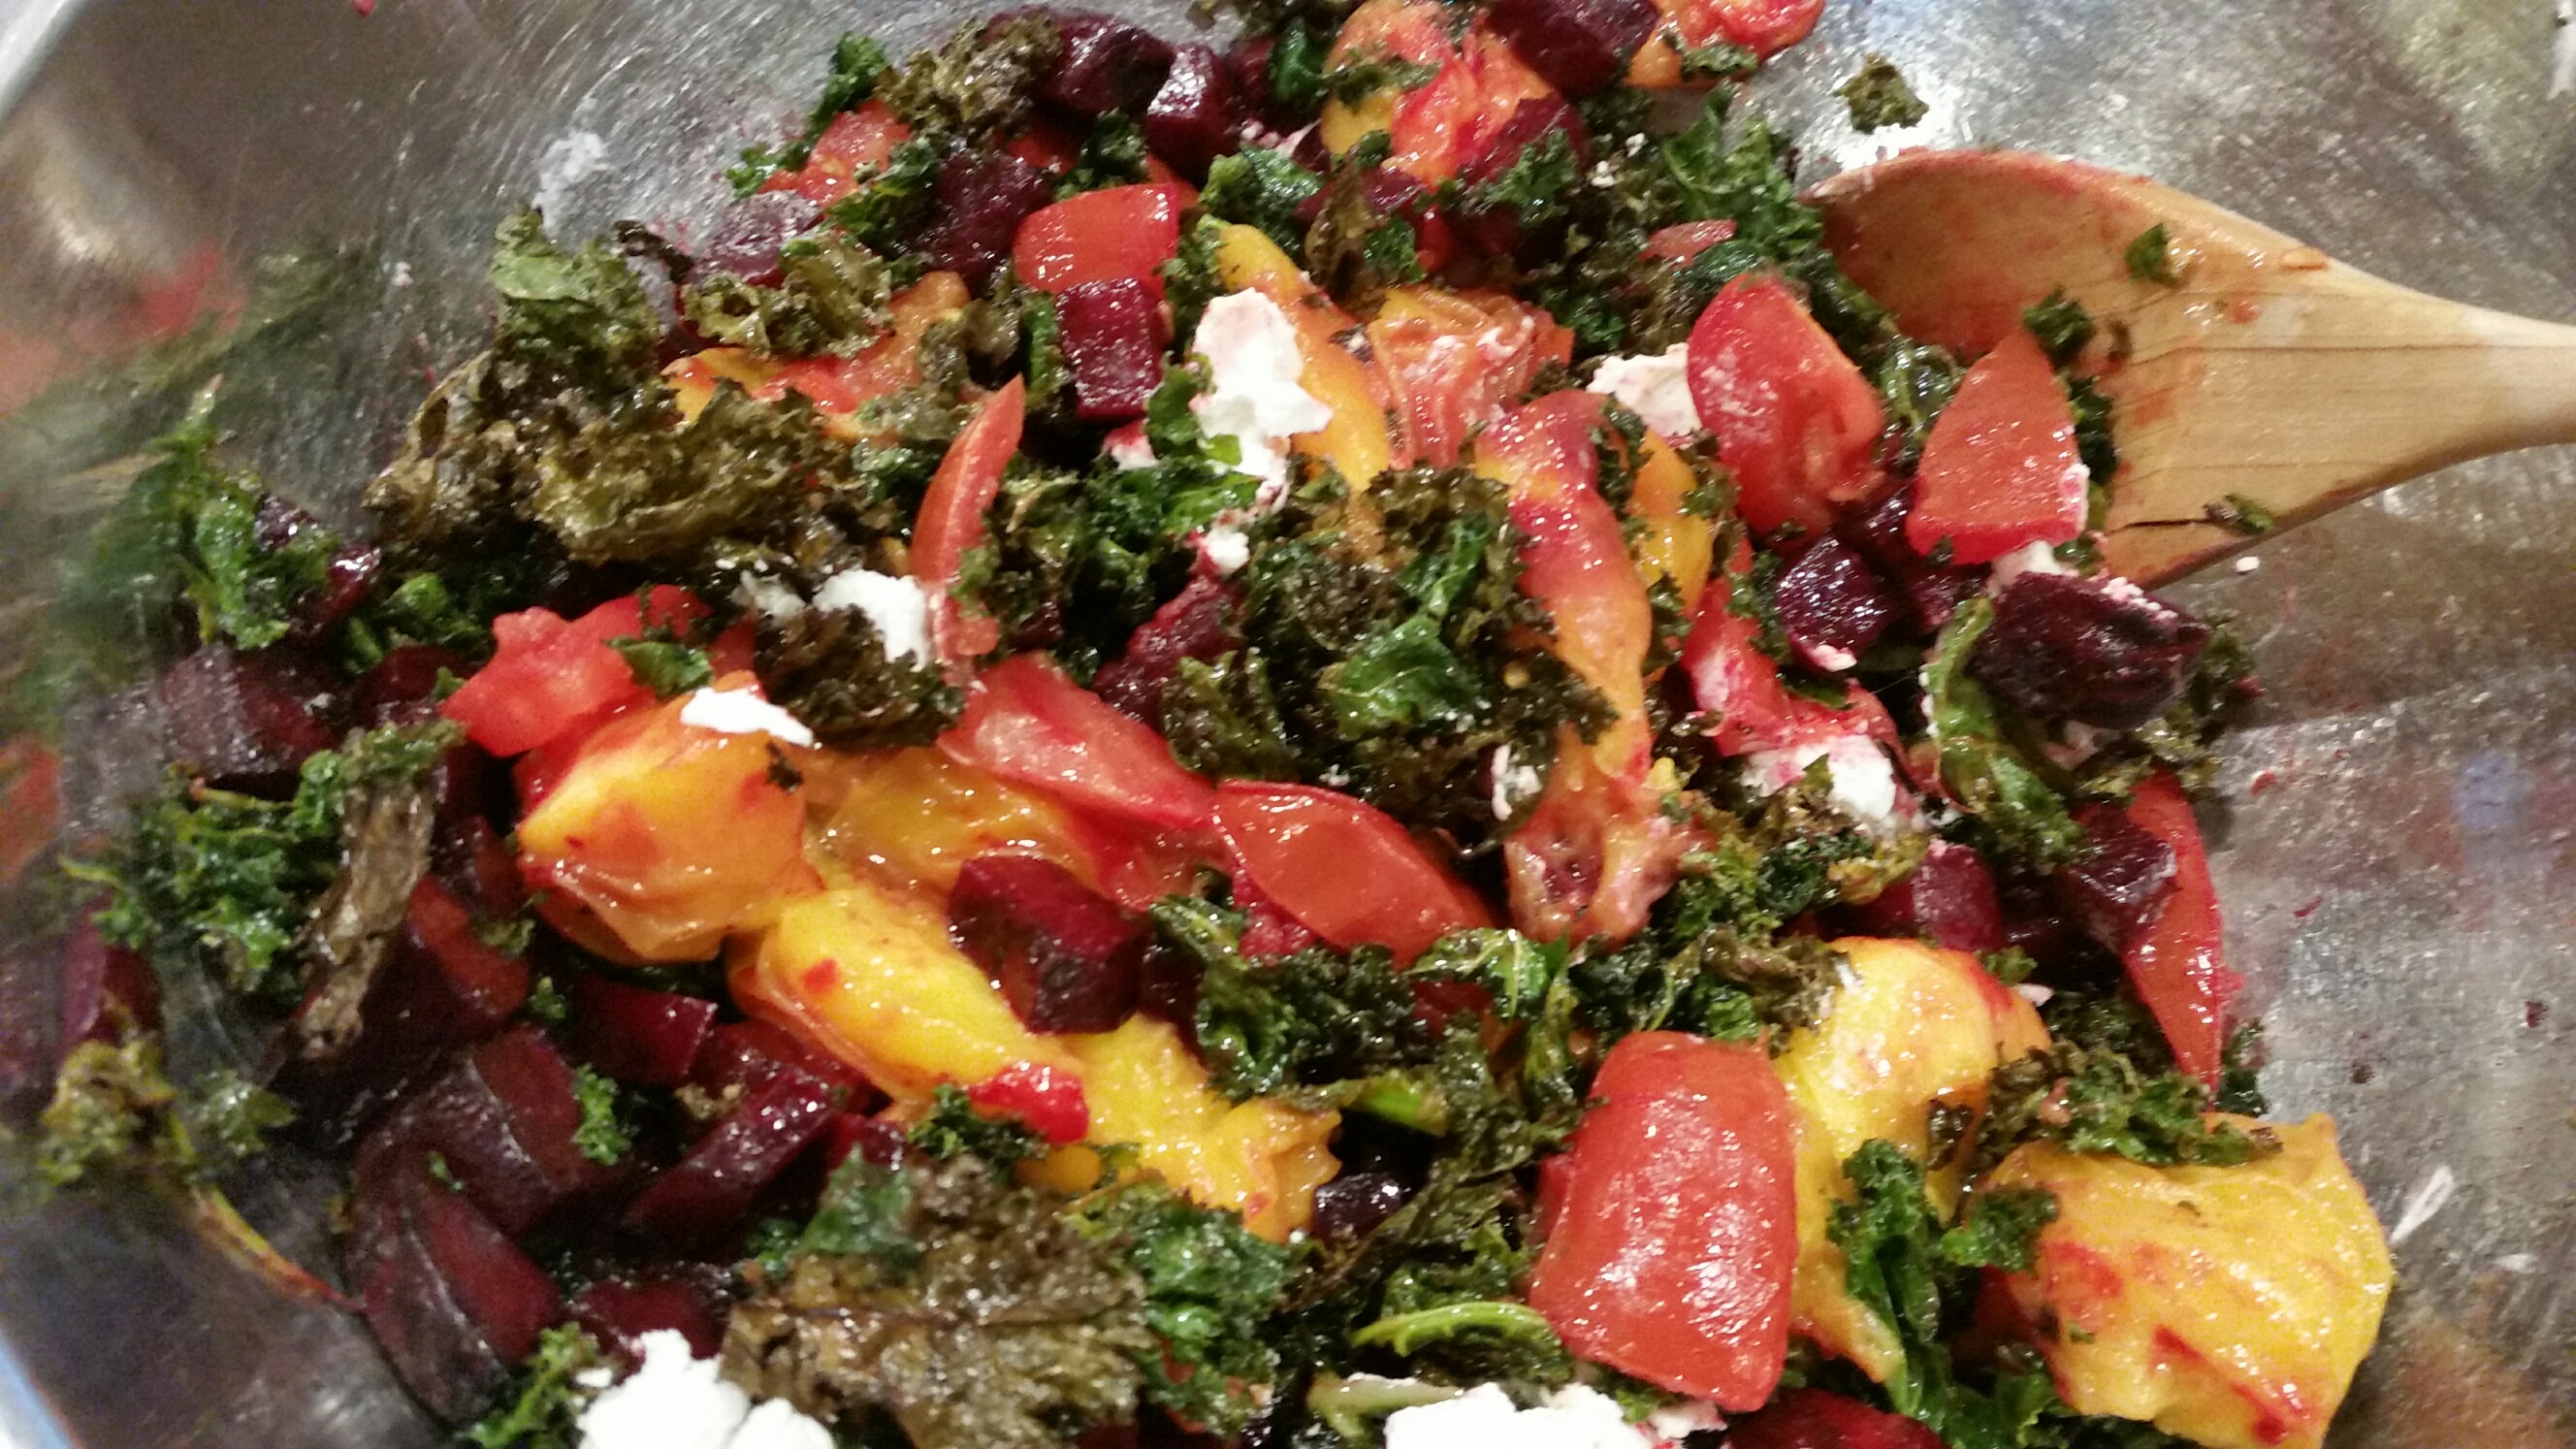
The Dressing
2 tablespoons olive oil
2 tablespoons balsamic vinegar
1 teaspoon honey
Sea salt
Preheat oven to 400 degrees. Line two pans with aluminum foil or parchment paper. On one baking sheet, toss the beets with 1 tablespoon olive oil and salt and roast for 20- 25 minutes. Remove and cool.
Lower oven temperature to 350 degrees. On the other baking sheet, toss the peaches and tomatoes with 1 tablespoon oil and salt. Bake 20 minutes. Remove and cool.
Cut and stem the kale. Toss the pieces with olive oil and salt and spread over cookie sheet. Bake until crisp, about 15 minutes.
Make the dressing: Whisk together all of the ingredients.
Gently mix together the roasted beets, kale, peaches and tomatoes. Toss with feta cheese and the dressing. Top with nuts and serve.
Categories: Healthy Plate, Recipes | Tags: easy recipes, healthy gluten free recipes, healthy plate, kale, kale salad, super salad, superfood | No Comments »
By Beth Hillson
I’ve worked with RYZE flour blends (yellow and blue) for several months now. Here are some of my findings. The blends produce superior results in many applications, cookies, biscuits, pie crust, scones, cakes, and muffins among them. These recipes show off the best of RYZE.
For other baked goods, specifically yeast breads, pizza and some cakes, the final results seem undercooked (gummy) on the inside although the outside is fully baked. Some other bakers have reported the same findings. For these items, I find that adding ½ to ¾ cup of an additional flour like sorghum, millet or corn flour brings out the best of RYZE’s characteristics.
Here’s why. RYZE is made up of a blend of rice flours. Just like rice itself, (think, short grain, sushi, or long grain rice) some of these rice flours absorb more liquid than others. That’s the beauty of RYZE. The added moisture produces baked goods that remain moist for several days even when I’ve left them on the counter. That’s amazing in itself since gluten free products dry out so quickly.
That isn’t necessarily the best when it comes to yeast bread recipes, I’ve found. The moisture retention produces a gummy inside texture. The fix is pretty simple. I added sorghum flour to “tame” those hydroscopic properties. In these baguettes, I also added almond flour and potato flakes. The result was terrific. The baguette recipe is one that you will want to make over and over.
RYZE is still revolutionary, even for these recipes. Think about it. You get the best of gluten free flour – products with great texture and moisture – and without any gums. I don’t know about you, but until now, I have always used a lot of gum in breads and pizza, so this is pretty liberating.
Want to try RYZE blends for yourself?
I’m doing a giveaway to ten lucky people. Just “Like’ Gluten-free Makeovers on facebook or send me an email at beth@glutenfreemakeovers.com and you’ll be entered to win. I’ll tell you more soon.
Culinary Curiosity
Meanwhile, I hope you’ll make these baguettes. Let me know what you think. If you’ve tried RYZE flour blends, share your findings on my facebook page, too. You can purchase RYZE flour blends at Amazon or wait for the drawing. Perhaps you’ll be one of our lucky winners.
Honey Sesame Baguettes
Makes 3 baguettes
This might just become your new favorite go-to bread. These chewy baguettes are full of flavor and texture thanks to a blend of RYZE Yellow flour and a few additional ingredients. The RYZE flour adds moisture, too, so the crumb is delicate and delicious. Cooled baguettes freeze well.
2 tablespoons ground flax seed
3 tablespoons hot water
2 cups RYZE Yellow Flour Blend
1 cup sorghum flour
¼ cup almond flour
¼ cup potato flakes
½ teaspoon baking powder
1 teaspoon kosher salt
3 teaspoons active dry yeast
1/3 cup safflower oil or other neutral oil
3 tablespoons honey
2 large eggs
1 ½ cups warm milk or water (about 100° F)
Beaten egg to brush on baguettes
Sesame seeds, optional
Line a 3-channel baguette pan with strips of parchment paper. Each should be a little wider than the channel. Spray the parchment sheets with PAM spray and set aside.
In a small bowl, combine the flax and hot water and set aside until mixture thickens.
In the bowl of a stand mixer fitted with the paddle attachment (or a large bowl, if blending by hand), place Ryze flour, sorghum flour, almond flour, potato flakes, baking powder, and salt. Mix on low speed until well combined. Add the yeast and mix again until well combined.
Combine oil, honey, eggs, and flax mixture and mix. Add egg mixture and milk to dry ingredients.
Turn the mixer up to medium speed and beat for 4 minutes. The dough should be thick and smooth.
Scoop an equal amount of the dough into each of the 3 baguette forms. Smooth the dough with the sides of the parchment paper.
Cover the pan with plastic wrap and place in a warm, moist, draft-free spot to rise for 30 to 40 minutes.
While the baguettes are rising, preheat oven to 375°F. When nearly doubled in size, brush the top of each baguette with the beaten egg and sprinkle the top with sesame seeds, if using.
Bake for 25 to 30 minutes in the preheated oven until lightly browned. Cover baguettes with aluminum foil or parchment paper after about 20 minutes if the tops are browning too quickly.
Remove to a cooling rack and cool completely before slicing. Or pull apart pieces of warm bread, dip in olive oil and enjoy.
Categories: Recipes | Tags: easy gluten free recipes, gluten free baking, gluten free bread, gluten free RYZE flour | 3 Comments »
Recipe from Beth Hillson
Serves 16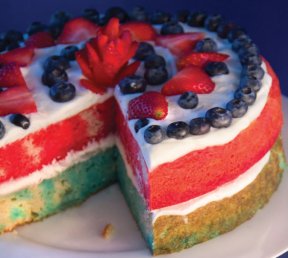
Here’s a great way to celebrate the Fourth of July. Layers are colored red and blue with the help of Jell-O. Fresh strawberries and blueberries are a no-fuss decoration and whipped cream makes the cake look luscious. The cake can be stored, well wrapped, for 3 days in the refrigerator. Do not freeze.
Make this easy, decorative dessert for any celebration by varying the Jell-O flavors and colors to match the holiday. This works with natural gelatin products, too. If you can’t find the color you want, use unflavored gelatin and color with natural food dye. Add a few drops of a flavor extract of your choice, if desired.
1 recipe (2 layers) baked Perfect Layer Cake (below)
2 cups boiling water, divided
1 (3-ounce) package Jell-O raspberry or strawberry gelatin
1 (3-ounce) package Jell-O berry blue gelatin
1 (8-ounce) container very cold heavy cream, coconut cream or prepared whipped topping, divided
1 cup confectioners’ sugar
½ teaspoon pure vanilla extract
1 cup fresh blueberries
1 cup sliced fresh strawberries
Prepare Perfect Layer Cake. Cool the 2 baked layers in their pans. Pierce each cake with a fork at ½-inch intervals.
Using 2 medium bowls, add 1 cup boiling water to each Jell-O flavor. Stir well to dissolve. Pour raspberry-flavored Jell-O over 1 cake layer and berry blue over other cake layer. Refrigerate several hours until firm.
Make whipped cream by beating heavy cream on medium speed, then high speed until thick. Add confectioners’ sugar and vanilla and beat until mixture is very thick. Refrigerate until ready to use. (If using prepared dairy-free whipped topping, skip this step.)
To unmold cake layers, place each pan in a sink with hot water touching just the bottom of the pan for 15 to 30 seconds. Unmold one layer by inverting it onto a cake plate. Spread 1 cup whipped cream on top. Unmold other layer and place on top of whipped cream.
Frost top of cake with more whipped cream. If desired, use extra whipped cream to frost sides of the cake. Decorate with berries. Refrigerate about 1 hour before serving.
Perfect Gluten-Free Layer Cake
Makes 2, 9-inch layers
This makes a great layer cake that can be decorated any way you wish. For other cakes, you’ll want to dust the layer cake pans with white rice flour. For the Fourth of July Cake, do not dust the pans.
2½ cups Cake & Pastry Flour Blend (follows)
4 teaspoons baking powder
1¼ teaspoons xanthan gum
½ teaspoon baking soda
½ teaspoon salt
¾ cup (1½ sticks) unsalted butter, room temperature
1 ½ cups sugar
4 large eggs
2 teaspoons pure vanilla extract
¾ cup milk of choice
Preheat oven to 350°F. Lightly grease two 9-inch round cake pans that are 2 inches deep. Do not dust with flour if making Fourth of July Cake.
Combine flour blend, baking powder, xanthan gum, baking soda and salt in a large bowl. Whisk until well blended. Set aside.
In a large mixing bowl, beat together butter and sugar until smooth and fluffy. Add eggs and vanilla and beat on medium speed 2 minutes or until batter is smooth. Mix in dry ingredients. Add milk and beat until smooth.
Divide batter evenly between prepared pans and smooth tops. Place in preheated oven and bake 23 to 25 minutes or until tops are golden brown and a toothpick inserted in the center comes out clean.
Remove from oven and let cool in the pans. Follow directions above to make Fourth of July Cake or let cool 10 minutes in pans and turn layers out onto a wire rack to cool completely before frosting.
Baker’s Tip: Use this recipe to make 24 cupcakes. To make cupcakes, spoon batter evenly into cups, filling about 2/3 full, and bake in preheated oven 15 to 18 minutes or until tops are golden brown and a toothpick inserted in the center comes out clean. Cool 10 minutes in pans before turning onto a wire rack to cool completely. Frost when cool.
Cake & Pastry Flour Blend
MAKES 2½ CUPS
1 cup white rice flour
¾ cup sorghum flour
¾ cup cornstarch, tapioca starch/flour or potato starch (not potato flour)
Whisk ingredients together. Store in a tightly covered container in the refrigerator. Bring to room temperature before using.
Recipe by Beth Hillson
Makes 14 to 16 cookies
These yummy, not-too-sweet cookies are healthy and satisfying – great for breakfast on the go, brunch or snacking. 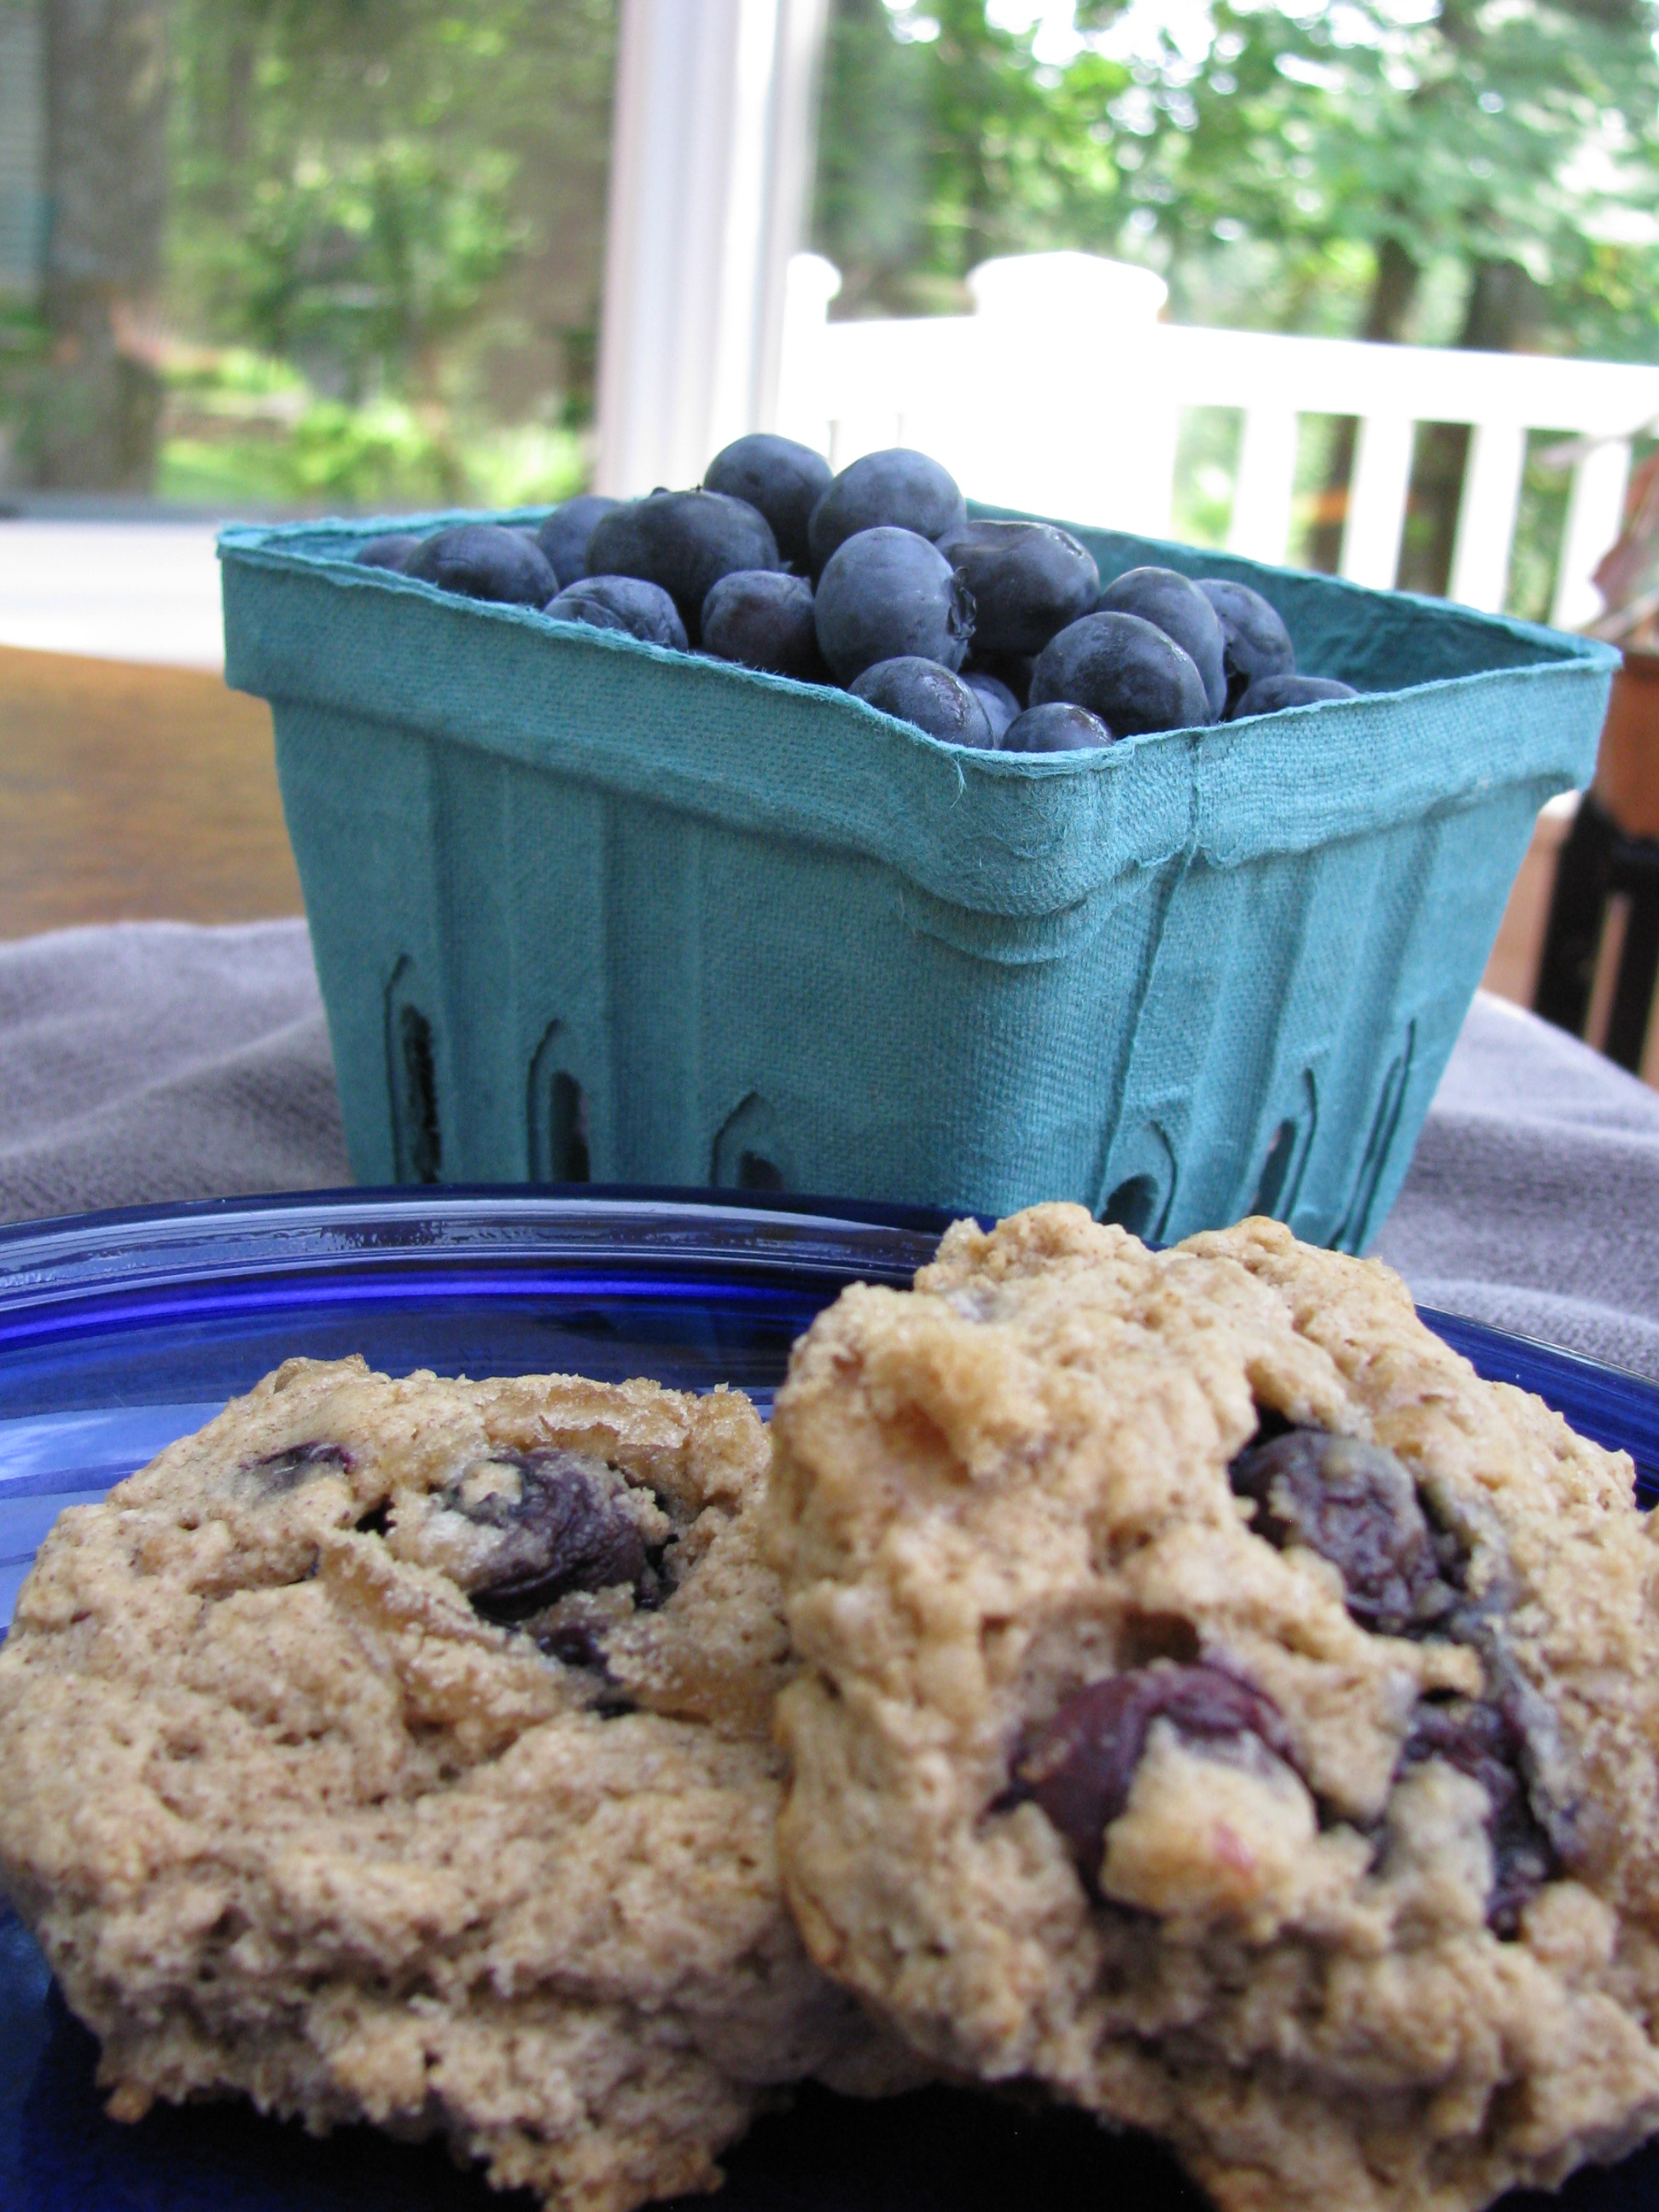 Double the recipe, wrap well, and store in the freezer.
1 1/2 cups all-purpose gluten-free blend
1/2 cup whole grain gluten-free flour (like amaranth, buckwheat, or sorghum)
1 teaspoon xanthan gum
1/4 teaspoon salt
1⁄3 cup packed light brown sugar, more for sprinkling on top
1 tablespoon baking powder
½ teaspoon baking soda
1 teaspoon ground cinnamon
5 tablespoon cold unsalted butter or buttery non-dairy spread, cut into small pieces
2 large eggs
½ cup yogurt, soy or coconut yogurt plus 2 tablespoons for brushing tops of cookies
2 teaspoons vanilla extract
¾ cup fresh blueberries, rinsed and drained
½ cup coarsely chopped walnuts or crispy gluten-free cereal
Preheat the oven to 350°F. Line two cookie sheets with parchment paper.
Combine the flour blend, whole grain flour, xanthan gum, salt, brown sugar, baking powder, baking soda, and cinnamon in a large bowl. Mix until the brown sugar is blended into the ingredients. Cut in the butter until the mixture resembles coarse meal.
In a separate bowl using a mixer, beat the eggs, yogurt and vanilla for 1 minute. Add to the dry ingredients and beat until smooth. Fold in the blueberries and nuts.
Using a medium scoop, scoop the dough onto the prepared cookie sheets, leaving about 1 inch between each. Use a sheet of plastic wrap to gently press and smooth the cookies into ½ -inch-thick disks. Brush with additional yogurt, sprinkle with brown sugar, and bake for 19 to 20 minutes. Serve warm.
The cookies may be reheated. These freeze well.
Follow Us Online
More Cookbook Stuff
Gluten-Free Makeovers - - Nearly 200 recipe makeovers for everyone to enjoy. Buy it at glutenfreeandmore.com, Amazon.com and barnesandnoble.com.
About This Blog
 Baking guru, Beth Hillson, transforms favorite foods into recipes that are safe for your gluten-free diet.


