
Blog Archives
I have exciting news . . well, sort of. Gluten-Free Makeovers won an honorable mention at the New England Book Festival. Ordinarily I would do the always-a-bridesmaid-never-a-bride thing and wallow in butter cream for a few days. But the category was cookbooks, all types of cookbooks. Mine was gluten-free, a fairly narrow subject within the category. And the cookbook that won was Around My French Table by Dorie Greenspan. It has universal appeal and has taken honors everywhere. If there is anyone I would want to be the bride in this category, it’s Dorie. I’m a huge fan of this great lady and wonderful chef. Her book, all her books, are well researched and inspired. And her recipes work. Besides, she lives in Connecticut part of the year. We are almost neighbors.
So, when I was asked to recreate a spice cake for some readers, this not-too-sweet cake appeared on my radar. It came from a recipe by Dorie Greenspan that appeared in Bon Appetit Magazine in October 2009. I knew I couldn’t miss if I made over a recipe she had created.
This one is amazing. It’s light and moist and, although considerably revised to make it gluten-free, I thank Dorie for steering me in the right direction. By frosting only the top and center of the cake with cream cheese frosting and using applesauce for part of the fat, it’s lower in calories than it’s hi-test cousin.
Dorie says to use fairly sweet apples with a sturdy structure like Gala of Fuji apples. There’s no question this is a winner. And, all things considered, it would make a fabulous wedding cake.
Apple Spice Cake with Spiced Cream Cheese Frosting
This cake serves 12
Cake:
1 cup brown rice flour
1 cup sorghum flour
½ cup tapioca starch
½ cup cornstarch or potato starch
1 ½ teaspoons xanthan gum
1 ¾ teaspoons ground cinnamon
1 ½ teaspoons baking powder
½ teaspoon salt
½ teaspoon baking soda
½ teaspoon ground nutmeg
¼ teaspoon ground ginger
¼ teaspoon ground cloves
1 cup (2 sticks) unsalted butter, room temperature
1 ¼ cups sugar
¾ cup (packed) light brown sugar
3 large eggs
2 teaspoons vanilla extract
2 tablespoons brandy or rum (optional)
1 1/3 cups unsweetened applesauce
2 medium Fuji or Gala apples, peeled, cut into 1/3-inch cubes (about 2 cups)
Spiced Cream Cheese Frosting:
1, 8-ounce package reduced fat cream cheese, room temperature
½ stick unsalted butter, room temperature
2 teaspoons vanilla extract
Pinch of salt
3 cups powdered sugar
½ teaspoon ground cinnamon
½ teaspoon ground nutmeg
½ cup coarsely ground walnuts
Position rack in center of oven and preheat to 350°F. Lightly oil two 9-inch-round cake pans with 2-inch-high sides. Whisk first 12 ingredients in medium bowl. Using electric mixer, beat butter in large bowl until fluffy. Add both sugars and beat until smooth. Add eggs one at a time, beating well after each addition. Beat in vanilla, then brandy, if desired (mixture may look curdled). Add flour mixture to egg mixture in thirds alternating with the applesauce. Beat until blended after each addition. Fold in apples. Divide batter between cake pans; smooth tops.
Bake cakes on the center rack until tester inserted into center of each comes out clean, about 45 to 50 minutes. Transfer cakes to racks and cool in pans 15 minutes. Cut around pan sides to loosen cakes. Invert cakes onto racks. Cool completely.
This can be made a day ahead. Wrap each cake in plastic and store at room temperature.
To Make the Frosting:
Using electric mixer, beat cream cheese and butter in large bowl until smooth. Beat in vanilla extract and pinch of salt. Gradually add powdered sugar, beating until frosting is smooth and creamy, about 2 minutes. Add the cinnamon and nutmeg and beat briefly to incorporate.
Transfer one cake to serving platter, flat side down. Drop half of frosting (about 1 1/2 cups) by spoonfuls atop cake. Spread frosting evenly to edges of cake. Top with second cake, flat side down. Drop remaining frosting by spoonfuls onto top of cake, leaving sides of cake plain. Spread frosting to top edges of cake, swirling and creating peaks, if desired. Sprinkle with walnuts. Let cake stand at room temperature 1 hour to allow frosting to set slightly.
Or cover loosely and refrigerate. Let cake stand at room temperature at least 2
hours before serving.

Categories: Recipes | Tags: apples, dessert, gluten free, Makeovers, spice cake | 9 Comments »
As a child, my biggest worries this time of year were whether Mrs. Lord was making caramel corn balls for Halloween and if Mrs. Oakes would have any candy coated apples left by the time I came to her house to trick or treat.
I spent the entire month of October anticipating the Candy Corn, the Tootsie Rolls, and the Mars Bars that would fill my shopping bag – several bags, if I was lucky. As I counted the days until the end of the month, I brooded about the ever cooling weather pattern. Would there be snow in the tiny Maine town I called home? Would I need mittens – something that made it very difficult to eat Mrs. Oakes’ sticky candy apples. Most of all, I wondered how many layers of clothing I would need to wear under my costume. Would the ubiquitous black cat costume still fit or would I have to opt for my brother’s red devil number?
In school, I sketched faces I might want to carve into my jack-’o-lantern. I practiced drawing angry faces, funny ones, sad ones. In the end, the pumpkin always looked the same, owing to my lack of dexterity and the ever-dull knife that was the only one my mother allowed me to use. Each year I promised myself that next year’s pumpkin would be much better. It never
was.
But not once did I realize that all the pumpkins I carved or stole from people’s porches and smashed in the middle of the road were edible, that pumpkin was food. I missed the connection, that these orange orbs were essential to my grandmother’s Thanksgiving pumpkin pie and my mother’s pumpkin quick breads. Pumpkin – – duh?!
I can’t say when the light went off, when I began using pumpkin in baking rather than carving. But one day, it did. And, now it’s the orange flesh that pleases me. Low in calories and high in fiber and vitamins, pumpkin is my friend. And it’s particularly great for gluten-free baking, adding moisture and texture to muffins and quick breads. Warm spices – – cinnamon, ginger, cardamom, cloves, and nutmeg – – pair nicely with pumpkin puree. Although you can bake a pumpkin and remove the flesh, you can also buy canned pumpkin puree. It’s so much easier and just as good.
So, say “Hello” to pumpkin and its many uses, and to this flavorful, moist pumpkin bread with crumb topping I made in honor of the season .
Pumpkin Bread with Crumb Topping
Makes 2 Medium Loaves
½ cup white rice flour
1 cup sorghum flour
1/3 cup cornstarch
2 ½ tablespoons tapioca starch
1 tablespoon baking powder
1 teaspoon xanthan gum
¾ teaspoon salt
½ teaspoon baking soda
½ teaspoon
ground cinnamon
¹⁄8 teaspoon
ground nutmeg
2 large eggs, at room temperature
1½ cups pumpkin puree (most of a 15-ounce can)
1 cup sugar
½ cup vegetable oil
¼ cup chopped pecans or other nuts, optional
1 cup Crumb Topping (below)
Preheat the oven to 350°F. Lightly oil two 8½ x 4½-inch loaf pans.
Combine the flours, cornstarch, tapioca starch, baking powder, xanthan gum, salt, baking soda, cinnamon, and nutmeg in a bowl. In a separate bowl, whisk together the eggs, pumpkin, sugar, and oil. Add to the dry ingredients and whisk to combine. Fold in the pecans, if using.
Divide the batter evenly between the two pans. Sprinkle ½ cup of the crumb topping over each loaf. Bake for 40 to 45 minutes, until toothpick inserted in the center comes away clean. Set on a wire rack and let cool for 10 minutes. Turn the breads out onto the rack and let cool completely. Wrap with plastic and let sit overnight before slicing.
Crumb Topping
Makes 3½ Cups or 3 Cups If Nuts Are Omitted
Store remaining topping in the refrigerator for 3 weeks or freezer for 3 months.
¾ cup rice flour
1 cup packed brown sugar
1 tablespoon ground cinnamon
¼ teaspoon ground nutmeg
¼ teaspoon ground cloves
½ teaspoon salt
½ cup ground pecans, walnuts, or almonds, optional
6 tablespoons unsalted butter or non-dairy buttery spread, at room temperature, cut into pieces
Combine the flour, brown sugar, cinnamon, nutmeg, cloves, salt, and pecans, if using, in a large bowl. Mix well. Add the butter and use your fingertips to mix just until crumbly.
Categories: Recipes | Tags: baking, gluten free, gluten-free makeover, holidays, pumpkin, quick breads | 3 Comments »
In late September we bicycled through the cranberry bogs in Cape Cod. The weather was gloriously sunny – -spectacular in fact. I could not get enough of the sparkling late summer air – – the sun on my face, a faint, salty breeze tussling my hair, an apple-picking crispness brushing cobwebs from my brain.
What could be better than a lazy Saturday afternoon on a relatively flat bike trail? But, as I peddled, I realized something was missing. The cranberry bogs beside the trail were dry and empty. Don’t cranberries grow in water? And where are the plants, anyway? I expected to see seas of red as we bicycled.
“What happened to all the cranberries?” I asked the store owner when we returned the bikes.
“Harvested,” he said. (Cape Codders are not known for using more words than needed.) “Headed for market, ” he added.
“Oh,” I said, trying to emulate his frugality.
Sure enough. Two weeks later, fresh cranberries began appearing in the produce aisle of my favorite grocery stores. Now, I realize that fresh cranberries are frozen and sold all year long. But I had never quite appreciated the relationship between the harvest and the availability of fresh produce. Who thinks about these things when they are pushing a grocery cart through a crowded supermarket?
In celebration, I bought three bags of fresh cranberries. It seemed fitting to honor the cranberry harvest with something sweet, and slightly sour. I came up with a Chocolate Cranberry Mousse Tart that I served for a recent gathering. I’ve made it twice since and the balance of tart and sweet, like the late summer sun, always amazes me.
You may find more superlatives to describe this easy dessert. But, in keeping with the Cape Cod tradition, I’ll just say, “Wow.”
The graham cracker crumb crust with a layer of chocolate can be used for many mousse-like pies. I keep a supply of Kinnikinnick graham-style crumbs on hand to make this dessert. And now I will keep a supply of fresh and frozen cranberries at the ready, too.
Chocolate Cranberry Mousse Tart
This is as festive as it is delicious. Decorate with whipped topping and chocolate shavings and garnish with cranberries.
One chocolate graham crumb crust (below) in a 9-inch tart or springform pan.
12-ounce bag fresh or frozen cranberries, rinsed and drained
¾ cup sugar, divided
6 tablespoons orange juice
2 ½ teaspoons dried orange peel
1/3 teaspoon ground ginger
3 tablespoons Triple Sec or other orange liqueur or additional orange juice
1 tablespoon unflavored gelatin softened in 1 1/2 tablespoon orange juice
1 ½ cup whipping cream or non-dairy whipped topping
In a medium saucepan, combine cranberries, 6 tablespoons sugar, orange juice,
orange peel, and ground ginger. Bring to a boil, stirring frequently. Lower heat
to medium low and cook, stirring frequently until cranberries break down, about
15 minutes. Remove from heat. Add Triple Sec and stir. Let cool slightly. Press mixture through a mesh sieve, scraping puree into a bowl. Do this until all the liquid has been pressed out of the fruit. Discard pulp. Warm the gelatin in a microwave for 10
seconds or until it liquefies. Pour into the cranberry mixture in a steady stream, stirring while adding. Scrape into a bowl and chill about 20 minutes.
Beat the cream and remaining 6 tablespoons sugar until stiff. Fold into cranberry mixture and spoon into prepared crust. Chill at least 3 hours. Cut and serve with additional
whipped cream if desired. Garnish with chocolate shavings.
Chocolate Graham Cracker Crust
This easy and tasty crust can be made several days ahead and stored in refrigerator
until ready to use.
1 cup gluten-free graham cracker style crumbs (such as Kinnikinnick brand)
3 teaspoons unsweetened cocoa
¼ cup sugar
3 tablespoons melted butter or non-dairy spread
½ cup semi-sweet chocolate chips, for dairy-free chips visit enjoylifefoods.com
2 tablespoons light cream or coconut milk
Preheat oven to 325 degrees. Lightly oil the bottom of a 9-inch springform pan.
Combine cookie crumbs, cocoa and sugar. Add the melted butter and stir until crumbs are moistened. Press into the bottom of the prepared pan. Bake in the center of a preheated oven, 12 minutes. Remove and cool.
In a microwave safe bowl, combine chocolate chips and cream or coconut milk. Heat on medium for 1 minutes or until chips are softened. Blend together until smooth. Spread mixture over cooled crust. Chill until set. Fill with cranberry mousse filling above.
Categories: Recipes, Uncategorized | Tags: dairy-free, dessert, gluten free, holiday | 5 Comments »
 When I was growing up, any special occasion called for tri-cornered rolls that my mother called Parker House Rolls. The name sounded exotic. We believed we were partaking in something sacred, a secret food that only my mother could make.
I’ve since discovered these were simply brown-and-serve dinner rolls with dimpled indentations on the top. She bought them in the grocery store, browned them in the oven, lovingly arranged them in a napkin-lined basket, and took all the credit. And, why not? These warm, doughy pillows were the backbone of every important gathering and I relished them as if she had measured the flour, proofed the yeast, and let them rise in the warmth of our own kitchen.
I remember placing one or two on my bread plate and letting a pat of butter melt into the little indentations in each. I licked the puddle of yellow liquid then sunk my teeth into the roll itself, letting leftover butter spill into the white interior. As proud as my mother was of her brown-and-serve rolls, an admonishment followed my butter ritual without fail. “Don’t eat too many of those or you’ll spoil your appetite,” Mom would say. What she meant was, “You won’t have room for your vegetables.” I truly hoped that would be the case.
I grew up assuming that warm dinner rolls were an inalienable right. That was, of course, before I became gluten free and gave up all rights to a bread plate.
One day I caught a photo on the King Arthur Flour (KAF) Baking web site demonstrating the process for making dimpled dinner rolls with three little crowns. Although most of their recipes are filled with verboten ingredients, unless you visit their gluten-free section, I was inspired by the way the rolls were assembled to create the tri-cornered appearance of Mom’s brown-and-serve rolls. This little demonstration made me wonder if I could makeover Mom’s dinner rolls using the method shown by P.J. Hamel and her baking team. I had a technique. Now I just needed a good gluten-free bread formula.
The Balance of Liquid to Dry
I knew a gluten-filled bread recipe would be difficult to use. The balance of liquid to dry defies conventional food science. So I went back to my gluten-free bread formulas and worked with one that contains high protein flour. (Chickpea or quinoa flour works well.) To add the maximum elasticity, I also used 1 teaspoon of gum per cup of flour. It provides great texture without leaving a gummy mouthfeel and taste. (If you don’t like to use xanthan or guar gum, add an additional tablespoon of potato flour.) The recipe I used is inspired by one from bloggers Vic and Hallie Dolcourt in Sunnyvale, CA. Like me, they are bread people and mad scientitsts in the kitchen.
Food Chemistry and Gluten-Free Breads
Before I give you the recipe, I need to tell you something else about food chemistry and gluten-free breads. It’s called balance. The balance of wet to dry ingredients is critical in gluten-free bread baking. Enough liquid is needed to help the yeast do its best work without creating a bread or roll that rises too quickly and sinks the moment it comes out of the oven. So I look for a smooth, shiny texture when the dough is beaten. If it looks lumpy, I add more liquid, one teaspoon at a time. If the dough is soupy, I add a bit more flour blend, one teaspoon at a time. You get the picture. This trick can be applied to any bread recipe. And one last thing. When I tested this recipe, I thought the dough was a little stiff and lumpy. I added more warm water, one tablespoon at a time until I reached the point where the dough was smooth. You can do that too, although I don’t think you’ll need to change a thing in this recipe. The rolls are light and delicious – – just like Mom’s!
I hope you’ll give this recipe a try. It’s a good reason to bring back the bread plates.
Dinner Rolls Like Mom’s
Makes 18 rolls
Dry Ingredients:
1 ¼ cups chickpea or quinoa flour
1 cup brown or white rice flour
¾ cup + 2 tablespoons tapioca flour
¾ cup corn or potato starch
1/3 cup powdered dry milk*
¼ cup potato flour (not starch)
1/4 cup packed brown sugar
4 teaspoons xanthan gum
1 ½ teaspoons salt
1 tablespoon instant active dry yeast
1 ½ teaspoons baking powder
Liquids:
1 cup + 6 tablespoons warm water at 110 degrees
4 eggs separated
1 teaspoon cider vinegar
3 tablespoons honey
1/3 cup butter or dairy-free buttery spread, melted in microwave for 30 seconds
1 egg mixed with 2 tablespoons water to brush tops
Mix dry ingredients in a bowl and reserve. Put all liquid ingredients except butter and egg yolks into the work bowl of a mixer fitted with the “paddle” attachment. Add the dry ingredient mixture 1 cup at a time while mixing on low. Allow the dough to rest for 10 minutes in the bowl. Add the melted butter and egg yolks. Mix on medium-high until blended, 3 to 4 minutes. Scrape down the sides half way through.
Lightly oil 18 muffin cups. Scoop out bits of dough and roll into balls (about 1-inch in diameter) in oiled plastic wrap. Place three balls in each cupcake tin compartment. Cover and let rise.
Preheat oven to 375 degrees. Brush tops with egg wash. Bake 15 to 20 minutes or until a toothpick inserted in one of the rolls comes out with just a few moist crumbs. Turn onto cooling rack. Let cool for10 minutes before serving.
Note: If the top of the rolls becomes too dark while baking, reduce temperature to 350 degrees or cover top loosely with aluminum foil. Store at room temperature for 1 to 2 days or freeze. To reheat, wrap in aluminum foil and heating in a 350 degree oven. Thaw frozen rolls before reheating.
* Vance’s Dari-Free can be substituted
All contents © 2011 Gluten-Free Makeovers®
Categories: Recipes | Tags: bread, dinner rolls, gluten free, gluten-free makeover, rolls | No Comments »

Blueberry Pancakes
This time of year I dream in blueberries. Perhaps it’s because the local crop is out and the berries are so sweet. I also dream in pancakes. They seem to go together like love-and-marriage and milk-and-honey.
My dream goes this way. I see waiters delivering plates piled high with light, airy flapjacks. From behind a vegetable frittata, I see diners drizzling warm maple syrup over stacks of golden discs. I watch them sawing wedges three cakes deep and piercing them with forks. Then, mouths line up in receiving position and heads tilt until the triangular parcels disappear. And I drool into my fruit cup.
I’ll admit it. I have a chronic case of Pancake Envy. I miss the light-textured, gluten-filled pancakes of yester year, the ones that made me say, “Ah” when I bit into them, the delicate cakes kissed with warm blueberry juice. So many gluten-free pancakes disappoint me – – so gummy, so dense they lay in the bottom of my stomach for what seems like days.
The other day, as I thumbed through a cookbook written by friends, DeDe Lahman and Neil Kleinberg, I opened to a recipe called “Neil’s Pancakes.” The picture was beyond gorgeous. I wondred. Could I make them over? Would they come close to the pancakes I remembered in my dreams?
If anyone could give me the fundamentals for making perfect pancakes, I knew it was Neil. He and his wife, DeDe, own Clinton Street Baking Company, an acclaimed neighborhood restaurant on Manhattan’s Lower East Side. The duo serve five hundred orders of pancakes a week in their hole-in-the-wall 32-seat place. Imagine, 500 plates of pancakes!
Although Neil comes from a classical French culinary background, he is an amazing baker and he shares great tips as well as gorgeous recipes in the cookbook of the same name. Of course the book is written in gluten. There’s flour everywhere. But it’s tantalizing close-up photos make my mouth water and my fingers itch to convert the recipes so I can eat them. Who wouldn’t be wooed by Black and White Cake with chocolate frosting cascading gracefully over luscious white cake or a giant bowl of Corn and Clam Chowder, chunks of bacon, potato and corn kernels suspended in the rich broth? And the endless photos of pancakes – – topped with raspberries, blueberries, bananas and chocolate. Oh yum. Neil touches every culinary bone in my body.
So today I made over Neil’s famous Blueberry Pancakes. I want you to know they are, indeed, the best pancakes I’ve ever tasted. I know you’ll want to make them, too. But before you
begin, here are a few tips about making this recipe over.
(1) I started with a light self-rising flour blend using nutritionally dense sorghum and amaranth flour. It’s healthy besides being light and sorghum and amaranth contain protein. It helps add structure to gluten-free baking.
(2) I used 1 ½ teaspoons baking powder per cup of blend and added more to the pancake batter. It’s a lot of baking powder, but necessary to create the light, airy texture.
Then I followed some of Neil’s tips.
(1) Preheat the griddle before using.
(2) Fold in stiffly beat egg whites for additional lift. Once added, don’t over mix or batter can deflate.
(3) Add fruit after pancakes have set to prevent the blueberries from bleeding their color into the batter.
Blueberry Pancake Makeover
Makes 14-16, 3 inch pancakes
Inspired by a recipe in Clinton St. Baking Company Cookbook by DeDe Lahman and Neil Kleinberg.
2 cups self-rising flour blend
1 teaspoon baking powder
1/3 cup sugar
3 large eggs, separated or flax gel
1 ½ cups 2% milk, soy milk or milk of choice
¾ teaspoon vanilla extract
6 tablespoons melted unsalted butter or non-dairy buttery spread
1 cup fresh blueberries (frozen will not work as well) or bananas, sliced and chunked
Combine flour blend, baking powder, and sugar. Separate eggs. To yolks add milk, vanilla, and butter, whisking to combine. Add the dry ingredients and whisk to blend. In a
separate bowl, beat the whites until soft peaks. You’ll notice lines beginning to form and stay on the surface as you beat. Do not overbeat. Fold half the whites into the batter and blend. Fold remaining whites into mixture. Do not blend completely. (You will still see bits of white foam.)
Preheat griddle or flat pan to between 350 and 375 degrees. (Preferably use a non-stick pan.) Lightly oil the surface. Use a ¼ cup scoop and drop batter onto preheated griddle. After the batter has begun to set, sprinkle blueberries or banana pieces over the surface. When under side is golden brown, flip the pancakes and cook an addition 3-5 minutes or until browned on the other side.
Serve with real maple syrup, blueberry compote, or enjoy as is.
SELF-RISING FLOUR
Reprinted from Gluten-Free Makeovers (Da Capo Press, Oct 2011)
Mix up a big batch and store in the refrigerator. Use for muffin, quick bread and pancake recipes.
1¼ cups white rice flour (6.5 ounces)
1 cup sweet white sorghum flour (4 ounces)
¾ cup amaranth flour (3 ounces)
¾ cup cornstarch (3.5 ounces) or potato starch (4 ounces)
¼ cup tapioca starch/flour (1.1 ounces)
2 tablespoons baking powder
2 teaspoons xanthan gum
1½ teaspoons salt
All contents © 2011 Gluten-Free Makeovers®
Categories: Recipes | Tags: blueberries, breakfast, gluten free, makeover, pancakes | 4 Comments »
Follow Us Online
More Cookbook Stuff
Gluten-Free Makeovers - - Nearly 200 recipe makeovers for everyone to enjoy. Buy it at glutenfreeandmore.com, Amazon.com and barnesandnoble.com.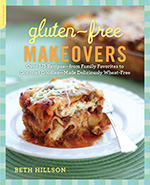
About This Blog
 Baking guru, Beth Hillson, transforms favorite foods into recipes that are safe for your gluten-free diet.


