Category Archives: Recipes
Quick, Delicious Chicken and Rice
I went to culinary school in the seventies when classic techniques were still in vogue. We whisked egg whites in copper bowls, boned whole fish, and removed chicken from its skeleton leaving meat and skin intact. But, Auguste Escoffier forgive me. There is more than one way to skin a chicken. As a modern chef and cook, I take shortcuts. Besides, being gluten-free, I cook to eat. I can’t wait all day to enjoy a meal.
In that same era, I took a cooking class in Indian Cuisine. We toasted and ground aromatic spices and made our own customized garam masala, a blend that’s used to flavor every dish. We peeled and grated ginger, poached tomatoes to remove the skin, and fried onions until they were a perfect golden hue. The end results were amazing; but, come on, who has the time to cook this way?
I did meet my future husband in this class and we fell in love over Biryani and Vindaloo. But, I confess we rarely made Indian food together. (It’s still one of my favorites to eat in restaurants and is a decidedly gluten-free-friendly cuisine.) Then I fell in love again – – with Passage Foods Simmer Sauces, aromatic blends of exotic spices, ginger, onion, and garlic, that simmer for hours before they are packaged. These sauces brought Indian food back into my kitchen. All I do is add a protein (chicken or lamb) and some veggies like eggplant, okra. tomato or potato. (Veggies aren’t even necessary if I’m in a rush.) In the time it takes to cook basmati rice in my rice steamer, I have a full meal.
Today, I added a few extra steps so I could justify calling this a recipe instead of a tip. With these additions, I turned Passage Foods Tikka Masala Simmer Sauce into Chicken Biryani and it tastes just like the meal we made in my Indian cooking class years ago.
In case you don’t know about Biryani, it’s a flavorful rice dish filled with aromatic Indian flavors, pieces of chicken or lamb and chunks of potato. There are four hallmarks of a good Biryani. (1) The grains of rice should not clump but be separate and easy to spread apart. (2) The aroma should fill the room with a sweetish fragrance that is not overpowering or reminiscent of any one specific spice. (3) The taste should be flavorful and roll off the tongue and the flavor should fill the meat. (4) There must be nicely browned potatoes and they should be as flavorful as the meat . Without potatoes, it is not Biryani.
So there you have it – – a perfect Biryani. And here’s the recipe. I think you’ll agree it’s easy and delicious. And thanks to simmer sauces, I’ve found a better way to skin a chicken.
Easy and Delicious Chicken Biryani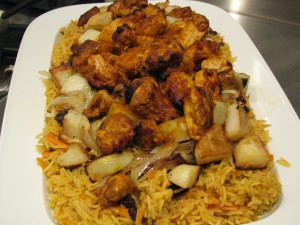
1 pouch Passage Foods Tikka Masala Simmer Sauce, divided (or other Indian simmer sauce)
1 pound boneless, skinless chicken breast cut in 1 inch cubes
3 tablespoons olive oil
2 large russet potatoes, peeled and cubed
1 large onion, peeled and cut into thin strips
1 ½ cups raw Basmati rice
3 cups gluten-free chicken broth
¾ cup dark raisins
1 ¼ cups shredded carrots (commercial product like Dole brand)
Reserve 1/2 cup of simmer sauce. Marinate chicken in the remaining simmer sauce for 30 to 90 minutes.
In a large skillet, heat 2 tablespoons of the oil and sauté the potatoes and onion until brown and potatoes are fork tender. Remove from skillet and set aside.
In a medium pot, combine the rice, reserved simmer sauce and chicken broth. Bring to a boil. Cover and simmer until most of the liquid is absorbed. Add raisins and carrots. Simmer until liquid is absorbed (about 18 to 20 minutes). The rice should be slightly chewy, not too soft. (Remember – it should not clump.)
While the rice is cooking, heat remaining oil in skillet. Sauté the chicken until browned and cooked through.
When rice is done, fold in the potato and onion mixture. Reheat briefly (about 1 minute). Spread mixture over a serving platter and top with chicken.
Serves 4.
Now For Some Deals!
Want a sample of Passage Foods Tikka Masala? Sign up for our newsletter in the upper right hand corner of this site. We’ll send five lucky people sample packs of Indian, Thai, and Moroccan Simmer Sauces. Or go to Passage Foods for information on where you can find their sauces.
Blender Girl Giveaway
I love this community of bloggers. So much energy! Look at this. My new best blogging friend Tess Masters aka Blender Girl is making April gluten-free month with great recipes from all your gluten free blogger friends and a KitchenAid Giveaway. Check it out.
Categories: Recipes, Uncategorized | Tags: chicken and rice, dinner in minutes, easy, gluten free, Indian cooking, quick, recipes | 3 Comments »
My latest makeover comes from Lois A. who asked me if I would recreate her recipe for an Italian cookie called Anginettes. She said her family made batches of these delectable treats for Christmas and Easter and delivered them all over the neighborhood. I’m not surprised. The cookies are amazing and the recipe makes enough to feed an army! I cut the batch in half but you can double it if you have a large family or are planning a gigantic Easter gathering.
As I researched Anginettes, I found that these cookies are a tradition in many families. Everyone has their own way of making them as well as story or two romanticizing the cookies – – wooing boyfriends with plates of these, making them for every member of the family or feeding the entire neighborhood.
Some family recipes call for adding citrus (lemon or orange); others make Anginettes with anisette liquor. Some drop the cookies; others, like Lois, roll them into knots. Many frost them with colorful confectionary icing as I have done here.
One thing is clear. This humble, slightly sweet cookie pairs well with strong coffee and good friends.
Certainly with all that tradition surrounding Anginettes, it seemed like someone should try to make them gluten-free. I was up to the task. But first, I had a few questions for Lois.
“Are they soft, hard, big, small?” I asked. Lois told me the texture should be soft. And the shape? It was another puzzle for a novice Anginette baker like me. Lois said the dough was rolled like a snake and folded over. “Folded like a pretzel?” I asked. Then she told me, “I get a melon ball- size piece of dough and form it into about a 3″ long snake. I put one end of the snake onto the baking sheet and bring it around and up, piling it on top of itself.” She sent a picture of finished cookies all frosted in pretty pastel colors.
I’m happy to say mine looked just like the picture. However, I was not able to twist 3-inch snakes. Mine were longer, around 5 to 6 inches. “Some families drop teaspoons onto baking sheets, but my family always did it this way,” she said. I tried making drop cookies too, and they were equally delicious.
To Make Over Lois’s Recipe: I replaced the regular flour with the Cake and Pastry Flour below. The flour blend is light and not the least bit grainy, lending itself to delicate pastries. I added a little more xanthan gum so the cookies would be more elastic and easier to roll and form. And I cut the shortening into the dry ingredients before adding the eggs and vanilla. That method almost always guarantees a light texture.
Several of the recipes called for orange juice. I added some to half the dough but it made it too wet to roll. So I made that portion into drop cookies – – equally good. I made confectionary frosting and divided it into three bowls, adding a different food color to each bowl. The result was these festive Easter cookies that are ridiculously easy and sinfully delicious. They taste even better the second day and freeze well, too.
 Anginettes (Makes 30 to 36 cookies)
2 ½ cups Cake and Pastry Flour (below), unsifted
½ cup sugar
1 ½ tablespoons baking powder
1 teaspoon xanthan gum
½ cup + 2 tablespoons Earth Balance organic shortening or other organic shortening, in small pieces
3 large eggs, lightly beaten
1 teaspoon vanilla
1/3 cup orange juice (to make drop cookies)
Preheat the oven to 375 degrees. Line 2 cookie sheets with parchment paper. Set aside.
Combine flour blend, sugar, baking powder and xanthan gum. Cut in the shortening until mixture resembles coarse crumbs. Mix in eggs and vanilla. (Add the orange juice here if making drop cookies.)
Pull off walnut-size pieces and roll into 6” long snakes. Wind the dough in a circle around itself with the end set on top. Place on cookie sheet. Bake 10-12 minutes.
Cool and frost with confectioners’ sugar mixed with enough milk so that it is of frosting consistency. Frosting can be tinted if desired.
Cake and Pastry Flour
2 cup sweet white sorghum flour
2 cup white rice flour
1 ½ cups cornstarch
3 teaspoons xanthan gum (or guar gum)
1 teaspoon salt
Mix to combine. Store leftover blend in a zip-lock bag in the refrigerator.
Categories: Recipes | Tags: dessert recipes, Desserts, Easter Cookies, Essy cookies, gluten free, Makeovers, recipes | 9 Comments »
I recently asked people what they missed most after they became gluten-free. The number one answer was Chicken and Dumplings followed by Roasted Turkey with Gravy and Stuffing, Chicken Pot Pie, and Lasagna – – comfort foods we all equate with nourishing goodness.
Comfort food and I go back a long way. Before I was diagnosed with celiac disease, when my tummy didn’t feel right, I would walk to the nearest Brigham’s in downtown Boston and order a hot turkey sandwich. The plate would be heaped with slices of turkey that had already left their indentation on two slices of Wonder Bread and their intention imprinted on my heart. The sandwich was swimming in turkey gravy, a mound of sage and celery dressing was casually deposited to the side and a little white pleated paper cup of cranberry sauce was propped against the meat. It was the only color on the otherwise anemic plate that matched my pasty complexion in those days. As I took the first bite, a fork full of equal parts turkey, bread and stuffing, I could feel wellness heading my way. This was my comfort food. But, ironically, I was dosing myself with the same medicine that was making me sick. Who knew?!
As I got sicker, my craving for comfort food increased. If it wasn’t a hot turkey sandwich, I ordered chicken and dumplings, or chicken pot pie. They engaged my soul and I felt good. My body, however, was another story. Hours later, I would feel that familiar tightening in my tummy, that slow burn and indigestion. By then the memories of my comfort food were far away. I would not correlate the meal I had eaten four hours ago with the queasiness I was experiencing now. For many years, I would not realize that the food I loved did not love me back.
When people on a gluten-free diet picked the same foods I craved before diagnosis, it made me wonder if they had similar memories. Perhaps they, too, remembered the days when they sought out these dishes in hopes of feeling better, in hopes of finding comfort. Perhaps “comfort food” has a double meaning for all of us who are gluten intolerant – – an unrequited love of old and a new, gluten-free love fulfilled.
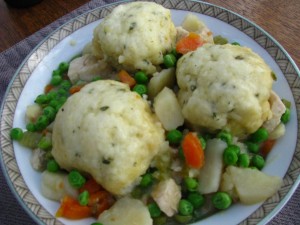
Hands down, the ultimate comfort food seems to be Chicken and Dumplings, the recipe I am asked to makeover more than any other. It sends me back to those days when I tried to find comfort at Brigham’s lunch counter, when I knew something was missing and tried to replace it with a nourishment that was ultimately my undoing.
And it sent me to my recipe files for a makeover because it seems that making this dish into a delicious gluten-free recipe is a challenge. Readers say the dumplings are too hard, or they break apart in the liquid; they are too dense, too dry. I had the same experience at first. I dug out the dish from my past, the one my mother made in our Yankee kitchen (although this recipe has its roots in Southern traditional), and I tried to create something equal to the taste and texture of the meal I remembered. After several tries, I got it just right!
Here’s How I Made it Over
The first time I made this with a high protein flour blend. The results were tasty but too dense. The dumplings didn’t rise and fill the pot as I expected. Then I opted for a white flour blend and added baking powder and butter. This time, they were just right. The dumplings had doubled in size; they filled the pan! The texture was light and they had the mouthfeel I remembered from my gluten-filled years.
The first time, I poached a whole chicken in broth and vegetables, the way my mother had done. But no one has time to wait that long for a delicious meal. Next time, I poached boneless chicken breasts. They take 5 to 10 minutes. You could also purchase a cooked rotisserie chicken, as long as it’s gluten-free, and remove the meat from the bone. As a final tip, you’ll want to scoop the dumpling dough onto simmering (not boiling) liquid and cover the pot tightly. Don’t peek while the dumplings cook. These aren’t as tasty as leftovers, so you’ll have to eat them all in one sitting which should not be difficult.
This is a food that will nourish your soul AND your tummy.
Chicken and Dumplings Serves 4
1 quart gluten-free chicken stock, more as needed
1/4 cup dry sherry or vermouth (optional)
1 clove garlic, crushed
1 pound boneless, skinless chicken breast
Salt and freshly ground pepper
1 medium onion, roughly chopped
2 celery stalks, trimmed and chopped
3 medium carrots, peeled and chopped
3 medium parsnips, peeled and chopped
2 medium potatoes peeled and cubed
1 teaspoon dried thyme
3/4 cup frozen peas, thawed
1/4 cup minced fresh parsley leaves
Ground black or white pepper
Dumplings
(Makes about 12 dumplings)
2 cups all-purpose gluten-free flour blend*
3 teaspoons baking powder
3/4 teaspoon salt
2 to 3 tablespoons minced fresh chives or other fresh herbs
2 tablespoons butter, melted
3/4 cup + 2 tablespoons milk of choice
1 large egg, beaten
Heat the chicken stock to a gentle simmer in a medium saucepan. Add sherry, if used, and garlic. Add chicken breasts and salt and pepper to taste. Poach covered for 5 minutes. Using a slotted spoon, remove the breasts and cool. Skim foam off the surface of the liquid.
Return the pot of chicken broth to medium-high heat. Add the onion, celery, carrot, parsnips, potatoes, and thyme. Cover and simmer vegetables until just fork tender (about 10 minutes), while making the dumplings.
Make the dumpling batter by sifting together flour, baking powder, and salt in a medium bowl. Add chopped chives or other fresh herbs. Add melted butter, milk and egg to the dry ingredients. Gently mix with a wooden spoon or fork until mixture is moist and comes together. Do not overmix or dumplings will be too dense.
Cube the chicken and return to the pot. Add additional broth if mixture is too thick or liquid has cooked down too much. Return to a simmer.
Drop dumpling batter into the simmering stew by heaping tablespoonfuls, over the surface of the stew. (Note that the dumplings will double in size as they cook.) Cover and simmer until dumplings are cooked through, about 15 minutes. Do not uncover and peek while the dumplings are cooking. In order for the dumplings to be light and fluffy, they must steam, not boil. Uncovering the pan releases the steam. If after 15 minutes they are still not cooked through (use a toothpick or skewer to test) cover pan again, and cook for another 5 minutes.
Gently stir in peas and parsley. Ladle portions of meat, sauce, vegetables, and dumplings into soup plates and serve. Note that the stew will continue to thicken as it sits.
* If all-purpose flour blend contains salt, do not add additional salt. If blend does not contain xanthan or guar gum, add 1 teaspoon gum to the dry ingredients.
Here’s the blend I like to use:
Basic Blend
2 ¾ cups rice flour
1 ¼ cups corn or potato starch
1/3 cup tapioca flour
Categories: Recipes | Tags: chicken and dumplings, comfort food, dinner, gluten free, main dishes, meals, one dish makeovers, recipes | 24 Comments »
Hello Sweetie! These dazzling Linzer Cookies are just the thing for your special someone. They are easy to make, keep for several days, and freeze well.
I confess. I am a sucker for cookies, especially cut-out cookies. But it seems like many of you are, too. People frequently ask me if I have a good recipe for roll-out cookies. So, here it is. These are wonderful and, since two cookies are sandwiched together, you get two-for-one when you make these Linzer Cookies.
And, now I feel like the Ginsu Knife salesperson. Not only can you make Linzer Cookies with this recipe, but you can also make fabulous drop cookies, too.
I love the idea of using one recipe to make many kinds of cookies. It’s brilliant.
My goal was to develop a dough that can be used for several variations. To create this makeover, I incorporated elements of several recipes I found in regular cookbooks and turned these inspirations into one Master Dough. I’m making roll-out Linzer Cookies here, but by adding an additional egg, I’ve also come up with recipes for fabulous Double Ginger Cookies and Cranberry and White Chocolate Cookies. (See the recipes below.) I suspect the possibilities are endless, but I will stop at two and let you use your own culinary inventiveness
to create others.
All of the mainstream recipes I found use butter. I tried these with Earth Balance Buttery (Vegan) Sticks and with unsalted butter. Truth be told, I prefer butter. There’s nothing quite like the taste in home-baked cookies. But, if you can’t tolerate dairy, these work well with a dairy-free spread. I also added one teaspoon of baking powder to lighten the finished product. Gluten-free baking needs all the help it can get.
For ease of handling, I rolled out the Linzer Cookies between sheets of plastic wrap. Don’t roll them too thin or they will be difficult to handle. And, don’t use raspberry jam with seeds. It is disastrous as the little seeds make it very difficult to fill the tiny opening in the top cookie.
Enjoy these cookies and don’t forget to share some with your sweetheart!
Roll-Out Linzer Cookies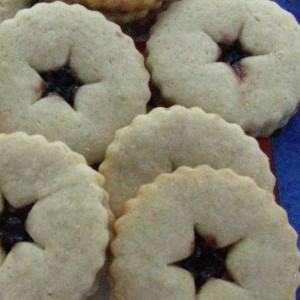
Makes 48 to 60 cookies
1 ¾ sticks (14 tablespoons) unsalted butter, softened to room temperature
¾ cup sugar
1 large egg
1 teaspoon vanilla extract
½ teaspoon orange extract
2 ½ cups cake and pastry flour blend (below) or all purpose blend
1 teaspoon baking powder
2/3 cup seedless raspberry jam or jelly
Preheat the oven to 350 degrees. Line two cookie sheets with parchment paper. In a large mixing bowl, beat the butter and sugar until soft and slightly fluffy. Add the egg, vanilla and orange extracts and beat until smooth. Combine flour blend and baking powder. Add the flour blend to the butter mixture, one cup at a time, beating briefly just to incorporate
after each addition.
Between two sheets of plastic wrap, roll out dough to 1/8 inch thick. Cut out 2-inch circles or other shapes. Gently gather the extra dough from around the cutouts and reroll it. Chill the cutout cookies for 15 minutes while you roll out remaining dough. With a small star or circle or the point of a paring knife, cut centers out of half the cookies. Remove the centers and add them to the dough you are reworking. When cookies are chilled, use a spatula to transfer them to the cookie sheets, setting them 1 inch apart. Bake 10 to 11 minutes or
just until the edges are slightly brown.
Heat the jam or jelly in a microwave for 45 seconds or until softened. Set the whole cookies on one sheet of parchment. Brush with jam and top with a cut-out cookie. Spoon the remaining jam into the center of each cookie sandwich, leaving any chunks of fruit behind. Let cool until set. Store in an airtight container at room temperature for 1 to 2 days or in the refrigerator for up to 5 days. These can also be frozen.
Cranberry White Chocolate Walnut Cookies
(Makes 42 to 48 cookies)
1 ¾ sticks (14 tablespoons) unsalted butter, softened to room temperature
¾ cup sugar
2 large eggs
1 teaspoon vanilla extract
½ teaspoon orange extract
2 ½ cups cake and pastry flour blend (below) or all purpose blend
1 teaspoon baking powder
¾ cup dried cranberries
¾ cup white chocolate
½ cup chopped walnuts
Preheat the oven to 375 degrees. Line two cookie sheets with parchment paper. In a large mixing bowl, beat the butter and sugar until soft and slightly fluffy. Add the eggs, vanilla and orange extracts and beat until smooth. Combine flour blend and baking powder. Add the flour blend to the butter mixture, one cup at a time, beating briefly just to incorporate
after each addition. Fold in cranberries, white chocolate, and chopped walnuts. Drop by tablespoons onto baking sheets and bake 10 to 12 minutes.
Double Ginger Spice Cookies
(Makes 42 to 48 cookies)
1 ¾ sticks (14 tablespoons) unsalted butter, softened to room temperature
¾ cup sugar
2 large eggs
3 tablespoons molasses
1 teaspoon vanilla extract
½ teaspoon orange extract
2 ½ cups cake and pastry flour blend (below) or all purpose blend
1 teaspoon baking powder
1 ½ teaspoons cinnamon
¼ teaspoon ginger
¾ cup chopped crystallized ginger
½ cup raisins.
Preheat the oven to 375 degrees. Line two cookie sheets with parchment paper. In a large mixing bowl, beat the butter and sugar until soft and slightly fluffy. Add the eggs, molasses, vanilla and orange extracts and beat until smooth. Combine flour blend, baking powder, and spices. Add the flour blend to the butter mixture, one cup at a time, beating briefly just
to incorporate after each addition. Fold in chopped ginger and raisins. Drop by
teaspoons onto a plate of sugar and roll to coat. Set on baking sheets and bake 10 to 12
minutes.
Cake and Pastry Flour
This makes ¼ cup more flour blend than you’ll need for the master dough recipe. Reserve the extra for dusting the counter when making roll-out cookies.
1 cup sweet white sorghum flour (4 ounces)
1 cup white rice flour (5.4 ounces)
¾ cup cornstarch (3.4 ounces)
1½ teaspoons xanthan gum (or guar gum)
½ teaspoon salt
SHORTCUT: This blend makes very light pastries and cookies with a fine crumb but, if you are pressed for time, you may use 2 ½ cups of any all purpose flour blend. Add the xanthan gum and salt if they are not already in the blend.
Categories: Recipes | Tags: Cookies, cut-out cookies, gluten free, gluten-free makeover, recipes, Valentines Day | No Comments »
Of all the take-your-breath-away vistas, the hikes into remote areas, the climbs over glacier crusted mountains, one adventure missed my radar entirely until we visited the Canadian Rockies last summer. In my wildest dreams, I never imagined a full-grown grizzly bear would be joining us for breakfast!
It was a crystal clear, late summer day and I was enjoying a world free of commercial interruption. Perhaps it was the berries, the yogurt, or the hour (nearly 8 a.m.). But, more likely, it was the location – – sleepy Baker Creek (near Lake Louise and Banff) – – where we stayed in a rustic cabin no more than fifteen feet from the water’s edge. I stood over my husband’s shoulder pouring coffee when she caught my eye, sauntering by, not ten feet from the sliding glass door.
“Honey, you might want to look up from your computer for a moment,” I said to my husband who had not fully unplugged, yet. Indeed, a magnificent brownish-gray beast with that unmistakable hump behind its head was wandering by. Griz held our attention for what seemed like an hour as she slowly meandered past the cabin and down to the chilly brook. “This might be a good time to get the camera,” said my husband. But, alas, I couldn’t move, could not take my eyes off the gorgeous creature who might have truly joined us for breakfast had I opened the glass door.
So, you’ll have to take my word that a grizzly bear came to breakfast one August morning. But you need not take my word that a visit to the Canadian Rockies affords an extraordinary mix of travel and exploration. Besides the vistas, the glaciers, the majestic falls, save an appetite for dinner. Restaurants in the Canadian Rockies are no strangers to the gluten-free diet. Every eatery seems to speak gluten-free and many offer separate menus, gluten-free pizza, breads, and rolls.
And we ate well – -from the four-star Post Hotel in Lake Louise to the rustic Bakers Creek Lodge at Bakers Creek, to pizza parlors and Cassio’s Italian restaurant (with several gluten-free pasta dishes). It’s just across from the railroad station in Jasper, Alberta.
High on my list was Evil Dave’s Grill in Jasper. There’s no Dave at this funky, self-styled
café. What you will find is great service, sublime atmosphere, and wicked food. Owners Mike and Cyndi Day are known for offering a whimsical menu and casual décor that makes diners feel nourished the moment they enter. From the gluten-free menu, check out Chinese Lettuce Wraps, Malicious Salmon (blackened salmon with a skewer of grilled shrimp) Fiendish Falafel, and convicted Felon (Asian style salmon over rice noodles).
My favorite was El Diablo Chicken, a signature dish that’s bursting with flavor and a bit of spice. (The heat can be adjusted by cutting back on the chipotle seasoning.) Chef Nicole shared the recipe which I adapted here. I’m plannng to serve this at a gathering for the Super Bowl, but its great presentation makes this a perfect company meal, too.
It’s not too early to plan a summer vacation to the Canadian Rockies where the season is short and hotels book quickly. And, about that grizzly – – well, you’ll have to find your own. Our bear was last seen swimming across the creek.
El Diablo Chicken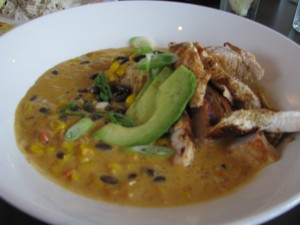
Serves 4 to 6
Adapted from a Recipe by Chef Nicole Langille at Evil Dave’s Grill, Jasper, Alberta, Canada
4 to 5 large boneless, skinless chicken breast filets (about 1 to 1 ½ pounds)
Marinade ingredients:
¼ cup olive oil
1tablespoon good quality chili powder
1 tablespoon minced garlic
Juice of one large lime
Combine marinade ingredients and add chicken breasts. Stir to coat and let stand, refrigerated, for at least 3 hours.
The Sauce:
1 tablespoon olive oil
½ of a large yellow onion, diced
Two vine-ripened tomatoes, diced or 1 (15 ounce) can of diced drained tomatoes
½ to 1 teaspoon chipotle powder (adjust for heat)
2 cups gluten-free chicken broth
¼ to ½ cup heavy cream
½ cup corn kernels, thawed, if frozen
½ cup canned black beans, rinsed and drained
1 ½ cups cooked Jasmine rice
Garnish:
1 to 2 ripe avocados, thinly sliced
2 scallions, top third removed, coarsely chopped
To make the sauce: Heat the olive oil in a medium saucepan. Sauté the onion and tomatoes for 2 to 3 minutes or until onion is translucent. Add chipotle powder and sauté briefly. Add the chicken broth and simmer until reduced by half. While the mixture is simmering, preheat a grill to medium high and grill the chicken on both sides until centers are no longer pink. Remove from heat. Let cool slightly and slice each filet diagonally to yield 5 to 6 slices per filet. Add the cream to the reduced chicken broth mixture and simmer 2 to 3 minutes. Remove from heat. Fold in corn and black beans.
Divide rice between 4 to 6 plates (or plate on one serving platter). Spoon a portion of the tomato mixture over the rice. Fan out chicken slices over the top and garnish with avocado slices and a sprinkle of chopped scallion. Or arrange on a platter and serve family-style.
Visit evildavegrill.com
Categories: Recipes | Tags: Baker's Creek Lodge, Canadian Rockies, chicken, dinner, entrees, Evil Dave's Grill, gluten free, main dishes, Makeovers, super bowl meals | No Comments »
I have exciting news . . well, sort of. Gluten-Free Makeovers won an honorable mention at the New England Book Festival. Ordinarily I would do the always-a-bridesmaid-never-a-bride thing and wallow in butter cream for a few days. But the category was cookbooks, all types of cookbooks. Mine was gluten-free, a fairly narrow subject within the category. And the cookbook that won was Around My French Table by Dorie Greenspan. It has universal appeal and has taken honors everywhere. If there is anyone I would want to be the bride in this category, it’s Dorie. I’m a huge fan of this great lady and wonderful chef. Her book, all her books, are well researched and inspired. And her recipes work. Besides, she lives in Connecticut part of the year. We are almost neighbors.
So, when I was asked to recreate a spice cake for some readers, this not-too-sweet cake appeared on my radar. It came from a recipe by Dorie Greenspan that appeared in Bon Appetit Magazine in October 2009. I knew I couldn’t miss if I made over a recipe she had created.
This one is amazing. It’s light and moist and, although considerably revised to make it gluten-free, I thank Dorie for steering me in the right direction. By frosting only the top and center of the cake with cream cheese frosting and using applesauce for part of the fat, it’s lower in calories than it’s hi-test cousin.
Dorie says to use fairly sweet apples with a sturdy structure like Gala of Fuji apples. There’s no question this is a winner. And, all things considered, it would make a fabulous wedding cake.
Apple Spice Cake with Spiced Cream Cheese Frosting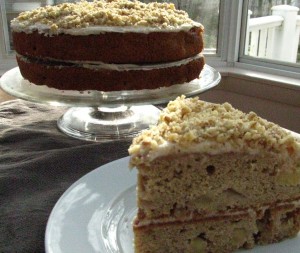
This cake serves 12
Cake:
1 cup brown rice flour
1 cup sorghum flour
½ cup tapioca starch
½ cup cornstarch or potato starch
1 ½ teaspoons xanthan gum
1 ¾ teaspoons ground cinnamon
1 ½ teaspoons baking powder
½ teaspoon salt
½ teaspoon baking soda
½ teaspoon ground nutmeg
¼ teaspoon ground ginger
¼ teaspoon ground cloves
1 cup (2 sticks) unsalted butter, room temperature
1 ¼ cups sugar
¾ cup (packed) light brown sugar
3 large eggs
2 teaspoons vanilla extract
2 tablespoons brandy or rum (optional)
1 1/3 cups unsweetened applesauce
2 medium Fuji or Gala apples, peeled, cut into 1/3-inch cubes (about 2 cups)
Spiced Cream Cheese Frosting:
1, 8-ounce package reduced fat cream cheese, room temperature
½ stick unsalted butter, room temperature
2 teaspoons vanilla extract
Pinch of salt
3 cups powdered sugar
½ teaspoon ground cinnamon
½ teaspoon ground nutmeg
½ cup coarsely ground walnuts
Position rack in center of oven and preheat to 350°F. Lightly oil two 9-inch-round cake pans with 2-inch-high sides. Whisk first 12 ingredients in medium bowl. Using electric mixer, beat butter in large bowl until fluffy. Add both sugars and beat until smooth. Add eggs one at a time, beating well after each addition. Beat in vanilla, then brandy, if desired (mixture may look curdled). Add flour mixture to egg mixture in thirds alternating with the applesauce. Beat until blended after each addition. Fold in apples. Divide batter between cake pans; smooth tops.
Bake cakes on the center rack until tester inserted into center of each comes out clean, about 45 to 50 minutes. Transfer cakes to racks and cool in pans 15 minutes. Cut around pan sides to loosen cakes. Invert cakes onto racks. Cool completely.
This can be made a day ahead. Wrap each cake in plastic and store at room temperature.
To Make the Frosting:
Using electric mixer, beat cream cheese and butter in large bowl until smooth. Beat in vanilla extract and pinch of salt. Gradually add powdered sugar, beating until frosting is smooth and creamy, about 2 minutes. Add the cinnamon and nutmeg and beat briefly to incorporate.
Transfer one cake to serving platter, flat side down. Drop half of frosting (about 1 1/2 cups) by spoonfuls atop cake. Spread frosting evenly to edges of cake. Top with second cake, flat side down. Drop remaining frosting by spoonfuls onto top of cake, leaving sides of cake plain. Spread frosting to top edges of cake, swirling and creating peaks, if desired. Sprinkle with walnuts. Let cake stand at room temperature 1 hour to allow frosting to set slightly.
Or cover loosely and refrigerate. Let cake stand at room temperature at least 2
hours before serving.
Categories: Recipes | Tags: apples, dessert, gluten free, Makeovers, spice cake | 9 Comments »
No one has ever mistaken me for a shrinking violet. I’m not subdued and I’ve never been one to turn my back on a challenge. You get the picture.
So when a friend who was recently diagnosed with celiac disease asked me if I had done a spritz cookie makeover, I said, “yes.” Truthfully, I hadn’t made spritz cookies in years. I wasn’t even sure I could find my cookie press, the one I inherited from my grandmother a while back. What was I thinking?
But my friend, who I will call Debbie, is still in the pity phase of the gluten-free diet, a place I rarely go. I don’t recall feeling badly even when I was diagnosed with celiac disease more than thirty years ago. Frankly, I didn’t know another soul with this disease back then. So who would have listened, if I did complain?
But Debbie was diagnosed this year. “I miss pizza. I can’t find a beer I like. “And I wish I could bake up a batch of the spritz cookies my family makes for the holidays,” she said.
After thirty-something years of living and baking gluten-free, I have a hard time accepting her glass-nearly-empty outlook. “Look what you can have,” I countered. This is when the stubborn in me goes from simmer to full boil. There is no need to miss out. Today, we have so many choices. And after writing my cookbook, Gluten-Free Makeovers, I am convinced that everything can be made over.
So, when Debbie asked if I had a gluten-free spritz cookie recipe, I didn’t tell her I had no idea what I had done with the recipe or if I ever had one. Nor did I mention that my cookie press had disappeared. I was out to prove a point – – we can eat everything, just gluten free. So what if I had no idea what I was doing? I’d figure it out. After all, isn’t that part of a no-shrinking-violet philosophy? I went to the basement where I store all the gadgets I rarely use. I rummaged in storage closets where they are well wrapped and piled in a heap. Under the back-up coffee maker, the spice grinder, the antique food mill, I found the gold metallic cylinder of a cookie press. I dug deeper and found the levered top. Two piles over, were the discs and finally, in with an old food processor, was the ring that holds the discs in place. I was ready to try my hand at making press cookies.
I did not realize there was more of a challenge ahead. On the surface, spritz cookies look pretty simple – – flour, butter, eggs and sugar. I could replace the flour and create my own cookie press cookies, I reasoned. And, at first, that’s exactly what I did. Little did I realize that these delicate cookies hold their shapes because of the wheat and gluten. Every shape I pushed through the metal cylinder produced the same non-descript blob of dough. I was ready to throw in the kitchen towel, give up the whisk, put my grandma’s cookie press in the tag sale box.
A one-for-one conversion was not doing the trick. How was I going to create a dough that would hold its shape when pressed through the cookie press but still tasted delicate with a pleasant crumb? Little by little I increased the flour, adjusted the xanthan gum. And soon I had reached the exact balance, the ratio of butter to flour that produced the right amount of texture but preserved the delicate crumb. So dust off your cookie press and enjoy!
Spritz Cookies
Makes 60 cookies
These rich, buttery treats are fun to make and decorate.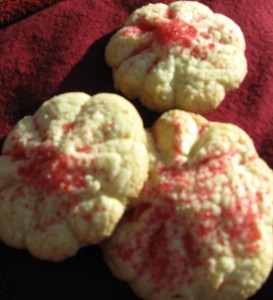
1 cup white rice flour + 2 tablespoons
¾ cup sorghum flour
½ cup cornstarch
1/3 cup tapioca starch
1 ½ teaspoons xanthan gum
½ teaspoon salt
1 cup (2 sticks) unsalted butter, softened
1 ¾ cups confectioners’ sugar
2 egg yolks
½ teaspoon almond extract
1 teaspoon vanilla extract
Preheat the oven to 400 degrees F. Line 3 to 4 cookie sheets with parchment paper and set aside. In a medium bowl, combine rice flour, sorghum flour, cornstarch, tapioca starch, xanthan gum, and salt. Whisk to combine. Sift and set aside.
In a medium bowl, cream the butter until light yellow. Add the sugar and beat about 3 minutes or until fluffy. Add the egg yolks and extracts and beat to combine. Add the
flour ingredients, a little at a time, beating briefly after each addition. Chill 30 minutes. Scoop into a cookie press and press out cookies, one at a time. If they do not release from the tube, loosen with a dull kitchen knife. Set 1 ½ inches apart.
Decorate with sprinkles or colored sugar and chill on trays for at least 10 and up to 30 minutes so that cookies hold their shape. Bake 8 to 10 minutes. Cool completely before storing.
TIP: Add food color to the dough and beat or divide dough and color each portion with a different color.
For best luck, use cookie press forms with the widest openings and avoid those with small holes in the designs.
Categories: Recipes | Tags: baking, Cookies, Gluten-Free. Desserts, holidays, Makeovers, Sweets | 7 Comments »
As a child, my biggest worries this time of year were whether Mrs. Lord was making caramel corn balls for Halloween and if Mrs. Oakes would have any candy coated apples left by the time I came to her house to trick or treat.
I spent the entire month of October anticipating the Candy Corn, the Tootsie Rolls, and the Mars Bars that would fill my shopping bag – several bags, if I was lucky. As I counted the days until the end of the month, I brooded about the ever cooling weather pattern. Would there be snow in the tiny Maine town I called home? Would I need mittens – something that made it very difficult to eat Mrs. Oakes’ sticky candy apples. Most of all, I wondered how many layers of clothing I would need to wear under my costume. Would the ubiquitous black cat costume still fit or would I have to opt for my brother’s red devil number?
In school, I sketched faces I might want to carve into my jack-’o-lantern. I practiced drawing angry faces, funny ones, sad ones. In the end, the pumpkin always looked the same, owing to my lack of dexterity and the ever-dull knife that was the only one my mother allowed me to use. Each year I promised myself that next year’s pumpkin would be much better. It never
was.
But not once did I realize that all the pumpkins I carved or stole from people’s porches and smashed in the middle of the road were edible, that pumpkin was food. I missed the connection, that these orange orbs were essential to my grandmother’s Thanksgiving pumpkin pie and my mother’s pumpkin quick breads. Pumpkin – – duh?!
I can’t say when the light went off, when I began using pumpkin in baking rather than carving. But one day, it did. And, now it’s the orange flesh that pleases me. Low in calories and high in fiber and vitamins, pumpkin is my friend. And it’s particularly great for gluten-free baking, adding moisture and texture to muffins and quick breads. Warm spices – – cinnamon, ginger, cardamom, cloves, and nutmeg – – pair nicely with pumpkin puree. Although you can bake a pumpkin and remove the flesh, you can also buy canned pumpkin puree. It’s so much easier and just as good.
So, say “Hello” to pumpkin and its many uses, and to this flavorful, moist pumpkin bread with crumb topping I made in honor of the season .
Pumpkin Bread with Crumb Topping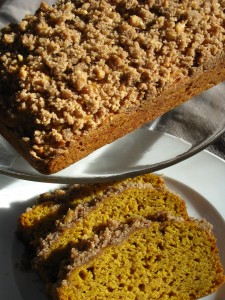
Makes 2 Medium Loaves
½ cup white rice flour
1 cup sorghum flour
1/3 cup cornstarch
2 ½ tablespoons tapioca starch
1 tablespoon baking powder
1 teaspoon xanthan gum
¾ teaspoon salt
½ teaspoon baking soda
½ teaspoon
ground cinnamon
¹⁄8 teaspoon
ground nutmeg
2 large eggs, at room temperature
1½ cups pumpkin puree (most of a 15-ounce can)
1 cup sugar
½ cup vegetable oil
¼ cup chopped pecans or other nuts, optional
1 cup Crumb Topping (below)
Preheat the oven to 350°F. Lightly oil two 8½ x 4½-inch loaf pans.
Combine the flours, cornstarch, tapioca starch, baking powder, xanthan gum, salt, baking soda, cinnamon, and nutmeg in a bowl. In a separate bowl, whisk together the eggs, pumpkin, sugar, and oil. Add to the dry ingredients and whisk to combine. Fold in the pecans, if using.
Divide the batter evenly between the two pans. Sprinkle ½ cup of the crumb topping over each loaf. Bake for 40 to 45 minutes, until toothpick inserted in the center comes away clean. Set on a wire rack and let cool for 10 minutes. Turn the breads out onto the rack and let cool completely. Wrap with plastic and let sit overnight before slicing.
Crumb Topping
Makes 3½ Cups or 3 Cups If Nuts Are Omitted
Store remaining topping in the refrigerator for 3 weeks or freezer for 3 months.
¾ cup rice flour
1 cup packed brown sugar
1 tablespoon ground cinnamon
¼ teaspoon ground nutmeg
¼ teaspoon ground cloves
½ teaspoon salt
½ cup ground pecans, walnuts, or almonds, optional
6 tablespoons unsalted butter or non-dairy buttery spread, at room temperature, cut into pieces
Combine the flour, brown sugar, cinnamon, nutmeg, cloves, salt, and pecans, if using, in a large bowl. Mix well. Add the butter and use your fingertips to mix just until crumbly.
Categories: Recipes | Tags: baking, gluten free, gluten-free makeover, holidays, pumpkin, quick breads | 3 Comments »
In late September we bicycled through the cranberry bogs in Cape Cod. The weather was gloriously sunny – -spectacular in fact. I could not get enough of the sparkling late summer air – – the sun on my face, a faint, salty breeze tussling my hair, an apple-picking crispness brushing cobwebs from my brain.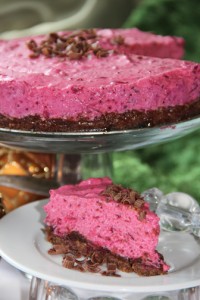
What could be better than a lazy Saturday afternoon on a relatively flat bike trail? But, as I peddled, I realized something was missing. The cranberry bogs beside the trail were dry and empty. Don’t cranberries grow in water? And where are the plants, anyway? I expected to see seas of red as we bicycled.
“What happened to all the cranberries?” I asked the store owner when we returned the bikes.
“Harvested,” he said. (Cape Codders are not known for using more words than needed.) “Headed for market, ” he added.
“Oh,” I said, trying to emulate his frugality.
Sure enough. Two weeks later, fresh cranberries began appearing in the produce aisle of my favorite grocery stores. Now, I realize that fresh cranberries are frozen and sold all year long. But I had never quite appreciated the relationship between the harvest and the availability of fresh produce. Who thinks about these things when they are pushing a grocery cart through a crowded supermarket?
In celebration, I bought three bags of fresh cranberries. It seemed fitting to honor the cranberry harvest with something sweet, and slightly sour. I came up with a Chocolate Cranberry Mousse Tart that I served for a recent gathering. I’ve made it twice since and the balance of tart and sweet, like the late summer sun, always amazes me.
You may find more superlatives to describe this easy dessert. But, in keeping with the Cape Cod tradition, I’ll just say, “Wow.”
The graham cracker crumb crust with a layer of chocolate can be used for many mousse-like pies. I keep a supply of Kinnikinnick graham-style crumbs on hand to make this dessert. And now I will keep a supply of fresh and frozen cranberries at the ready, too.
Chocolate Cranberry Mousse Tart
This is as festive as it is delicious. Decorate with whipped topping and chocolate shavings and garnish with cranberries.
One chocolate graham crumb crust (below) in a 9-inch tart or springform pan.
12-ounce bag fresh or frozen cranberries, rinsed and drained
¾ cup sugar, divided
6 tablespoons orange juice
2 ½ teaspoons dried orange peel
1/3 teaspoon ground ginger
3 tablespoons Triple Sec or other orange liqueur or additional orange juice
1 tablespoon unflavored gelatin softened in 1 1/2 tablespoon orange juice
1 ½ cup whipping cream or non-dairy whipped topping
In a medium saucepan, combine cranberries, 6 tablespoons sugar, orange juice,
orange peel, and ground ginger. Bring to a boil, stirring frequently. Lower heat
to medium low and cook, stirring frequently until cranberries break down, about
15 minutes. Remove from heat. Add Triple Sec and stir. Let cool slightly. Press mixture through a mesh sieve, scraping puree into a bowl. Do this until all the liquid has been pressed out of the fruit. Discard pulp. Warm the gelatin in a microwave for 10
seconds or until it liquefies. Pour into the cranberry mixture in a steady stream, stirring while adding. Scrape into a bowl and chill about 20 minutes.
Beat the cream and remaining 6 tablespoons sugar until stiff. Fold into cranberry mixture and spoon into prepared crust. Chill at least 3 hours. Cut and serve with additional
whipped cream if desired. Garnish with chocolate shavings.
Chocolate Graham Cracker Crust
This easy and tasty crust can be made several days ahead and stored in refrigerator
until ready to use.
1 cup gluten-free graham cracker style crumbs (such as Kinnikinnick brand)
3 teaspoons unsweetened cocoa
¼ cup sugar
3 tablespoons melted butter or non-dairy spread
½ cup semi-sweet chocolate chips, for dairy-free chips visit enjoylifefoods.com
2 tablespoons light cream or coconut milk
Preheat oven to 325 degrees. Lightly oil the bottom of a 9-inch springform pan.
Combine cookie crumbs, cocoa and sugar. Add the melted butter and stir until crumbs are moistened. Press into the bottom of the prepared pan. Bake in the center of a preheated oven, 12 minutes. Remove and cool.
In a microwave safe bowl, combine chocolate chips and cream or coconut milk. Heat on medium for 1 minutes or until chips are softened. Blend together until smooth. Spread mixture over cooled crust. Chill until set. Fill with cranberry mousse filling above.
Categories: Recipes, Uncategorized | Tags: dairy-free, dessert, gluten free, holiday | 5 Comments »
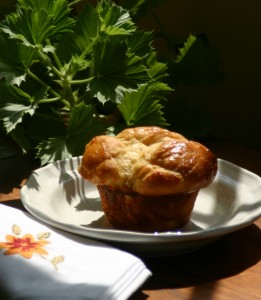 When I was growing up, any special occasion called for tri-cornered rolls that my mother called Parker House Rolls. The name sounded exotic. We believed we were partaking in something sacred, a secret food that only my mother could make.
I’ve since discovered these were simply brown-and-serve dinner rolls with dimpled indentations on the top. She bought them in the grocery store, browned them in the oven, lovingly arranged them in a napkin-lined basket, and took all the credit. And, why not? These warm, doughy pillows were the backbone of every important gathering and I relished them as if she had measured the flour, proofed the yeast, and let them rise in the warmth of our own kitchen.
I remember placing one or two on my bread plate and letting a pat of butter melt into the little indentations in each. I licked the puddle of yellow liquid then sunk my teeth into the roll itself, letting leftover butter spill into the white interior. As proud as my mother was of her brown-and-serve rolls, an admonishment followed my butter ritual without fail. “Don’t eat too many of those or you’ll spoil your appetite,” Mom would say. What she meant was, “You won’t have room for your vegetables.” I truly hoped that would be the case.
I grew up assuming that warm dinner rolls were an inalienable right. That was, of course, before I became gluten free and gave up all rights to a bread plate.
One day I caught a photo on the King Arthur Flour (KAF) Baking web site demonstrating the process for making dimpled dinner rolls with three little crowns. Although most of their recipes are filled with verboten ingredients, unless you visit their gluten-free section, I was inspired by the way the rolls were assembled to create the tri-cornered appearance of Mom’s brown-and-serve rolls. This little demonstration made me wonder if I could makeover Mom’s dinner rolls using the method shown by P.J. Hamel and her baking team. I had a technique. Now I just needed a good gluten-free bread formula.
The Balance of Liquid to Dry
I knew a gluten-filled bread recipe would be difficult to use. The balance of liquid to dry defies conventional food science. So I went back to my gluten-free bread formulas and worked with one that contains high protein flour. (Chickpea or quinoa flour works well.) To add the maximum elasticity, I also used 1 teaspoon of gum per cup of flour. It provides great texture without leaving a gummy mouthfeel and taste. (If you don’t like to use xanthan or guar gum, add an additional tablespoon of potato flour.) The recipe I used is inspired by one from bloggers Vic and Hallie Dolcourt in Sunnyvale, CA. Like me, they are bread people and mad scientitsts in the kitchen.
Food Chemistry and Gluten-Free Breads
Before I give you the recipe, I need to tell you something else about food chemistry and gluten-free breads. It’s called balance. The balance of wet to dry ingredients is critical in gluten-free bread baking. Enough liquid is needed to help the yeast do its best work without creating a bread or roll that rises too quickly and sinks the moment it comes out of the oven. So I look for a smooth, shiny texture when the dough is beaten. If it looks lumpy, I add more liquid, one teaspoon at a time. If the dough is soupy, I add a bit more flour blend, one teaspoon at a time. You get the picture. This trick can be applied to any bread recipe. And one last thing. When I tested this recipe, I thought the dough was a little stiff and lumpy. I added more warm water, one tablespoon at a time until I reached the point where the dough was smooth. You can do that too, although I don’t think you’ll need to change a thing in this recipe. The rolls are light and delicious – – just like Mom’s!
I hope you’ll give this recipe a try. It’s a good reason to bring back the bread plates.
Dinner Rolls Like Mom’s
Makes 18 rolls
Dry Ingredients:
1 ¼ cups chickpea or quinoa flour
1 cup brown or white rice flour
¾ cup + 2 tablespoons tapioca flour
¾ cup corn or potato starch
1/3 cup powdered dry milk*
¼ cup potato flour (not starch)
1/4 cup packed brown sugar
4 teaspoons xanthan gum
1 ½ teaspoons salt
1 tablespoon instant active dry yeast
1 ½ teaspoons baking powder
Liquids:
1 cup + 6 tablespoons warm water at 110 degrees
4 eggs separated
1 teaspoon cider vinegar
3 tablespoons honey
1/3 cup butter or dairy-free buttery spread, melted in microwave for 30 seconds
1 egg mixed with 2 tablespoons water to brush tops
Mix dry ingredients in a bowl and reserve. Put all liquid ingredients except butter and egg yolks into the work bowl of a mixer fitted with the “paddle” attachment. Add the dry ingredient mixture 1 cup at a time while mixing on low. Allow the dough to rest for 10 minutes in the bowl. Add the melted butter and egg yolks. Mix on medium-high until blended, 3 to 4 minutes. Scrape down the sides half way through.
Lightly oil 18 muffin cups. Scoop out bits of dough and roll into balls (about 1-inch in diameter) in oiled plastic wrap. Place three balls in each cupcake tin compartment. Cover and let rise.
Preheat oven to 375 degrees. Brush tops with egg wash. Bake 15 to 20 minutes or until a toothpick inserted in one of the rolls comes out with just a few moist crumbs. Turn onto cooling rack. Let cool for10 minutes before serving.
Note: If the top of the rolls becomes too dark while baking, reduce temperature to 350 degrees or cover top loosely with aluminum foil. Store at room temperature for 1 to 2 days or freeze. To reheat, wrap in aluminum foil and heating in a 350 degree oven. Thaw frozen rolls before reheating.
* Vance’s Dari-Free can be substituted
All contents © 2011 Gluten-Free Makeovers®
Categories: Recipes | Tags: bread, dinner rolls, gluten free, gluten-free makeover, rolls | No Comments »




 Baking guru,