Blog Archives
Pear Coffee Cake
As a baker, I am reluctant to let go of certain sacrosacnt ingredients. Eggs is one of those precious commodities. Then a colleague who is gluten and egg-free asked me if I could convert a coffee cake recipe so she could enjoy, too. I recalled that, back in the days when I owned the Gluten-Free Pantry, I had made many recipes where I replaced eggs with silken tofu, flax gel (1 tablespoon flax meal with 3 tablespoons of hot water) or even with applesauce. I dug out my favorite coffee cake recipe, already gluten-free, and went to work. The results were delicious.
This stunning coffee cake uses soy (or coconut) yogurt and pear puree. The yogurt adds back some of the protein from the eggs and the pear puree, like applesauce, contains pectin which tenderizes the cake. I added a little bit more baking powder to help it rise, usually another job done by the eggs. 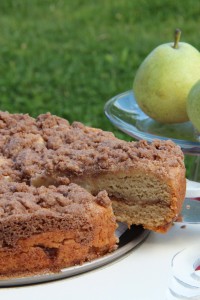
This is comfort food at its best and begs for a cup of coffee or tea. I also like to make this with apples and applesauce.
1 cup sugar
1 ½ cups All-purpose Gluten-Free Flour Blend
½ cup sorghum flour
2 teaspoons xanthan gum*
½ teaspoon salt*
2 teaspoons baking powder
1 teaspoon baking soda
1½ cups soy or coconut yogurt (flavored yogurt works well)
6 tablespoons vegetable oil
4 tablespoons pureed baby pear puree or unsweetened applesauce
½ cup peeled and chopped ripe Bartlett, Bosc or red pears, or diced canned pears
Crumble Topping (below)
Preheat the oven to 325°F and lightly oil a 9-inch springform pan.
Combine the sugar, flour blend, sorghum flour, xanthan gum, salt, baking powder, and baking soda in a large bowl. Set aside.
Combine the yogurt, vegetable oil, and pear puree in a mixing bowl and beat until smooth. Add the dry ingredients and beat until smooth. Fold in chopped fruit.
Spoon half the batter over the bottom of the prepared pan and smooth to the edges of the pan. Cover with half of the crumb mixture. Spoon the remaining batter over the crumb topping and smooth to the edges. Sprinkle the remaining topping over the top.
Bake 50 to 55 minutes, until cake tester comes out clean and center springs back when gently touched.
Cool 10 minutes in the pan. Remove the rim of the pan and cool completely on a wire rack. Serve.
*If your all-purpose blend contains salt and gum, omit the salt and reduce the gum to ½ teaspoon.
Crumble Topping
½ cup rice flour
½ cup packed brown sugar
2 teaspoons ground cinnamon
¼ teaspoon ground allspice
1/8 teaspoon ground cloves
¼ teaspoon salt
4 tablespoons unsalted butter or non-dairy buttery spread, at room temperature
Combine the flour, brown sugar, cinnamon, allspice, cloves, and salt in a large bowl. Mix well. Add the butter and use fingertips or a fork to mix just until crumbly.
This can be made ahead and stored in the refrigerator for up to 2 weeks.
Categories: Recipes | Tags: baked goods, coffee cake, coffee cake recipes, comfort food, dairy-free, egg-free, gluten free, Sweets | 2 Comments »
I envy Northern California for its long growing season, its verdant farms and endless vineyards. But from June to September, Connecticut is in full bloom and I am content to stay close to home, near the local orchards and farms that rival anything I’ve seen in any other part of the US. Our best chefs know that cooking with fresh, local foods can turn ordinary recipes into three-star meals. I’m reminded of that secret when Connecticut’s harvest smiles. I load up on fresh corn, heirloom tomatoes, zucchini, blueberries, raspberries, strawberries, and herbs. I can never have enough!
And just about now, the orchards are bearing fruit – – pears, apples, and peaches. Ah. Peaches. Perhaps my favorite of all the local produce. Nothing else comes close to that juicy, tree-ripened crop. Their faint fruit perfume floats over the back roads as I drive by the local orchards. I buy them by the bushelful. By the time I get home, I’ve devoured a sizable number and my car seat and steering wheel bear the sticky evidence. It’s a race to reach my saturation point before the trees return to their dormant state. So I eat just as many as I possibly can. But I reserve enough to bake a few special treats.
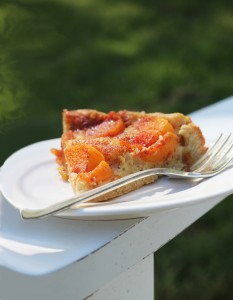
This peach cake is one. Fresh peach slices, fanned out over the buttery cake, turn this into an elegant dessert that bursts with intense flavor. The cake makes the perfect company dessert that fools most into thinking it’s not gluten-free. Perhaps that’s because I started with a great, gluten-filled recipe. This is a makeover from one I saw in Bon Appetit several years ago. It can also be packed and taken to a picnic or a pot luck meal. Don’t tell, but I make this with frozen peaches when the fresh varieties are not available. They beat the hard, unripened fruit that I find in stores throughout the rest of the year. I’ve also used fresh plums. The purple skin makes for an equally beautiful presentation.
3/4 cup all-purpose gluten-free flour blend *
½ cup sorghum Flour
1½ teaspoons baking powder
½ teaspoon xanthan gum
¾ cup plus 3 tablespoons sugar, divided
8 tablespoons (1 stick) unsalted butter or non-dairy buttery spread, at room temperature
1½ teaspoons finely grated orange zest
2 large eggs or egg replacer of choice
1 tablespoon fresh orange juice
4 ripe, but firm peaches halved and each half cut into 4 slices*
¾ teaspoon ground cinnamon for topping
Whipped cream or whipped dairy-free topping
Second Choice: Cascadian Farms or other brand Organic sliced peaches can be used. Thaw fruit before using. Purchase 2, 10-ounce bags and pick the prettiest slices for this cake. Save the rest for another use.
Preheat the oven to 350°F. Lightly oil a 9-inch spring form pan. Combine the flour blend, sorghum flour, baking powder, and xanthan gum in a bowl; set aside.
Beat ¾ cup of the sugar and butter in a mixing bowl until fluffy. Add the dry ingredients and orange zest and beat until crumbly. Add the eggs, one at a time, beating after each addition. Add the orange juice and beat just to incorporate. Spread the batter evenly in the prepared pan.
Arrange the peach slices on top of the batter so that they touch and form concentric circles that cover the batter. Press into the batter lightly. Don’t worry if the slices are not perfect. The cake will partially cover the fruit as it bakes. Combine the remaining 3 tablespoons sugar and the cinnamon and sprinkle over the batter.
Bake 55 to 60 minutes, until golden and a tester inserted into the center comes out clean. Run a knife along the side of the pan to release and remove the side of the pan. Serve slightly warm or at room temperature with whipped cream or dairy-free topping.
* If the blend you use does not contain salt and gum, add ½ teaspoon salt and ½ teaspoon additional xanthan gum to the dry ingredients.
A letter from a reader sent me scurrying to create an oatmeal cookie.
“I have had celiac for 15 years, I’m excited about all the new products coming out in all these years. But I haven’t found an oatmeal cookie I like. I was wondering if you have a recipe for oatmeal cookies?”
The note sparked memories of my childhood when we would pull down the Quaker Oats cannister from the top shelf of the cupboard and make the recipe on the back of the container. I couldn’t recall the last time I made oatmeal cookies – certainly not since I became gluten-free 36 years ago.
So her suggestion triggered a powerful reaction in me, a hankering to enjoy chewy oatmeal cookies again. But this time, I couldn’t use Quaker Oats or all-purpose flour and my tastebuds hankered for a more updated, mature version of my childhood favorite. Nevertheless, as I creamed the butter and sugar and folded in gluten-free oats with a wooden spoon that had belonged to my mother, I was, once again, standing at the counter in her blue and yellow kitchen. Funny how a hankering evokes such vivid memories – – the days of childhood, the days of old fashion oatmeal cookies, the days before I was gluten-free.
I suspect oatmeal cookies stir up fond associations for all of us. I brought these cookies to a barbecue where the young adults far outnumbered us oldsters. One-by-one, the “kids” in the group sought me out to say, “thank you.” “These are the best cookies I have ever had,” several of them told me. A couple of them (friends of my son who is a celiac) knew they were gluten-free, but no one else suspected.
The recipe was inspired by one on Food.com. It’s a good thing it makes a big batch! They disappear quickly. A key step in this recipe is to let the dried cranberries soak in the eggs and vanilla for 1 hour. So allow a little extra time when preparing these. If you’d like to reduce the fat, replace 4 to 6 tablespoons of butter with the same amount of unsweetened applesauce.
The Best Oatmeal Cookies Ever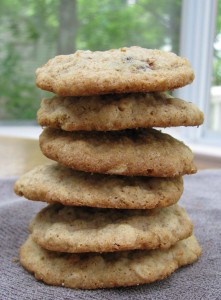
Makes 72-84 cookies
3 large eggs, well beaten
1 cup dried cranberries such as Craisin brand
1 teaspoon vanilla extract
1 cup unsalted butter. softened
1 cup lightly-packed light brown sugar
¾ cup white sugar
2 ¾ cups any All-Purpose Gluten-Free Flour Blend*
1 teaspoon cinnamon
2 teaspoons baking soda
2 ¼ cups gluten-free rolled oats (not steel cut or thick cut oats)
3/4 cup chopped toasted walnuts
*Add 1 ½ teaspoons xanthan gum and ½ teaspoon salt if these are not included in your blend.
Combine eggs, cranberries and vanilla and let stand for one hour.
Preheat oven to 350 degrees. Line two or more cookie sheets with parchment. Set aside.
Cream together butter and sugars. Mix flour with cinnamon and baking soda and whisk to combine. Add to butter mixture and mix well. Blend in egg mixture, oats, and chopped walnuts. Dough will be stiff.
Drop by heaping teaspoons onto cookie sheet, or roll into balls and flatten slightly. Bake for 10 to 12 minutes or until lightly browned around the edges. Cool in pan before removing to a serving tray as cookies are quite soft.
These freeze well.
Categories: Recipes | Tags: cookie recipes, Cookies, dessert recipes, gluten free, gluten-free makeover, oatmeal cookies, recipes | 10 Comments »
Using Your Noodle
I’ve always had a love affair with pasta salads. Easily transformed, they take on the flavor of the dressing, the add-ins, the seasonings, the spices. Cilantro, black beans, corn, and pico de gallo allow me to call my salad, “Mexican Fiesta.” Adding chopped pepperoni, black olives, mozzarella cheese, and artichoke hearts turns my dish into “Antipasto Pasta.”
What’s more, I make it up as I go along. If I have feta cheese and Greek dressing that’s gluten free, the salad might be more of a “Greek Goddess” salad. Caesar dressing and anchovies might become my “Hail Caesar Pasta Salad.” You get the picture. Pasta salad is easy, versatile, and delicious. And little tweaks can completely change its ethnic roots.
Perfect Pasta
With all the gluten-free pasta products available, the trick is selecting the best cut for your salad and following a few simple tips to keep the noodles from getting mushy or absorbing all the dressing before it’s served.
For most pasta salads, select a short pasta. Spirals (fussili), elbows, cavatelli, and small shells are great choices as they hold their shape and pull the flavors of the salad into the crevices of the noodles.
Undercook pasta by 3 to 4 minutes or just until the brittleness is gone. It should be chewy, but not crunchy. Drain the pasta and rinse well under cold water. This removes the starch and cools the pasta so that it does not continue cooking. Now the pasta can sit while you prepare the added ingredients.
Pasta salads can be prepared a few hours ahead but don’t toss the ingredients and dressing into the salad until just before serving.
All Grains are Not Created Equal
Gluten-free pasta comes in all matter of grains. Quinoa, corn, rice, and brown rice are the most common. And many are a blend of flours as well. White rice and brown rice pasta do not hold up as well as others. You might want to leave these for hot dishes that are served as soon as they are made. Corn pasta (preferably from Italy) and quinoa pasta are well suited to pasta salads. They do not fall apart or turn mushy and can even stay overnight in the refrigerator without decomposing.
Here’s one of my favorite summer pasta salads. Roasting the vegetables before they are added, produces an intense and vibrant flavor that is both fresh and satisfying.
Quinoa Pasta Salad with Roasted Tomatoes, Orange and Olives
1 (8-ounce) box Ancient Harvest quinoa rotelle pasta (about 2 cups) or other quinoa or corn pasta
6 large plum tomatoes, each cut into 6 to 8 wedges
1 large onion, halved lengthwise, cut into thin wedges
2 tablespoons extra-virgin olive oil
4 cloves garlic, coarsely chopped
Juice and zest of one orange rind, divided
Salt and freshly ground pepper, to taste
Fresh basil, cut into thin strips (about ¼ cup)
½ cup halved, pitted Kalamata olives
½ cup fresh feta cheese crumbles or dairy-free cheese shreds 2 tablespoons orange juice
1 tablespoon olive oil
Cook pasta in a large pot of boiling salted water 6 to 7 minutes or until tender but still firm to bite. Rinse in cool water and drain well. Set aside.
Preheat oven to 450°F. Oil 2 rimmed baking sheets with nonstick spray.
Spread tomato wedges on one sheet and onion wedges on the second sheet.
Combine 2 tablespoons olive oil, garlic and juice and rind of one orange. Drizzle half over vegetables on each sheet. Sprinkle with salt and pepper. Roast in preheated oven until vegetables are very tender and brown around edges, stirring occasionally, about 30 minutes for onions and 45 minutes for tomatoes. Cool slightly. Set aside.
Transfer pasta to a large serving bowl. Add roasted tomato and onion mixtures, basil and olives to pasta. Stir gently. Add cheese, 2 tablespoons orange juice and olive oil. Toss. Add more salt and pepper, to taste.
Categories: Recipes | Tags: gluten free, Memorial Day recipes, Pasta, Pasta Salad, pasta salad recipes, recipes | 4 Comments »
May is Celiac Awareness Month
I am celebrating with cupcakes and I hope you’ll join me. I’ll tell you how in a moment, but first, here’s a little background on why this event has far-reaching implications for all of us.
The World’s Tallest Gluten-Free Cake
Last year I was part of the world’s largest gluten-free cake event along with the American Celiac Disease Alliance (ACDA) and the 1in133.org awareness project. Hundreds of us met in Washington, DC to build the world’s tallest gluten-free cake, bring attention to the number of people with celiac disease and convince the FDA to reopen the process for creating gluten-free regulations.
While Jules Shepard and John Forberger headed the confectionery team, Andrea Levario and I headed to Capitol Hill to manage the legislative front. With our sons, media folks and gluten-free manufacturers in tow, we spoke to Congressional leaders about the importance of gluten-free regulations. We asked them to keep the pressure on the FDA to push the regulations forward.
They Heard Us And We Ate Cake
In the early evening, we gathered at a reception for supporters and Congressional folks. To our delight, the Deputy Commissioner of the FDA, Mike Taylor, attended. In front of hundreds of us, Deputy Commissioner Taylor told the group we would have gluten-free regulations. On August 4, the FDA reopened the comment period for the regulations. The comment period closed on October 3 and the FDA promised to issue these regulations by the end of the third quarter of 2012. The countdown is on.
Calling All Cupcake Builders
This May, as we await the forthcoming regulations, I invite everyone to make cupcakes – – one for every year you have been gluten-free. Take a picture and share it with the community by posting to the ACDA’s Facebook page. Then post to your Facebook page, blog and link back to the ACDA’s page. Vote for your favorite cupcake by “liking” the photos on the Alliance Facebook page. Prizes will be awarded in categories like best presentation; most unique decorations; most years being gluten-free; and kids categories. The winners will receive products and coupons from several gluten-free companies. Get out those whisks and mixing bowls. The more likes we receive the more voices will be heard from our virtual community. Go to 1in133 for guidelines.
Let’s Eat Cupcakes 
This weekend, I made 56 chocolate cupcakes with peanut butter frosting; 36 for me and 19 for my son, Jeremy. That’s a lot of cupcakes. Let me tell you. But, I’ve seen, firsthand, the power of community. When a standard for gluten-free on food packaging comes out, I can say I had a hand in making it happen. I hope you’ll join me in that effort. It feels good. And, besides, you get to eat cupcakes!
 Here’s the recipe I used. You are welcome to “borrow” it. The chocolate cupcakes are a variation on those in my book, Gluten-Free Makeovers. The frosting is pure decadence – – a blend of peanut butter and cream cheese. I love peanut butter and chocolate and the slightly tangy cream cheese flavor cuts the sweetness in a lovely, subtle way. To bring it all together, I top these cupcakes with crushed Reese Peanut Butter Cups. If you are allergic to peanut butter, you could use sunflower butter or simply frost these with plain cream cheese frosting.
CHOCOLATE PEANUT BUTTER BLOSSOM CUPCAKES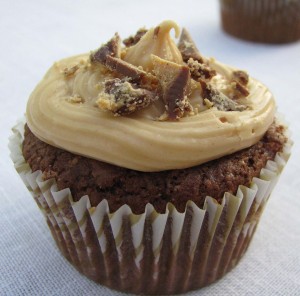
Makes 24 to 28 cupcakes
2 ¼ cups Cake and Pastry Flour
½ cup unsweetened cocoa
2 ½ teaspoons baking powder
½ teaspoon baking soda
1½ cups granulated sugar
12 tablespoons (1½ sticks) unsalted butter or non-dairy buttery spread, at room temperature
3 large eggs, at room temperature
1½ teaspoons vanilla extract
1 cup milk, soy milk, or rice milk
Preheat the oven to 375°F. Lightly grease or oil two 12-cup muffin tins or line with paper liners. Combine the cake flour, cocoa, baking powder; and baking soda. Set aside.
In a separate bowl, beat the sugar and butter until light and fluffy. Add the eggs one at a time, beating to incorporate. Blend in the vanilla. Add the flour mixture alternately with the milk in 3 batches, beginning and ending with the dry ingredients and mixing until each addition is just incorporated.
Spoon the batter evenly into the muffin cups, filling a little more than half full. Smooth the tops and bake on the center rack for 16 to 18 minutes, until a wooden toothpick inserted in the center comes out clean. Let cool in the pans on a wire rack for 10 minutes. Remove from the pans and cool completely before frosting.
PEANUT BUTTER BLOSSOM FROSTING
1 cup smooth peanut butter (any gluten-free brand)
½ cup milk
4 ounces low-fat cream cheese
1 tablespoon vanilla
3 cups confectioners’ sugar
½ cup (about 6) Reese’s Peanut Butter Cups, crumbled (optional)
Beat the peanut butter, milk, cream cheese, vanilla, and sugar together until smooth and fluffy. Frost cupcakes. Sprinkle with crumbled peanut butter cups. Refrigerate until time to serve.
Cake and Pastry Flour
1 cup sweet white sorghum flour (4 ounces)
1 cup white rice flour (5.4 ounces)
¾ cup cornstarch (3.4 ounces)
1½ teaspoons xanthan gum (or guar gum)
½ teaspoon salt
SHORTCUT: This blend makes very light pastries and cookies with a fine crumb but, if you are pressed for time, you may use 2 ½ cups of any all purpose flour blend. Add the xanthan gum and salt if they are not already in the blend.
Categories: Recipes | Tags: 1in133, celiac awareness, chocolate and peanut butter, cupcakes, gluten free, gluten-free makeover, Gluten-Free. Desserts, recipes | 8 Comments »
Quick, Delicious Chicken and Rice
I went to culinary school in the seventies when classic techniques were still in vogue. We whisked egg whites in copper bowls, boned whole fish, and removed chicken from its skeleton leaving meat and skin intact. But, Auguste Escoffier forgive me. There is more than one way to skin a chicken. As a modern chef and cook, I take shortcuts. Besides, being gluten-free, I cook to eat. I can’t wait all day to enjoy a meal.
In that same era, I took a cooking class in Indian Cuisine. We toasted and ground aromatic spices and made our own customized garam masala, a blend that’s used to flavor every dish. We peeled and grated ginger, poached tomatoes to remove the skin, and fried onions until they were a perfect golden hue. The end results were amazing; but, come on, who has the time to cook this way?
I did meet my future husband in this class and we fell in love over Biryani and Vindaloo. But, I confess we rarely made Indian food together. (It’s still one of my favorites to eat in restaurants and is a decidedly gluten-free-friendly cuisine.) Then I fell in love again – – with Passage Foods Simmer Sauces, aromatic blends of exotic spices, ginger, onion, and garlic, that simmer for hours before they are packaged. These sauces brought Indian food back into my kitchen. All I do is add a protein (chicken or lamb) and some veggies like eggplant, okra. tomato or potato. (Veggies aren’t even necessary if I’m in a rush.) In the time it takes to cook basmati rice in my rice steamer, I have a full meal.
Today, I added a few extra steps so I could justify calling this a recipe instead of a tip. With these additions, I turned Passage Foods Tikka Masala Simmer Sauce into Chicken Biryani and it tastes just like the meal we made in my Indian cooking class years ago.
In case you don’t know about Biryani, it’s a flavorful rice dish filled with aromatic Indian flavors, pieces of chicken or lamb and chunks of potato. There are four hallmarks of a good Biryani. (1) The grains of rice should not clump but be separate and easy to spread apart. (2) The aroma should fill the room with a sweetish fragrance that is not overpowering or reminiscent of any one specific spice. (3) The taste should be flavorful and roll off the tongue and the flavor should fill the meat. (4) There must be nicely browned potatoes and they should be as flavorful as the meat . Without potatoes, it is not Biryani.
So there you have it – – a perfect Biryani. And here’s the recipe. I think you’ll agree it’s easy and delicious. And thanks to simmer sauces, I’ve found a better way to skin a chicken.
Easy and Delicious Chicken Biryani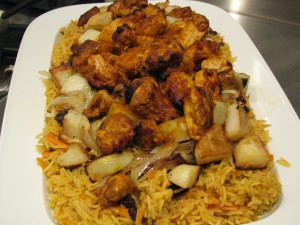
1 pouch Passage Foods Tikka Masala Simmer Sauce, divided (or other Indian simmer sauce)
1 pound boneless, skinless chicken breast cut in 1 inch cubes
3 tablespoons olive oil
2 large russet potatoes, peeled and cubed
1 large onion, peeled and cut into thin strips
1 ½ cups raw Basmati rice
3 cups gluten-free chicken broth
¾ cup dark raisins
1 ¼ cups shredded carrots (commercial product like Dole brand)
Reserve 1/2 cup of simmer sauce. Marinate chicken in the remaining simmer sauce for 30 to 90 minutes.
In a large skillet, heat 2 tablespoons of the oil and sauté the potatoes and onion until brown and potatoes are fork tender. Remove from skillet and set aside.
In a medium pot, combine the rice, reserved simmer sauce and chicken broth. Bring to a boil. Cover and simmer until most of the liquid is absorbed. Add raisins and carrots. Simmer until liquid is absorbed (about 18 to 20 minutes). The rice should be slightly chewy, not too soft. (Remember – it should not clump.)
While the rice is cooking, heat remaining oil in skillet. Sauté the chicken until browned and cooked through.
When rice is done, fold in the potato and onion mixture. Reheat briefly (about 1 minute). Spread mixture over a serving platter and top with chicken.
Serves 4.
Now For Some Deals!
Want a sample of Passage Foods Tikka Masala? Sign up for our newsletter in the upper right hand corner of this site. We’ll send five lucky people sample packs of Indian, Thai, and Moroccan Simmer Sauces. Or go to Passage Foods for information on where you can find their sauces.
Blender Girl Giveaway
I love this community of bloggers. So much energy! Look at this. My new best blogging friend Tess Masters aka Blender Girl is making April gluten-free month with great recipes from all your gluten free blogger friends and a KitchenAid Giveaway. Check it out.
Categories: Recipes, Uncategorized | Tags: chicken and rice, dinner in minutes, easy, gluten free, Indian cooking, quick, recipes | 3 Comments »
My latest makeover comes from Lois A. who asked me if I would recreate her recipe for an Italian cookie called Anginettes. She said her family made batches of these delectable treats for Christmas and Easter and delivered them all over the neighborhood. I’m not surprised. The cookies are amazing and the recipe makes enough to feed an army! I cut the batch in half but you can double it if you have a large family or are planning a gigantic Easter gathering.
As I researched Anginettes, I found that these cookies are a tradition in many families. Everyone has their own way of making them as well as story or two romanticizing the cookies – – wooing boyfriends with plates of these, making them for every member of the family or feeding the entire neighborhood.
Some family recipes call for adding citrus (lemon or orange); others make Anginettes with anisette liquor. Some drop the cookies; others, like Lois, roll them into knots. Many frost them with colorful confectionary icing as I have done here.
One thing is clear. This humble, slightly sweet cookie pairs well with strong coffee and good friends.
Certainly with all that tradition surrounding Anginettes, it seemed like someone should try to make them gluten-free. I was up to the task. But first, I had a few questions for Lois.
“Are they soft, hard, big, small?” I asked. Lois told me the texture should be soft. And the shape? It was another puzzle for a novice Anginette baker like me. Lois said the dough was rolled like a snake and folded over. “Folded like a pretzel?” I asked. Then she told me, “I get a melon ball- size piece of dough and form it into about a 3″ long snake. I put one end of the snake onto the baking sheet and bring it around and up, piling it on top of itself.” She sent a picture of finished cookies all frosted in pretty pastel colors.
I’m happy to say mine looked just like the picture. However, I was not able to twist 3-inch snakes. Mine were longer, around 5 to 6 inches. “Some families drop teaspoons onto baking sheets, but my family always did it this way,” she said. I tried making drop cookies too, and they were equally delicious.
To Make Over Lois’s Recipe: I replaced the regular flour with the Cake and Pastry Flour below. The flour blend is light and not the least bit grainy, lending itself to delicate pastries. I added a little more xanthan gum so the cookies would be more elastic and easier to roll and form. And I cut the shortening into the dry ingredients before adding the eggs and vanilla. That method almost always guarantees a light texture.
Several of the recipes called for orange juice. I added some to half the dough but it made it too wet to roll. So I made that portion into drop cookies – – equally good. I made confectionary frosting and divided it into three bowls, adding a different food color to each bowl. The result was these festive Easter cookies that are ridiculously easy and sinfully delicious. They taste even better the second day and freeze well, too.
 Anginettes (Makes 30 to 36 cookies)
2 ½ cups Cake and Pastry Flour (below), unsifted
½ cup sugar
1 ½ tablespoons baking powder
1 teaspoon xanthan gum
½ cup + 2 tablespoons Earth Balance organic shortening or other organic shortening, in small pieces
3 large eggs, lightly beaten
1 teaspoon vanilla
1/3 cup orange juice (to make drop cookies)
Preheat the oven to 375 degrees. Line 2 cookie sheets with parchment paper. Set aside.
Combine flour blend, sugar, baking powder and xanthan gum. Cut in the shortening until mixture resembles coarse crumbs. Mix in eggs and vanilla. (Add the orange juice here if making drop cookies.)
Pull off walnut-size pieces and roll into 6” long snakes. Wind the dough in a circle around itself with the end set on top. Place on cookie sheet. Bake 10-12 minutes.
Cool and frost with confectioners’ sugar mixed with enough milk so that it is of frosting consistency. Frosting can be tinted if desired.
Cake and Pastry Flour
2 cup sweet white sorghum flour
2 cup white rice flour
1 ½ cups cornstarch
3 teaspoons xanthan gum (or guar gum)
1 teaspoon salt
Mix to combine. Store leftover blend in a zip-lock bag in the refrigerator.
Categories: Recipes | Tags: dessert recipes, Desserts, Easter Cookies, Essy cookies, gluten free, Makeovers, recipes | 9 Comments »
I recently asked people what they missed most after they became gluten-free. The number one answer was Chicken and Dumplings followed by Roasted Turkey with Gravy and Stuffing, Chicken Pot Pie, and Lasagna – – comfort foods we all equate with nourishing goodness.
Comfort food and I go back a long way. Before I was diagnosed with celiac disease, when my tummy didn’t feel right, I would walk to the nearest Brigham’s in downtown Boston and order a hot turkey sandwich. The plate would be heaped with slices of turkey that had already left their indentation on two slices of Wonder Bread and their intention imprinted on my heart. The sandwich was swimming in turkey gravy, a mound of sage and celery dressing was casually deposited to the side and a little white pleated paper cup of cranberry sauce was propped against the meat. It was the only color on the otherwise anemic plate that matched my pasty complexion in those days. As I took the first bite, a fork full of equal parts turkey, bread and stuffing, I could feel wellness heading my way. This was my comfort food. But, ironically, I was dosing myself with the same medicine that was making me sick. Who knew?!
As I got sicker, my craving for comfort food increased. If it wasn’t a hot turkey sandwich, I ordered chicken and dumplings, or chicken pot pie. They engaged my soul and I felt good. My body, however, was another story. Hours later, I would feel that familiar tightening in my tummy, that slow burn and indigestion. By then the memories of my comfort food were far away. I would not correlate the meal I had eaten four hours ago with the queasiness I was experiencing now. For many years, I would not realize that the food I loved did not love me back.
When people on a gluten-free diet picked the same foods I craved before diagnosis, it made me wonder if they had similar memories. Perhaps they, too, remembered the days when they sought out these dishes in hopes of feeling better, in hopes of finding comfort. Perhaps “comfort food” has a double meaning for all of us who are gluten intolerant – – an unrequited love of old and a new, gluten-free love fulfilled.
Hands down, the ultimate comfort food seems to be Chicken and Dumplings, the recipe I am asked to makeover more than any other. It sends me back to those days when I tried to find comfort at Brigham’s lunch counter, when I knew something was missing and tried to replace it with a nourishment that was ultimately my undoing.
And it sent me to my recipe files for a makeover because it seems that making this dish into a delicious gluten-free recipe is a challenge. Readers say the dumplings are too hard, or they break apart in the liquid; they are too dense, too dry. I had the same experience at first. I dug out the dish from my past, the one my mother made in our Yankee kitchen (although this recipe has its roots in Southern traditional), and I tried to create something equal to the taste and texture of the meal I remembered. After several tries, I got it just right!
Here’s How I Made it Over
The first time I made this with a high protein flour blend. The results were tasty but too dense. The dumplings didn’t rise and fill the pot as I expected. Then I opted for a white flour blend and added baking powder and butter. This time, they were just right. The dumplings had doubled in size; they filled the pan! The texture was light and they had the mouthfeel I remembered from my gluten-filled years.
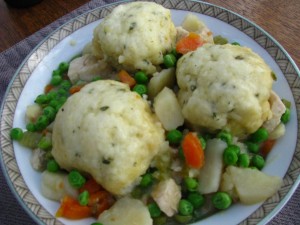
The first time, I poached a whole chicken in broth and vegetables, the way my mother had done. But no one has time to wait that long for a delicious meal. Next time, I poached boneless chicken breasts. They take 5 to 10 minutes. You could also purchase a cooked rotisserie chicken, as long as it’s gluten-free, and remove the meat from the bone. As a final tip, you’ll want to scoop the dumpling dough onto simmering (not boiling) liquid and cover the pot tightly. Don’t peek while the dumplings cook. These aren’t as tasty as leftovers, so you’ll have to eat them all in one sitting which should not be difficult.
This is a food that will nourish your soul AND your tummy.
Chicken and Dumplings Serves 4
1 quart gluten-free chicken stock, more as needed
1/4 cup dry sherry or vermouth (optional)
1 clove garlic, crushed
1 pound boneless, skinless chicken breast
Salt and freshly ground pepper
1 medium onion, roughly chopped
2 celery stalks, trimmed and chopped
3 medium carrots, peeled and chopped
3 medium parsnips, peeled and chopped
2 medium potatoes peeled and cubed
1 teaspoon dried thyme
3/4 cup frozen peas, thawed
1/4 cup minced fresh parsley leaves
Ground black or white pepper
Dumplings
(Makes about 12 dumplings)
2 cups all-purpose gluten-free flour blend*
3 teaspoons baking powder
3/4 teaspoon salt
2 to 3 tablespoons minced fresh chives or other fresh herbs
2 tablespoons butter, melted
3/4 cup + 2 tablespoons milk of choice
1 large egg, beaten
Heat the chicken stock to a gentle simmer in a medium saucepan. Add sherry, if used, and garlic. Add chicken breasts and salt and pepper to taste. Poach covered for 5 minutes. Using a slotted spoon, remove the breasts and cool. Skim foam off the surface of the liquid.
Return the pot of chicken broth to medium-high heat. Add the onion, celery, carrot, parsnips, potatoes, and thyme. Cover and simmer vegetables until just fork tender (about 10 minutes), while making the dumplings.
Make the dumpling batter by sifting together flour, baking powder, and salt in a medium bowl. Add chopped chives or other fresh herbs. Add melted butter, milk and egg to the dry ingredients. Gently mix with a wooden spoon or fork until mixture is moist and comes together. Do not overmix or dumplings will be too dense.
Cube the chicken and return to the pot. Add additional broth if mixture is too thick or liquid has cooked down too much. Return to a simmer.
Drop dumpling batter into the simmering stew by heaping tablespoonfuls, over the surface of the stew. (Note that the dumplings will double in size as they cook.) Cover and simmer until dumplings are cooked through, about 15 minutes. Do not uncover and peek while the dumplings are cooking. In order for the dumplings to be light and fluffy, they must steam, not boil. Uncovering the pan releases the steam. If after 15 minutes they are still not cooked through (use a toothpick or skewer to test) cover pan again, and cook for another 5 minutes.
Gently stir in peas and parsley. Ladle portions of meat, sauce, vegetables, and dumplings into soup plates and serve. Note that the stew will continue to thicken as it sits.
* If all-purpose flour blend contains salt, do not add additional salt. If blend does not contain xanthan or guar gum, add 1 teaspoon gum to the dry ingredients.
Here’s the blend I like to use:
Basic Blend
2 ¾ cups rice flour
1 ¼ cups corn or potato starch
1/3 cup tapioca flour
Categories: Recipes | Tags: chicken and dumplings, comfort food, dinner, gluten free, main dishes, meals, one dish makeovers, recipes | 24 Comments »
Hello Sweetie! These dazzling Linzer Cookies are just the thing for your special someone. They are easy to make, keep for several days, and freeze well.
I confess. I am a sucker for cookies, especially cut-out cookies. But it seems like many of you are, too. People frequently ask me if I have a good recipe for roll-out cookies. So, here it is. These are wonderful and, since two cookies are sandwiched together, you get two-for-one when you make these Linzer Cookies.
And, now I feel like the Ginsu Knife salesperson. Not only can you make Linzer Cookies with this recipe, but you can also make fabulous drop cookies, too.
I love the idea of using one recipe to make many kinds of cookies. It’s brilliant.
My goal was to develop a dough that can be used for several variations. To create this makeover, I incorporated elements of several recipes I found in regular cookbooks and turned these inspirations into one Master Dough. I’m making roll-out Linzer Cookies here, but by adding an additional egg, I’ve also come up with recipes for fabulous Double Ginger Cookies and Cranberry and White Chocolate Cookies. (See the recipes below.) I suspect the possibilities are endless, but I will stop at two and let you use your own culinary inventiveness
to create others.
All of the mainstream recipes I found use butter. I tried these with Earth Balance Buttery (Vegan) Sticks and with unsalted butter. Truth be told, I prefer butter. There’s nothing quite like the taste in home-baked cookies. But, if you can’t tolerate dairy, these work well with a dairy-free spread. I also added one teaspoon of baking powder to lighten the finished product. Gluten-free baking needs all the help it can get.
For ease of handling, I rolled out the Linzer Cookies between sheets of plastic wrap. Don’t roll them too thin or they will be difficult to handle. And, don’t use raspberry jam with seeds. It is disastrous as the little seeds make it very difficult to fill the tiny opening in the top cookie.
Enjoy these cookies and don’t forget to share some with your sweetheart!
Roll-Out Linzer Cookies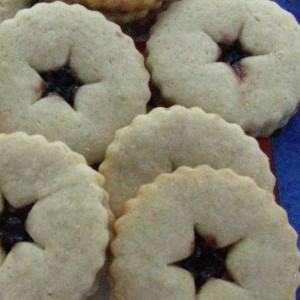
Makes 48 to 60 cookies
1 ¾ sticks (14 tablespoons) unsalted butter, softened to room temperature
¾ cup sugar
1 large egg
1 teaspoon vanilla extract
½ teaspoon orange extract
2 ½ cups cake and pastry flour blend (below) or all purpose blend
1 teaspoon baking powder
2/3 cup seedless raspberry jam or jelly
Preheat the oven to 350 degrees. Line two cookie sheets with parchment paper. In a large mixing bowl, beat the butter and sugar until soft and slightly fluffy. Add the egg, vanilla and orange extracts and beat until smooth. Combine flour blend and baking powder. Add the flour blend to the butter mixture, one cup at a time, beating briefly just to incorporate
after each addition.
Between two sheets of plastic wrap, roll out dough to 1/8 inch thick. Cut out 2-inch circles or other shapes. Gently gather the extra dough from around the cutouts and reroll it. Chill the cutout cookies for 15 minutes while you roll out remaining dough. With a small star or circle or the point of a paring knife, cut centers out of half the cookies. Remove the centers and add them to the dough you are reworking. When cookies are chilled, use a spatula to transfer them to the cookie sheets, setting them 1 inch apart. Bake 10 to 11 minutes or
just until the edges are slightly brown.
Heat the jam or jelly in a microwave for 45 seconds or until softened. Set the whole cookies on one sheet of parchment. Brush with jam and top with a cut-out cookie. Spoon the remaining jam into the center of each cookie sandwich, leaving any chunks of fruit behind. Let cool until set. Store in an airtight container at room temperature for 1 to 2 days or in the refrigerator for up to 5 days. These can also be frozen.
Cranberry White Chocolate Walnut Cookies
(Makes 42 to 48 cookies)
1 ¾ sticks (14 tablespoons) unsalted butter, softened to room temperature
¾ cup sugar
2 large eggs
1 teaspoon vanilla extract
½ teaspoon orange extract
2 ½ cups cake and pastry flour blend (below) or all purpose blend
1 teaspoon baking powder
¾ cup dried cranberries
¾ cup white chocolate
½ cup chopped walnuts
Preheat the oven to 375 degrees. Line two cookie sheets with parchment paper. In a large mixing bowl, beat the butter and sugar until soft and slightly fluffy. Add the eggs, vanilla and orange extracts and beat until smooth. Combine flour blend and baking powder. Add the flour blend to the butter mixture, one cup at a time, beating briefly just to incorporate
after each addition. Fold in cranberries, white chocolate, and chopped walnuts. Drop by tablespoons onto baking sheets and bake 10 to 12 minutes.
Double Ginger Spice Cookies
(Makes 42 to 48 cookies)
1 ¾ sticks (14 tablespoons) unsalted butter, softened to room temperature
¾ cup sugar
2 large eggs
3 tablespoons molasses
1 teaspoon vanilla extract
½ teaspoon orange extract
2 ½ cups cake and pastry flour blend (below) or all purpose blend
1 teaspoon baking powder
1 ½ teaspoons cinnamon
¼ teaspoon ginger
¾ cup chopped crystallized ginger
½ cup raisins.
Preheat the oven to 375 degrees. Line two cookie sheets with parchment paper. In a large mixing bowl, beat the butter and sugar until soft and slightly fluffy. Add the eggs, molasses, vanilla and orange extracts and beat until smooth. Combine flour blend, baking powder, and spices. Add the flour blend to the butter mixture, one cup at a time, beating briefly just
to incorporate after each addition. Fold in chopped ginger and raisins. Drop by
teaspoons onto a plate of sugar and roll to coat. Set on baking sheets and bake 10 to 12
minutes.
Cake and Pastry Flour
This makes ¼ cup more flour blend than you’ll need for the master dough recipe. Reserve the extra for dusting the counter when making roll-out cookies.
1 cup sweet white sorghum flour (4 ounces)
1 cup white rice flour (5.4 ounces)
¾ cup cornstarch (3.4 ounces)
1½ teaspoons xanthan gum (or guar gum)
½ teaspoon salt
SHORTCUT: This blend makes very light pastries and cookies with a fine crumb but, if you are pressed for time, you may use 2 ½ cups of any all purpose flour blend. Add the xanthan gum and salt if they are not already in the blend.
Categories: Recipes | Tags: Cookies, cut-out cookies, gluten free, gluten-free makeover, recipes, Valentines Day | No Comments »
Of all the take-your-breath-away vistas, the hikes into remote areas, the climbs over glacier crusted mountains, one adventure missed my radar entirely until we visited the Canadian Rockies last summer. In my wildest dreams, I never imagined a full-grown grizzly bear would be joining us for breakfast!
It was a crystal clear, late summer day and I was enjoying a world free of commercial interruption. Perhaps it was the berries, the yogurt, or the hour (nearly 8 a.m.). But, more likely, it was the location – – sleepy Baker Creek (near Lake Louise and Banff) – – where we stayed in a rustic cabin no more than fifteen feet from the water’s edge. I stood over my husband’s shoulder pouring coffee when she caught my eye, sauntering by, not ten feet from the sliding glass door.
“Honey, you might want to look up from your computer for a moment,” I said to my husband who had not fully unplugged, yet. Indeed, a magnificent brownish-gray beast with that unmistakable hump behind its head was wandering by. Griz held our attention for what seemed like an hour as she slowly meandered past the cabin and down to the chilly brook. “This might be a good time to get the camera,” said my husband. But, alas, I couldn’t move, could not take my eyes off the gorgeous creature who might have truly joined us for breakfast had I opened the glass door.
So, you’ll have to take my word that a grizzly bear came to breakfast one August morning. But you need not take my word that a visit to the Canadian Rockies affords an extraordinary mix of travel and exploration. Besides the vistas, the glaciers, the majestic falls, save an appetite for dinner. Restaurants in the Canadian Rockies are no strangers to the gluten-free diet. Every eatery seems to speak gluten-free and many offer separate menus, gluten-free pizza, breads, and rolls.
And we ate well – -from the four-star Post Hotel in Lake Louise to the rustic Bakers Creek Lodge at Bakers Creek, to pizza parlors and Cassio’s Italian restaurant (with several gluten-free pasta dishes). It’s just across from the railroad station in Jasper, Alberta.
High on my list was Evil Dave’s Grill in Jasper. There’s no Dave at this funky, self-styled
café. What you will find is great service, sublime atmosphere, and wicked food. Owners Mike and Cyndi Day are known for offering a whimsical menu and casual décor that makes diners feel nourished the moment they enter. From the gluten-free menu, check out Chinese Lettuce Wraps, Malicious Salmon (blackened salmon with a skewer of grilled shrimp) Fiendish Falafel, and convicted Felon (Asian style salmon over rice noodles).
My favorite was El Diablo Chicken, a signature dish that’s bursting with flavor and a bit of spice. (The heat can be adjusted by cutting back on the chipotle seasoning.) Chef Nicole shared the recipe which I adapted here. I’m plannng to serve this at a gathering for the Super Bowl, but its great presentation makes this a perfect company meal, too.
It’s not too early to plan a summer vacation to the Canadian Rockies where the season is short and hotels book quickly. And, about that grizzly – – well, you’ll have to find your own. Our bear was last seen swimming across the creek.
El Diablo Chicken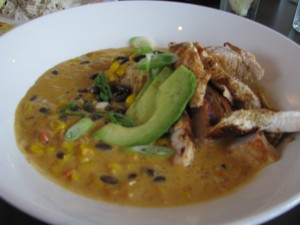
Serves 4 to 6
Adapted from a Recipe by Chef Nicole Langille at Evil Dave’s Grill, Jasper, Alberta, Canada
4 to 5 large boneless, skinless chicken breast filets (about 1 to 1 ½ pounds)
Marinade ingredients:
¼ cup olive oil
1tablespoon good quality chili powder
1 tablespoon minced garlic
Juice of one large lime
Combine marinade ingredients and add chicken breasts. Stir to coat and let stand, refrigerated, for at least 3 hours.
The Sauce:
1 tablespoon olive oil
½ of a large yellow onion, diced
Two vine-ripened tomatoes, diced or 1 (15 ounce) can of diced drained tomatoes
½ to 1 teaspoon chipotle powder (adjust for heat)
2 cups gluten-free chicken broth
¼ to ½ cup heavy cream
½ cup corn kernels, thawed, if frozen
½ cup canned black beans, rinsed and drained
1 ½ cups cooked Jasmine rice
Garnish:
1 to 2 ripe avocados, thinly sliced
2 scallions, top third removed, coarsely chopped
To make the sauce: Heat the olive oil in a medium saucepan. Sauté the onion and tomatoes for 2 to 3 minutes or until onion is translucent. Add chipotle powder and sauté briefly. Add the chicken broth and simmer until reduced by half. While the mixture is simmering, preheat a grill to medium high and grill the chicken on both sides until centers are no longer pink. Remove from heat. Let cool slightly and slice each filet diagonally to yield 5 to 6 slices per filet. Add the cream to the reduced chicken broth mixture and simmer 2 to 3 minutes. Remove from heat. Fold in corn and black beans.
Divide rice between 4 to 6 plates (or plate on one serving platter). Spoon a portion of the tomato mixture over the rice. Fan out chicken slices over the top and garnish with avocado slices and a sprinkle of chopped scallion. Or arrange on a platter and serve family-style.
Visit evildavegrill.com
Categories: Recipes | Tags: Baker's Creek Lodge, Canadian Rockies, chicken, dinner, entrees, Evil Dave's Grill, gluten free, main dishes, Makeovers, super bowl meals | No Comments »






 Baking guru,