Blog Archives
My friend Pat sent me her recipe for Fruit Rocks. It called for all-purpose flour. That was the easy part. It also called for a supermarket’s worth of candied fruit, chopped pecans and dates. The amount seemed like a lot for the quantity of flour.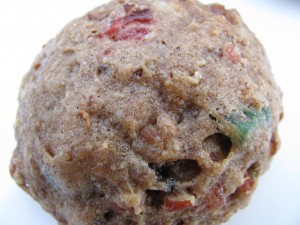
To my delight, I met Pat and her husband at a cooking class I did in Atlanta in March. She brought me some of her fruit rock cookies made gluten free. They were yummy, but very dense. Chockfull of fruit and nuts, they reminded me of fruitcake. But they were crumbly, too. My baker’s instinct told me, indeed, there was too much fruit.
Upon researching this old fashion cookie, I discovered a number of variations. Some were listed as Russian Rock Cookies. Others were called Christmas Rock Cookies. One called for cocoa, another for lemon juice, a third for raisins.
I kept many parts of Pat’s recipe – – the candied cherries, chopped dates, and pecans. I added cocoa but did not add raisins. Then I created a flour blend – – an enhanced version of my cake and pastry flour from Gluten-Free Makeovers and increased the fat a bit, but not as much as one of the other recipes would have added. It seemed like the cookies should be delicate, but sturdy enough to keep the chopped fruit suspended.
The results were delicious. These are like “loaded” miniature fruitcakes only better. The flavor and texture will keep you coming back for more.
One batch makes enough for all your holiday gifts.
Fruit Rock Cookies (makes about 96 cookies)
1 cup white rice flour
1 cup sorghum flour
1 cup cornstarch (or tapioca starch)
2 teaspoons xanthan gum
1 teaspoon salt
2 tablespoon cocoa powder
3/4 teaspoon baking soda
3 teaspoons ground cinnamon
1 teaspoon allspice
¾ pound (12 ounces) chopped pecans
1, 4-ounce container red candied cherries, chopped
1, 4-ounce container green candied cherries, chopped
½ pound candied peel and fruit mix
½ pound chopped dates
1-1/2 cups granulated sugar
6 tablespoons unsalted butter or dairy-free alternative, at room temperature
6 tablespoons Earth Balance organic shortening, at room temperature
3 large eggs
2 tablespoons lemon juice
1 teaspoon vanilla extract
½ cup water
Preheat oven to 350 degrees. Line 4 baking sheets with parchment paper. Set aside.
Blend flours, cornstarch, xanthan gum, salt, cocoa powder, baking soda, and spices. Whisk until cocoa is evenly dispersed. Remove ½ cup of flour mixture.
Combine chopped pecans, cherries, peel and fruit mix, and dates. Toss with reserved ½ cup of flour blend. Set aside.
Cream sugar with butter and shortening until light and fluffy. Add eggs and beat until fluffy. Add the remaining flour mixture to butter mixture. Stir in lemon juice and vanilla extract. Add water and stir until mixture is smooth.
Fold fruit mixture into batter, mixing thoroughly. Drop by teaspoon onto prepared baking sheet, about one inch apart. Bake for 15 to 18 minutes. Do not over-brown.
Store cookies in jars for up to a week or freeze for later use.
Categories: Recipes | Tags: gluten free cookies, gluten free holiday cookies, gluten free recipe, gluten-free makeover | 12 Comments »
“I have a friend who is new to the gluten free diet. She wanted to do these Candy Cane Cookies for her family at Christmas. Needless to say, these traditional favorites are not the same when you make them gluten free. If you can help my friend, Charlotte, I would appreciate it. Thank you,” writes Marie from Maryland.
Marie sent me the original recipe from a Gold Medal Flour cookbook. Initially I thought the gluten-free version of the cookies would not be sturdy enough to maintain its shape without crumbling. Isn’t that always the challenge when making gluten-free baked goods? Then I remembered a recipe I made over last year for Spritz cookies. I remembered the challenge was finding a blend and a balance of ingredients that created structure but still tasted delicious and was not crumbly. The problem is that Cut Out cookies, Spritz cookies and Candy Cane cookies spread and lose their shape if you make them following a one-to-one substitution. I needed a special blend, a delicate balance.
So what I did it. I added a little more flour blend than the original recipe calls for (about 2 tablespoons more) just as I had for the Spritz cookies. And I added ¼ cup additional confectioners’ sugar. It not only adds more sweetness but also, the added cornstarch helps add structure.
The result was these light, rich, cookies that are both sturdy and delicate. They are fun to make so invite extras into the kitchen to help form the canes. Enjoy!
Candy Cane Cookies 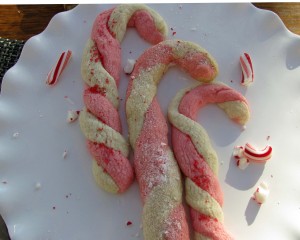
Makes 40 to 48 cookies
1 cup white rice flour
¾ cup sorghum flour
½ cup cornstarch
1/3 cup tapioca starch
1 ½ teaspoons xanthan gum
½ teaspoon salt
½ cup (1 sticks) unsalted butter, softened (or dairy-free substitute)
½ cup (1 stick) Earth Balance or other organic shortening
1 ¼ cups confectioners’ sugar
1 large egg
1½ teaspoons almond extract
1 teaspoon vanilla extract
½ teaspoon red food coloring*
½ cup crushed candy cane candy
½ cup granulated sugar
Preheat the oven to 375 degrees F. Line 3 to 4 cookie sheets with parchment paper and set aside. In a medium bowl, combine rice flour, sorghum flour, cornstarch, tapioca starch, xanthan gum, and salt. Whisk to combine. Sift and set aside.
In a medium bowl, cream the butter, shortening, confectioners’ sugar, and egg until fluffy. Add flavorings and beat briefly to combine. Add the flour mixture and beat briefly to combine. Divide dough in half. Blend food coloring into one half.
Roll a 4-inch strip (using 1 teaspoon of dough) from each color. Roll the strips back and forth to smooth the surface then place strips side by side and press together lightly. Twist like a rope by rolling together or twisting like a rope. Experiment to see which method works best for you. Just be careful not to blend the two strands or the candy cane cookies will look more marbled than twisted.
Place on prepared cookie sheets. Curve the top down to form the handle of the cane. Bake 9 minutes, until lightly browned. While still warm, sprinkle with candy-sugar mixture. Cool completely before storing.
*Natural food coloring is available through IndiaTree.com
TIP: Instead of crushed peppermint candy and granulated sugar, dust with red or green sanding sugar when the cookies come out of the oven.
Categories: Recipes | Tags: gluten free candy cane cookies, gluten free cookies, gluten free recipe, gluten-free makeover | 2 Comments »
Christine from New Zealand wrote to say, “I haven’t had a Crumpet for years and wondered if you had a recipe for gluten free crumpets?”
She piqued my interest as I had never had one. So I did a bit of research. Crumpets are made with a rather thin yeast batter and are cooked on a bake stone or griddle in crumpet or English muffin rings. The distinguishing feature of real crumpets is their pliable texture and the characteristic holes into which butter deliciously melts and oozes.
After reading a mainstream formula, I developed this recipe makeover. These crumpets are soft, light in texture and quite tasty. You will not be disappointed. Add your favorite jam or slather with butter. I like both. If you are not able to get one of the all-purpose flour blends I mentioned here, you can use any flour blend you have available.
Crumpets by Beth Hillson 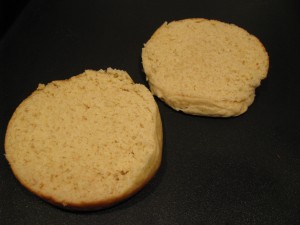
This recipe makes 8 to 10 crumpets.
1 ½ cups all-purpose gluten-free flour blend such as Gluten-Free Pantry All-Purpose Flour or King Arthur Multi-Purpose Flour
½ cup sorghum flour
2 ¼ teaspoons dry active yeast
1 teaspoon of sugar
½ teaspoon cream of tartar
¾ cup warm milk (about 110 degrees)
½ cup warm water (about 110 degrees)
1 ½ teaspoon baking powder
1 teaspoon baking soda
1 tablespoon melted butter
TIP: If using a blend that does not contain gum and salt, add 1 teaspoon xanthan gum and ½ teaspoon salt.
1) Combine flours, yeast, sugar, cream of tartar and blend. Add warm milk and water and beat for 3 minutes. Cover with plastic wrap and let stand in a warm place for about 20 minutes. The thick batter should double in size.
2) Add baking powder, baking soda and butter and beat for 1 minute or until well mixed. Cover and let stand 10 minutes.
3) Preheat a griddle to 350 degrees. Coat 8 to 10, 3 ½ inch English muffin rings well with vegetable spray. Set on griddle, bake stone or large skillet (see note below).
4) Place enough mixture into the center of each ring to come halfway to the top of the ring. Cook for 4-6 minutes over medium heat, until bubbles appear over the entire surface, and the dough appears ‘dry’.
5) Use tongs to remove the ring. Turn the crumpet over and cook an additional 2 to 4 minutes to brown the top. Remove from the pan and cool on a baking rack. Split and enjoy. Or, if thin enough, do not split before eating.
Notes: Alternatively, make thinner crumpets by filling only one-third of the way up the rings. These do not need to be cooked on the second side. If you don’t have a griddle, heat a heavy cast iron skillet and line it with as many rings as possible. You’ll need to make these in more than one batch.
Categories: Recipes | Tags: gluten free, gluten free bread, gluten free crumpets, gluten free recipe, gluten-free makeover | 2 Comments »
Happy Holidays! With Thanksgiving just around the corner, wow your guests with this unique and delicious twist on traditional apple pie. The rich sour cream center brightens the apple flavor and the presentation can’t be beat. For those with a dairy allergy replace the sour cream with soy sour cream or coconut yogurt. This can be made egg-free, too.
Apple Custard Crumb Pie 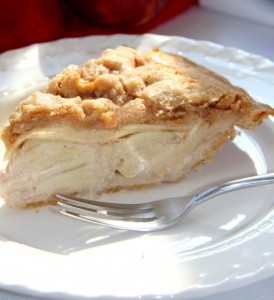
Serves 8
Streusel Topping
½ cup packed light brown sugar
¾ cup all-purpose flour blend (any brand)
½ teaspoon ground cinnamon
¼ teaspoon salt
6 tablespoons cold unsalted butter or dairy-free butter replacement, cut into small pieces
Filling
5 McIntosh apples
2/3 cup low-fat sour cream, dairy-free sour cream or coconut yogurt
1 large egg, lightly beaten
½–¾ cup sugar, to taste
3 tablespoons all-purpose flour blend of choice or rice flour
1 teaspoon ground cinnamon
¼ teaspoon salt
1 Flaky Pie Crust, uncooked (below)
1. To make Streusel Topping, combine all topping ingredients in a food processor and pulse until mixture resembles coarse meal. Reserve.
2. Preheat oven to 350°F.
3. Peel and thinly slice apples.
4. In a large mixing bowl, combine sour cream and egg and beat well.
5. In another bowl, combine sugar, flour, cinnamon and salt. Whisk into sour cream mixture. Add apple slices, tossing to coat.
6. Spread mixture over uncooked crust. Sprinkle Streusel Topping over the top.
7. Set pie on a cookie sheet for ease of handling. Place on middle rack in preheated oven and bake 55 to 60 minutes or until filling is bubbly and topping is brown. If crust browns too quickly, cover edges loosely with foil.
TIP: For an egg-free pie, replace the egg in the filling by adding 3 additional tablespoons sour cream (or dairy-free substitute) in step 4. Add 1 tablespoon cornstarch or potato starch in step 5.
Flaky Pie Crust
Makes One 9-Inch Crust
Unless rolled too thin, this dough is not prone to tearing. If it does, pull it back into place and pat it down.
1½ cups + 2 tablespoons High-Protein Flour Blend (below)
1 tablespoon potato flour (not potato starch)
1 teaspoon xanthan gum
¼ teaspoon salt
2-3 teaspoons sugar
½ teaspoon baking powder
½ teaspoon ground cinnamon
4 tablespoons cold butter or dairy-free butter replacement
4 tablespoons organic shortening
1 large egg or 2 tablespoons additional unsweetened applesauce
1 teaspoon cider vinegar
2 tablespoons unsweetened applesauce
1. In the bowl of a food processor fitted with the knife blade, combine dry ingredients. Cut buttery stick and shortening into pieces. Sprinkle over dry ingredients. Pulse several times until pieces are the size of large peas.
2. In a separate bowl, combine egg, vinegar and applesauce. Add to flour mixture and blend just to combine. Carefully gather dough into a ball. (Watch your fingers as steel knife is very sharp.) Wrap in plastic wrap and chill at least 1 hour.
3. Place the dough between 2 layers of plastic wrap and press it down with heel of hand. Then gently roll it into a 9-inch circle. Start from the middle and roll out uniformly in all directions to form the circle. Rotate the dough in ¼ turns to help even-out crust to about ¼-inch thickness throughout.
4. Carefully peel off the top layer of plastic wrap. Turn the crust into the pan, slowly peeling off the backing. Press the crust into the pan and crimp the edges, trimming off any excess dough.
TIP: To reduce the fat in this pie crust, replace 3 tablespoons butter or shortening with an equal amount of unsweetened applesauce.
High-Protein Flour Blend
Makes 3¼ cups
1 cup amaranth flour
1 cup brown rice flour
¾ cup cornstarch or potato starch (not potato flour)
½ cup tapioca starch/flour
1. Combine ingredients. Store in a tightly covered container in the refrigerator until used.
Short on time? Use a commercial high protein flour blend or add 1 cup of amaranth flour to 2 1/4 cups gluten-free all-purpose flour blend.
A version of this recipe first appeared in Living Without Magazine.
Categories: Recipes | Tags: gluten free apple custard pie, gluten free pie, gluten free Thanksgiving, gluten-free makeover, gluten-free recipes | 2 Comments »
Crêpes were the first recipe I made over after I was diagnosed with celiac disease more than 35 years ago.
A few months earlier, I had been given Julia Child’s first cookbook, “Mastering The Art of French Cooking,” and I was cooking my way through Julia’s wonderful recipes. Her cookbooks opened a door and, whisk in hand, I went through. I cooked and baked and held parties just to have tasters who would help me devour my experiments. Her book was my beacon, my inspiration.
Then a doctor told me to avoid gluten and I was overwhelmed. I could not simply put those books back on the shelf and close my mind to the delicious foods I had discovered. So I went to culinary school and began experimenting again, but this time, I made my recipes with gluten-free flour. As long as I maintained the ratio in a recipe, the balance of wet to dry and fat and sugar, and replaced regular flour with the same amount of gluten-free flour, I had success every time.
I picked crêpes first because the formula called for a few simple ingredients – eggs, milk, and flour. What could be easier? And the batter sits overnight so the mixture is tenderized and softens. It turns out, the ingredients have an affinity for rice flour. The crêpes held together beautifully. The results were delicious. I flamed them with brandy to make Crêpes Suzette. I filled them with ricotta cheese, lemon and currants. No one had any idea they were gluten-free.
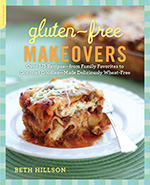
With my taste buds engaged and my curiosity in overdrive, I was ready to try more recipes. Today, I am confident that any recipe can be made over with gluten-free ingredients. My cookbook, “Gluten-Free Makeovers,” is filled with many of these successes.
Last week would have been Julia Child’s 100th birthday and the 50th year since “Mastering The Art of French Cooking,” was released. Celebrations large and small were held all over the world. I made crêpes in honor of Julia’s birthday, reserving an extra shot of brandy for a toast. Happy Birthday, Julia and Bon Appetit!
This recipe is a classic French formula. The trick is to make these very thin so they are pliable and easy to roll. Since this is peach season, I made up a quick peach Melba-style filling. Unfilled crêpes freeze well.
Crêpes with Easy Peach Melba-Style Filling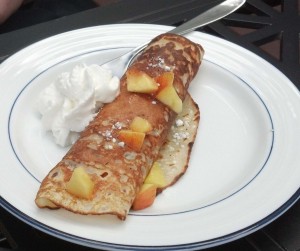
Makes Fifteen to Twenty 6-inch Crêpes
The Crêpe recipe is reprinted from my cookbook, Gluten-Free Makeovers (Da Capo Press) where you’ll find more delicious fillings for them.
2 large eggs
¾ cup rice flour
¼ cup tapioca starch/flour
½ teaspoon salt
¼ teaspoon xanthan gum
1 tablespoon sugar (for dessert crepes)
1¼ cups milk, soy milk, or rice milk
1.Whisk together the eggs in a large bowl. In a separate bowl, combine rice flour, tapioca starch, salt, xanthan gum, and sugar, if using. Whisk into the eggs just until moistened. The mixture will be very thick and gloppy.
2. Add the milk, a little at a time, stirring vigorously until the mixture is smooth and the consistency of heavy cream. Cover and chill for up to 24 hours.
3. Lightly oil one or two 6-inch crêpe pans or heavy frying pans and set over medium heat. Pour about 2 tablespoons of the batter into each pan and swirl until the pan is coated. Pour any excess batter back into the bowl. Cook the crêpe until the edges look very dry, about 1 minute. With a sharp knife, loosen the edges of the crêpe. Using fingers, grab the edges and flip the crêpe. Cook another 30 seconds and remove to a platter. Continue until the remaining batter is used, lightly oiling the pans with a paper towel as necessary.
Peach Melba-Style Filling
1 cup seedless raspberry jam
2 tablespoon brandy
6 medium vine-ripened peaches, peeled and coarsely chopped
confectioners’ sugar
1 peach, skin left on, for garnish
Combine jam with brandy. Spread 1 tablespoon of the mixture over the surface of a crêpe. Add a few pieces of cut up peaches. Roll the crêpe. Repeat until all the crêpes are used. Dust with confectioners’ sugar and serve.
Categories: Recipes | Tags: easy quick gluten-free dessert, gluten-free makeover, gluten-free recipes, Gluten-Free. Desserts, Julia Child | 3 Comments »
I envy Northern California for its long growing season, its verdant farms and endless vineyards. But from June to September, Connecticut is in full bloom and I am content to stay close to home, near the local orchards and farms that rival anything I’ve seen in any other part of the US. Our best chefs know that cooking with fresh, local foods can turn ordinary recipes into three-star meals. I’m reminded of that secret when Connecticut’s harvest smiles. I load up on fresh corn, heirloom tomatoes, zucchini, blueberries, raspberries, strawberries, and herbs. I can never have enough!
And just about now, the orchards are bearing fruit – – pears, apples, and peaches. Ah. Peaches. Perhaps my favorite of all the local produce. Nothing else comes close to that juicy, tree-ripened crop. Their faint fruit perfume floats over the back roads as I drive by the local orchards. I buy them by the bushelful. By the time I get home, I’ve devoured a sizable number and my car seat and steering wheel bear the sticky evidence. It’s a race to reach my saturation point before the trees return to their dormant state. So I eat just as many as I possibly can. But I reserve enough to bake a few special treats.
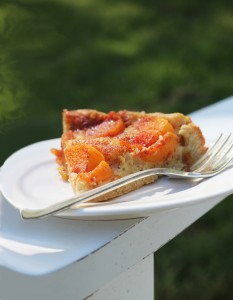
This peach cake is one. Fresh peach slices, fanned out over the buttery cake, turn this into an elegant dessert that bursts with intense flavor. The cake makes the perfect company dessert that fools most into thinking it’s not gluten-free. Perhaps that’s because I started with a great, gluten-filled recipe. This is a makeover from one I saw in Bon Appetit several years ago. It can also be packed and taken to a picnic or a pot luck meal. Don’t tell, but I make this with frozen peaches when the fresh varieties are not available. They beat the hard, unripened fruit that I find in stores throughout the rest of the year. I’ve also used fresh plums. The purple skin makes for an equally beautiful presentation.
3/4 cup all-purpose gluten-free flour blend *
½ cup sorghum Flour
1½ teaspoons baking powder
½ teaspoon xanthan gum
¾ cup plus 3 tablespoons sugar, divided
8 tablespoons (1 stick) unsalted butter or non-dairy buttery spread, at room temperature
1½ teaspoons finely grated orange zest
2 large eggs or egg replacer of choice
1 tablespoon fresh orange juice
4 ripe, but firm peaches halved and each half cut into 4 slices*
¾ teaspoon ground cinnamon for topping
Whipped cream or whipped dairy-free topping
Second Choice: Cascadian Farms or other brand Organic sliced peaches can be used. Thaw fruit before using. Purchase 2, 10-ounce bags and pick the prettiest slices for this cake. Save the rest for another use.
Preheat the oven to 350°F. Lightly oil a 9-inch spring form pan. Combine the flour blend, sorghum flour, baking powder, and xanthan gum in a bowl; set aside.
Beat ¾ cup of the sugar and butter in a mixing bowl until fluffy. Add the dry ingredients and orange zest and beat until crumbly. Add the eggs, one at a time, beating after each addition. Add the orange juice and beat just to incorporate. Spread the batter evenly in the prepared pan.
Arrange the peach slices on top of the batter so that they touch and form concentric circles that cover the batter. Press into the batter lightly. Don’t worry if the slices are not perfect. The cake will partially cover the fruit as it bakes. Combine the remaining 3 tablespoons sugar and the cinnamon and sprinkle over the batter.
Bake 55 to 60 minutes, until golden and a tester inserted into the center comes out clean. Run a knife along the side of the pan to release and remove the side of the pan. Serve slightly warm or at room temperature with whipped cream or dairy-free topping.
* If the blend you use does not contain salt and gum, add ½ teaspoon salt and ½ teaspoon additional xanthan gum to the dry ingredients.
A letter from a reader sent me scurrying to create an oatmeal cookie.
“I have had celiac for 15 years, I’m excited about all the new products coming out in all these years. But I haven’t found an oatmeal cookie I like. I was wondering if you have a recipe for oatmeal cookies?”
The note sparked memories of my childhood when we would pull down the Quaker Oats cannister from the top shelf of the cupboard and make the recipe on the back of the container. I couldn’t recall the last time I made oatmeal cookies – certainly not since I became gluten-free 36 years ago.
So her suggestion triggered a powerful reaction in me, a hankering to enjoy chewy oatmeal cookies again. But this time, I couldn’t use Quaker Oats or all-purpose flour and my tastebuds hankered for a more updated, mature version of my childhood favorite. Nevertheless, as I creamed the butter and sugar and folded in gluten-free oats with a wooden spoon that had belonged to my mother, I was, once again, standing at the counter in her blue and yellow kitchen. Funny how a hankering evokes such vivid memories – – the days of childhood, the days of old fashion oatmeal cookies, the days before I was gluten-free.
I suspect oatmeal cookies stir up fond associations for all of us. I brought these cookies to a barbecue where the young adults far outnumbered us oldsters. One-by-one, the “kids” in the group sought me out to say, “thank you.” “These are the best cookies I have ever had,” several of them told me. A couple of them (friends of my son who is a celiac) knew they were gluten-free, but no one else suspected.
The recipe was inspired by one on Food.com. It’s a good thing it makes a big batch! They disappear quickly. A key step in this recipe is to let the dried cranberries soak in the eggs and vanilla for 1 hour. So allow a little extra time when preparing these. If you’d like to reduce the fat, replace 4 to 6 tablespoons of butter with the same amount of unsweetened applesauce.
The Best Oatmeal Cookies Ever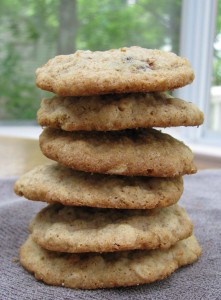
Makes 72-84 cookies
3 large eggs, well beaten
1 cup dried cranberries such as Craisin brand
1 teaspoon vanilla extract
1 cup unsalted butter. softened
1 cup lightly-packed light brown sugar
¾ cup white sugar
2 ¾ cups any All-Purpose Gluten-Free Flour Blend*
1 teaspoon cinnamon
2 teaspoons baking soda
2 ¼ cups gluten-free rolled oats (not steel cut or thick cut oats)
3/4 cup chopped toasted walnuts
*Add 1 ½ teaspoons xanthan gum and ½ teaspoon salt if these are not included in your blend.
Combine eggs, cranberries and vanilla and let stand for one hour.
Preheat oven to 350 degrees. Line two or more cookie sheets with parchment. Set aside.
Cream together butter and sugars. Mix flour with cinnamon and baking soda and whisk to combine. Add to butter mixture and mix well. Blend in egg mixture, oats, and chopped walnuts. Dough will be stiff.
Drop by heaping teaspoons onto cookie sheet, or roll into balls and flatten slightly. Bake for 10 to 12 minutes or until lightly browned around the edges. Cool in pan before removing to a serving tray as cookies are quite soft.
These freeze well.
Categories: Recipes | Tags: cookie recipes, Cookies, dessert recipes, gluten free, gluten-free makeover, oatmeal cookies, recipes | 10 Comments »
May is Celiac Awareness Month
I am celebrating with cupcakes and I hope you’ll join me. I’ll tell you how in a moment, but first, here’s a little background on why this event has far-reaching implications for all of us.
The World’s Tallest Gluten-Free Cake
Last year I was part of the world’s largest gluten-free cake event along with the American Celiac Disease Alliance (ACDA) and the 1in133.org awareness project. Hundreds of us met in Washington, DC to build the world’s tallest gluten-free cake, bring attention to the number of people with celiac disease and convince the FDA to reopen the process for creating gluten-free regulations.
While Jules Shepard and John Forberger headed the confectionery team, Andrea Levario and I headed to Capitol Hill to manage the legislative front. With our sons, media folks and gluten-free manufacturers in tow, we spoke to Congressional leaders about the importance of gluten-free regulations. We asked them to keep the pressure on the FDA to push the regulations forward.
They Heard Us And We Ate Cake
In the early evening, we gathered at a reception for supporters and Congressional folks. To our delight, the Deputy Commissioner of the FDA, Mike Taylor, attended. In front of hundreds of us, Deputy Commissioner Taylor told the group we would have gluten-free regulations. On August 4, the FDA reopened the comment period for the regulations. The comment period closed on October 3 and the FDA promised to issue these regulations by the end of the third quarter of 2012. The countdown is on.
Calling All Cupcake Builders
This May, as we await the forthcoming regulations, I invite everyone to make cupcakes – – one for every year you have been gluten-free. Take a picture and share it with the community by posting to the ACDA’s Facebook page. Then post to your Facebook page, blog and link back to the ACDA’s page. Vote for your favorite cupcake by “liking” the photos on the Alliance Facebook page. Prizes will be awarded in categories like best presentation; most unique decorations; most years being gluten-free; and kids categories. The winners will receive products and coupons from several gluten-free companies. Get out those whisks and mixing bowls. The more likes we receive the more voices will be heard from our virtual community. Go to 1in133 for guidelines.
Let’s Eat Cupcakes 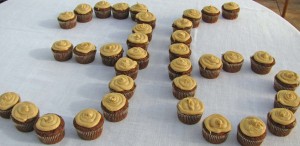
This weekend, I made 56 chocolate cupcakes with peanut butter frosting; 36 for me and 19 for my son, Jeremy. That’s a lot of cupcakes. Let me tell you. But, I’ve seen, firsthand, the power of community. When a standard for gluten-free on food packaging comes out, I can say I had a hand in making it happen. I hope you’ll join me in that effort. It feels good. And, besides, you get to eat cupcakes!
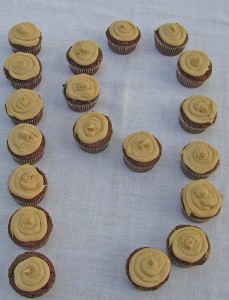 Here’s the recipe I used. You are welcome to “borrow” it. The chocolate cupcakes are a variation on those in my book, Gluten-Free Makeovers. The frosting is pure decadence – – a blend of peanut butter and cream cheese. I love peanut butter and chocolate and the slightly tangy cream cheese flavor cuts the sweetness in a lovely, subtle way. To bring it all together, I top these cupcakes with crushed Reese Peanut Butter Cups. If you are allergic to peanut butter, you could use sunflower butter or simply frost these with plain cream cheese frosting.
CHOCOLATE PEANUT BUTTER BLOSSOM CUPCAKES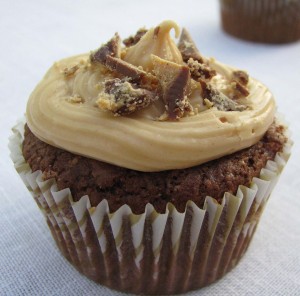
Makes 24 to 28 cupcakes
2 ¼ cups Cake and Pastry Flour
½ cup unsweetened cocoa
2 ½ teaspoons baking powder
½ teaspoon baking soda
1½ cups granulated sugar
12 tablespoons (1½ sticks) unsalted butter or non-dairy buttery spread, at room temperature
3 large eggs, at room temperature
1½ teaspoons vanilla extract
1 cup milk, soy milk, or rice milk
Preheat the oven to 375°F. Lightly grease or oil two 12-cup muffin tins or line with paper liners. Combine the cake flour, cocoa, baking powder; and baking soda. Set aside.
In a separate bowl, beat the sugar and butter until light and fluffy. Add the eggs one at a time, beating to incorporate. Blend in the vanilla. Add the flour mixture alternately with the milk in 3 batches, beginning and ending with the dry ingredients and mixing until each addition is just incorporated.
Spoon the batter evenly into the muffin cups, filling a little more than half full. Smooth the tops and bake on the center rack for 16 to 18 minutes, until a wooden toothpick inserted in the center comes out clean. Let cool in the pans on a wire rack for 10 minutes. Remove from the pans and cool completely before frosting.
PEANUT BUTTER BLOSSOM FROSTING
1 cup smooth peanut butter (any gluten-free brand)
½ cup milk
4 ounces low-fat cream cheese
1 tablespoon vanilla
3 cups confectioners’ sugar
½ cup (about 6) Reese’s Peanut Butter Cups, crumbled (optional)
Beat the peanut butter, milk, cream cheese, vanilla, and sugar together until smooth and fluffy. Frost cupcakes. Sprinkle with crumbled peanut butter cups. Refrigerate until time to serve.
Cake and Pastry Flour
1 cup sweet white sorghum flour (4 ounces)
1 cup white rice flour (5.4 ounces)
¾ cup cornstarch (3.4 ounces)
1½ teaspoons xanthan gum (or guar gum)
½ teaspoon salt
SHORTCUT: This blend makes very light pastries and cookies with a fine crumb but, if you are pressed for time, you may use 2 ½ cups of any all purpose flour blend. Add the xanthan gum and salt if they are not already in the blend.
Categories: Recipes | Tags: 1in133, celiac awareness, chocolate and peanut butter, cupcakes, gluten free, gluten-free makeover, Gluten-Free. Desserts, recipes | 8 Comments »
Hello Sweetie! These dazzling Linzer Cookies are just the thing for your special someone. They are easy to make, keep for several days, and freeze well.
I confess. I am a sucker for cookies, especially cut-out cookies. But it seems like many of you are, too. People frequently ask me if I have a good recipe for roll-out cookies. So, here it is. These are wonderful and, since two cookies are sandwiched together, you get two-for-one when you make these Linzer Cookies.
And, now I feel like the Ginsu Knife salesperson. Not only can you make Linzer Cookies with this recipe, but you can also make fabulous drop cookies, too.
I love the idea of using one recipe to make many kinds of cookies. It’s brilliant.
My goal was to develop a dough that can be used for several variations. To create this makeover, I incorporated elements of several recipes I found in regular cookbooks and turned these inspirations into one Master Dough. I’m making roll-out Linzer Cookies here, but by adding an additional egg, I’ve also come up with recipes for fabulous Double Ginger Cookies and Cranberry and White Chocolate Cookies. (See the recipes below.) I suspect the possibilities are endless, but I will stop at two and let you use your own culinary inventiveness
to create others.
All of the mainstream recipes I found use butter. I tried these with Earth Balance Buttery (Vegan) Sticks and with unsalted butter. Truth be told, I prefer butter. There’s nothing quite like the taste in home-baked cookies. But, if you can’t tolerate dairy, these work well with a dairy-free spread. I also added one teaspoon of baking powder to lighten the finished product. Gluten-free baking needs all the help it can get.
For ease of handling, I rolled out the Linzer Cookies between sheets of plastic wrap. Don’t roll them too thin or they will be difficult to handle. And, don’t use raspberry jam with seeds. It is disastrous as the little seeds make it very difficult to fill the tiny opening in the top cookie.
Enjoy these cookies and don’t forget to share some with your sweetheart!
Roll-Out Linzer Cookies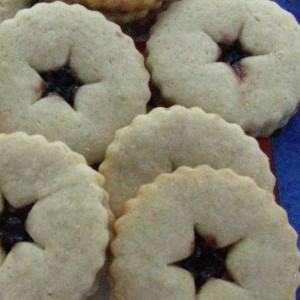
Makes 48 to 60 cookies
1 ¾ sticks (14 tablespoons) unsalted butter, softened to room temperature
¾ cup sugar
1 large egg
1 teaspoon vanilla extract
½ teaspoon orange extract
2 ½ cups cake and pastry flour blend (below) or all purpose blend
1 teaspoon baking powder
2/3 cup seedless raspberry jam or jelly
Preheat the oven to 350 degrees. Line two cookie sheets with parchment paper. In a large mixing bowl, beat the butter and sugar until soft and slightly fluffy. Add the egg, vanilla and orange extracts and beat until smooth. Combine flour blend and baking powder. Add the flour blend to the butter mixture, one cup at a time, beating briefly just to incorporate
after each addition.
Between two sheets of plastic wrap, roll out dough to 1/8 inch thick. Cut out 2-inch circles or other shapes. Gently gather the extra dough from around the cutouts and reroll it. Chill the cutout cookies for 15 minutes while you roll out remaining dough. With a small star or circle or the point of a paring knife, cut centers out of half the cookies. Remove the centers and add them to the dough you are reworking. When cookies are chilled, use a spatula to transfer them to the cookie sheets, setting them 1 inch apart. Bake 10 to 11 minutes or
just until the edges are slightly brown.
Heat the jam or jelly in a microwave for 45 seconds or until softened. Set the whole cookies on one sheet of parchment. Brush with jam and top with a cut-out cookie. Spoon the remaining jam into the center of each cookie sandwich, leaving any chunks of fruit behind. Let cool until set. Store in an airtight container at room temperature for 1 to 2 days or in the refrigerator for up to 5 days. These can also be frozen.
Cranberry White Chocolate Walnut Cookies
(Makes 42 to 48 cookies)
1 ¾ sticks (14 tablespoons) unsalted butter, softened to room temperature
¾ cup sugar
2 large eggs
1 teaspoon vanilla extract
½ teaspoon orange extract
2 ½ cups cake and pastry flour blend (below) or all purpose blend
1 teaspoon baking powder
¾ cup dried cranberries
¾ cup white chocolate
½ cup chopped walnuts
Preheat the oven to 375 degrees. Line two cookie sheets with parchment paper. In a large mixing bowl, beat the butter and sugar until soft and slightly fluffy. Add the eggs, vanilla and orange extracts and beat until smooth. Combine flour blend and baking powder. Add the flour blend to the butter mixture, one cup at a time, beating briefly just to incorporate
after each addition. Fold in cranberries, white chocolate, and chopped walnuts. Drop by tablespoons onto baking sheets and bake 10 to 12 minutes.
Double Ginger Spice Cookies
(Makes 42 to 48 cookies)
1 ¾ sticks (14 tablespoons) unsalted butter, softened to room temperature
¾ cup sugar
2 large eggs
3 tablespoons molasses
1 teaspoon vanilla extract
½ teaspoon orange extract
2 ½ cups cake and pastry flour blend (below) or all purpose blend
1 teaspoon baking powder
1 ½ teaspoons cinnamon
¼ teaspoon ginger
¾ cup chopped crystallized ginger
½ cup raisins.
Preheat the oven to 375 degrees. Line two cookie sheets with parchment paper. In a large mixing bowl, beat the butter and sugar until soft and slightly fluffy. Add the eggs, molasses, vanilla and orange extracts and beat until smooth. Combine flour blend, baking powder, and spices. Add the flour blend to the butter mixture, one cup at a time, beating briefly just
to incorporate after each addition. Fold in chopped ginger and raisins. Drop by
teaspoons onto a plate of sugar and roll to coat. Set on baking sheets and bake 10 to 12
minutes.
Cake and Pastry Flour
This makes ¼ cup more flour blend than you’ll need for the master dough recipe. Reserve the extra for dusting the counter when making roll-out cookies.
1 cup sweet white sorghum flour (4 ounces)
1 cup white rice flour (5.4 ounces)
¾ cup cornstarch (3.4 ounces)
1½ teaspoons xanthan gum (or guar gum)
½ teaspoon salt
SHORTCUT: This blend makes very light pastries and cookies with a fine crumb but, if you are pressed for time, you may use 2 ½ cups of any all purpose flour blend. Add the xanthan gum and salt if they are not already in the blend.
Categories: Recipes | Tags: Cookies, cut-out cookies, gluten free, gluten-free makeover, recipes, Valentines Day | No Comments »
As a child, my biggest worries this time of year were whether Mrs. Lord was making caramel corn balls for Halloween and if Mrs. Oakes would have any candy coated apples left by the time I came to her house to trick or treat.
I spent the entire month of October anticipating the Candy Corn, the Tootsie Rolls, and the Mars Bars that would fill my shopping bag – several bags, if I was lucky. As I counted the days until the end of the month, I brooded about the ever cooling weather pattern. Would there be snow in the tiny Maine town I called home? Would I need mittens – something that made it very difficult to eat Mrs. Oakes’ sticky candy apples. Most of all, I wondered how many layers of clothing I would need to wear under my costume. Would the ubiquitous black cat costume still fit or would I have to opt for my brother’s red devil number?
In school, I sketched faces I might want to carve into my jack-’o-lantern. I practiced drawing angry faces, funny ones, sad ones. In the end, the pumpkin always looked the same, owing to my lack of dexterity and the ever-dull knife that was the only one my mother allowed me to use. Each year I promised myself that next year’s pumpkin would be much better. It never
was.
But not once did I realize that all the pumpkins I carved or stole from people’s porches and smashed in the middle of the road were edible, that pumpkin was food. I missed the connection, that these orange orbs were essential to my grandmother’s Thanksgiving pumpkin pie and my mother’s pumpkin quick breads. Pumpkin – – duh?!
I can’t say when the light went off, when I began using pumpkin in baking rather than carving. But one day, it did. And, now it’s the orange flesh that pleases me. Low in calories and high in fiber and vitamins, pumpkin is my friend. And it’s particularly great for gluten-free baking, adding moisture and texture to muffins and quick breads. Warm spices – – cinnamon, ginger, cardamom, cloves, and nutmeg – – pair nicely with pumpkin puree. Although you can bake a pumpkin and remove the flesh, you can also buy canned pumpkin puree. It’s so much easier and just as good.
So, say “Hello” to pumpkin and its many uses, and to this flavorful, moist pumpkin bread with crumb topping I made in honor of the season .
Pumpkin Bread with Crumb Topping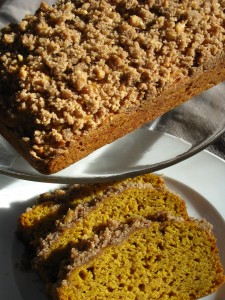
Makes 2 Medium Loaves
½ cup white rice flour
1 cup sorghum flour
1/3 cup cornstarch
2 ½ tablespoons tapioca starch
1 tablespoon baking powder
1 teaspoon xanthan gum
¾ teaspoon salt
½ teaspoon baking soda
½ teaspoon
ground cinnamon
¹⁄8 teaspoon
ground nutmeg
2 large eggs, at room temperature
1½ cups pumpkin puree (most of a 15-ounce can)
1 cup sugar
½ cup vegetable oil
¼ cup chopped pecans or other nuts, optional
1 cup Crumb Topping (below)
Preheat the oven to 350°F. Lightly oil two 8½ x 4½-inch loaf pans.
Combine the flours, cornstarch, tapioca starch, baking powder, xanthan gum, salt, baking soda, cinnamon, and nutmeg in a bowl. In a separate bowl, whisk together the eggs, pumpkin, sugar, and oil. Add to the dry ingredients and whisk to combine. Fold in the pecans, if using.
Divide the batter evenly between the two pans. Sprinkle ½ cup of the crumb topping over each loaf. Bake for 40 to 45 minutes, until toothpick inserted in the center comes away clean. Set on a wire rack and let cool for 10 minutes. Turn the breads out onto the rack and let cool completely. Wrap with plastic and let sit overnight before slicing.
Crumb Topping
Makes 3½ Cups or 3 Cups If Nuts Are Omitted
Store remaining topping in the refrigerator for 3 weeks or freezer for 3 months.
¾ cup rice flour
1 cup packed brown sugar
1 tablespoon ground cinnamon
¼ teaspoon ground nutmeg
¼ teaspoon ground cloves
½ teaspoon salt
½ cup ground pecans, walnuts, or almonds, optional
6 tablespoons unsalted butter or non-dairy buttery spread, at room temperature, cut into pieces
Combine the flour, brown sugar, cinnamon, nutmeg, cloves, salt, and pecans, if using, in a large bowl. Mix well. Add the butter and use your fingertips to mix just until crumbly.
Categories: Recipes | Tags: baking, gluten free, gluten-free makeover, holidays, pumpkin, quick breads | 3 Comments »




 Baking guru,