
Blog Archives
Makes 24 large cookies
Looking for an easy, last-minute cookie to round out your holiday baking? These are just the thing. Soft and chewy with the right amount of crispness, these cookies will become a staple in your house. Bites of candied ginger add a delightful explosion of flavor and a blend of vibrant spices – cinnamon, allspice and ground ginger- lend festive notes to these simple cookies. They are even tastier the second day.
If you prefer crispy cookies (aka ginger snaps), bake 10 to 11 minutes. Otherwise, cook a smidge under 10 minutes. Cookies may seem a little underdone when they come out of the oven, but will firm up as they cool. If you can get your hands on RYZE Blue Flour Blend, it adds remarkable chewiness to these cookies. However, you can make them with any all-purpose gluten-free flour blend. (Increase the amount of flour to 2 cups and add 1 teaspoon xanthan gum if it is not in the blend.)
1 ¾ cups Ryze Blue Flour Blend or 2 cups gluten-free flour blend with 1 teaspoon xanthan gum
2 teaspoons baking soda
2 to 3 teaspoons ground ginger (depending on your taste buds)
1 teaspoon ground cinnamon
½ teaspoon ground allspice
¼ teaspoon salt
¾ cup organic shortening
1 cup packed light brown sugar
1 large egg
¼ cup light (Original flavor) molasses
1 teaspoon cider vinegar
½ cup finely chopped candied ginger
Line 2 baking sheets with parchment paper. Preheat oven to 375 degrees.
In a medium bowl, whisk together flour blend, baking soda, ginger, cinnamon, allspice, and salt. Set aside.
In a medium bowl, beat the shortening and the sugar until mixture is fluffy, about 2 minutes.
Add the egg, molasses, and vinegar and beat well.
Add the flour mixture and beat until smooth. Fold in the chopped candied ginger.
Scoop out generous tablespoon-size portions of dough. Roll in a ball and set on baking sheets, at least 1 inch apart. Flatten each ball into a disk about ¼ inch in thickness.
Sprinkle with granulated sugar. Bake 8 to 10 minutes or until the tops of the cookies are set and slightly brown on the edges. Do not overbake. Remove from the oven and let rest on the pans for 5 minutes before turning onto a wire rack to cool completely.
Cooled cookies may be frozen.
Makes 24 large cookies

A Recipe From Beth
Tate’s Bake Shop GF Ginger Cookie Ice Cream Sandwiches
One Serving
I’m okay taking shortcuts when the results are delicious and impressive. And during the holiday season, I’m all about doing things the easy way. This fun dessert is exactly that — bursting with flavor and embarrassingly simple. I start with two top notch ingredients — yummy tasting Ginger Cookies from Tate’s Bake Shop and exquisitely rich ginger ice cream from Bart’s Homemade Ice Cream. My guests assemble their own ice cream sandwiches. I sit back and collect the ooh’s and ah’s.
First, let me tell you a little bit about the amazingly talented baker behind these cookies. If you visit Southampton, NY with its charming beach community and New York chicness, you’ll come upon a little bake shop called Tate’s. It’s legendary around the Hamptons. Creator, Kathleen King, has been baking here forever. Long before she decided to turn her amazing cookies into gluten free gems, I was making over recipes from her first cookbook so I could enjoy the gluten free versions.
Now Tate’s Bake Shop makes a gluten free line of cookies (in a dedicated facility) that will knock your socks off. I was beyond excited to receive a gift basket of their goodies. The butter, the crunch. Wow. My friend, Gail, had just served Tate’s Ginger Cookie Ice Cream Sandwiches with ginger ice cream at a dinner party. The cookies are peppered with bites of crystallized ginger. I was over the moon. I had to recreate that “recipe” for you here.
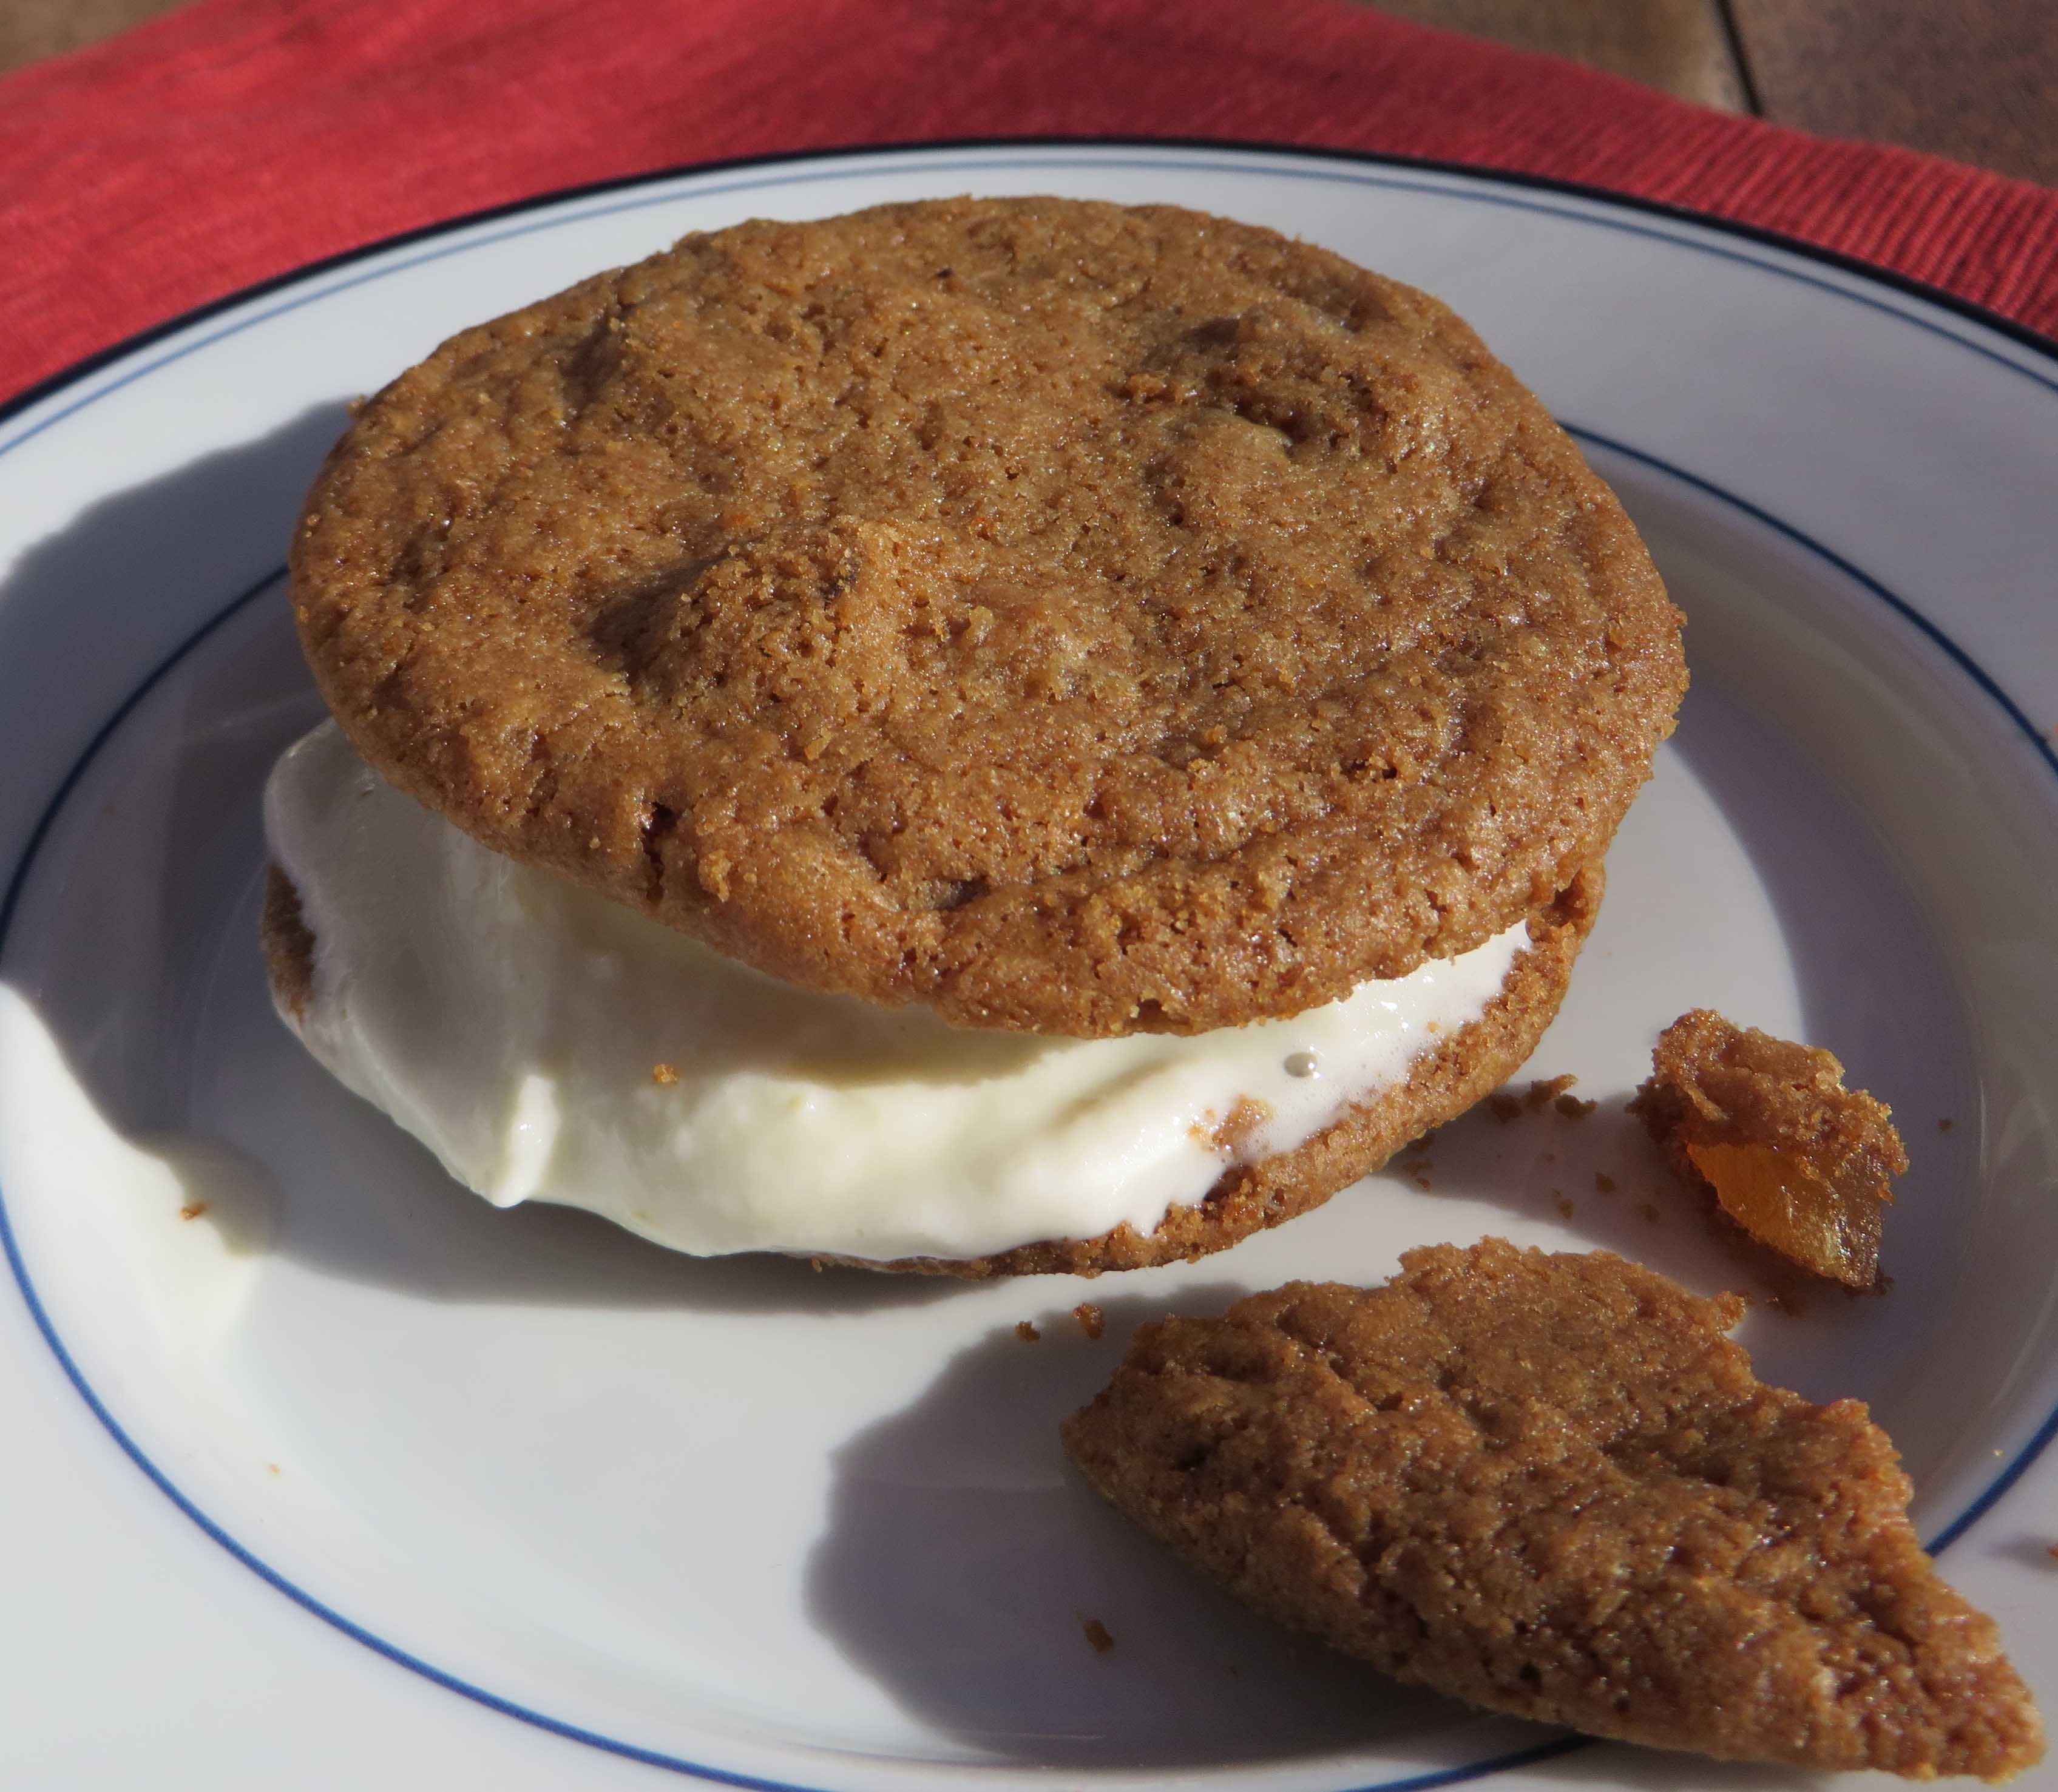
2 Tate’s Ginger Zinger Cookies
1 scoop (about ¼ cup) Bart’s Homemade Ginger Ice Cream (it says GF on the label) or another good quality ginger ice cream
Warm Hot Fudge Sauce, if desired
Soften the ice cream a bit then spread it over the flat side of one cookie. Top with the second cookie (flat side pressed onto the ice cream. Dip in warm hot fudge sauce if you wish. Eat every morsel! Ask for more!
A Giveaway 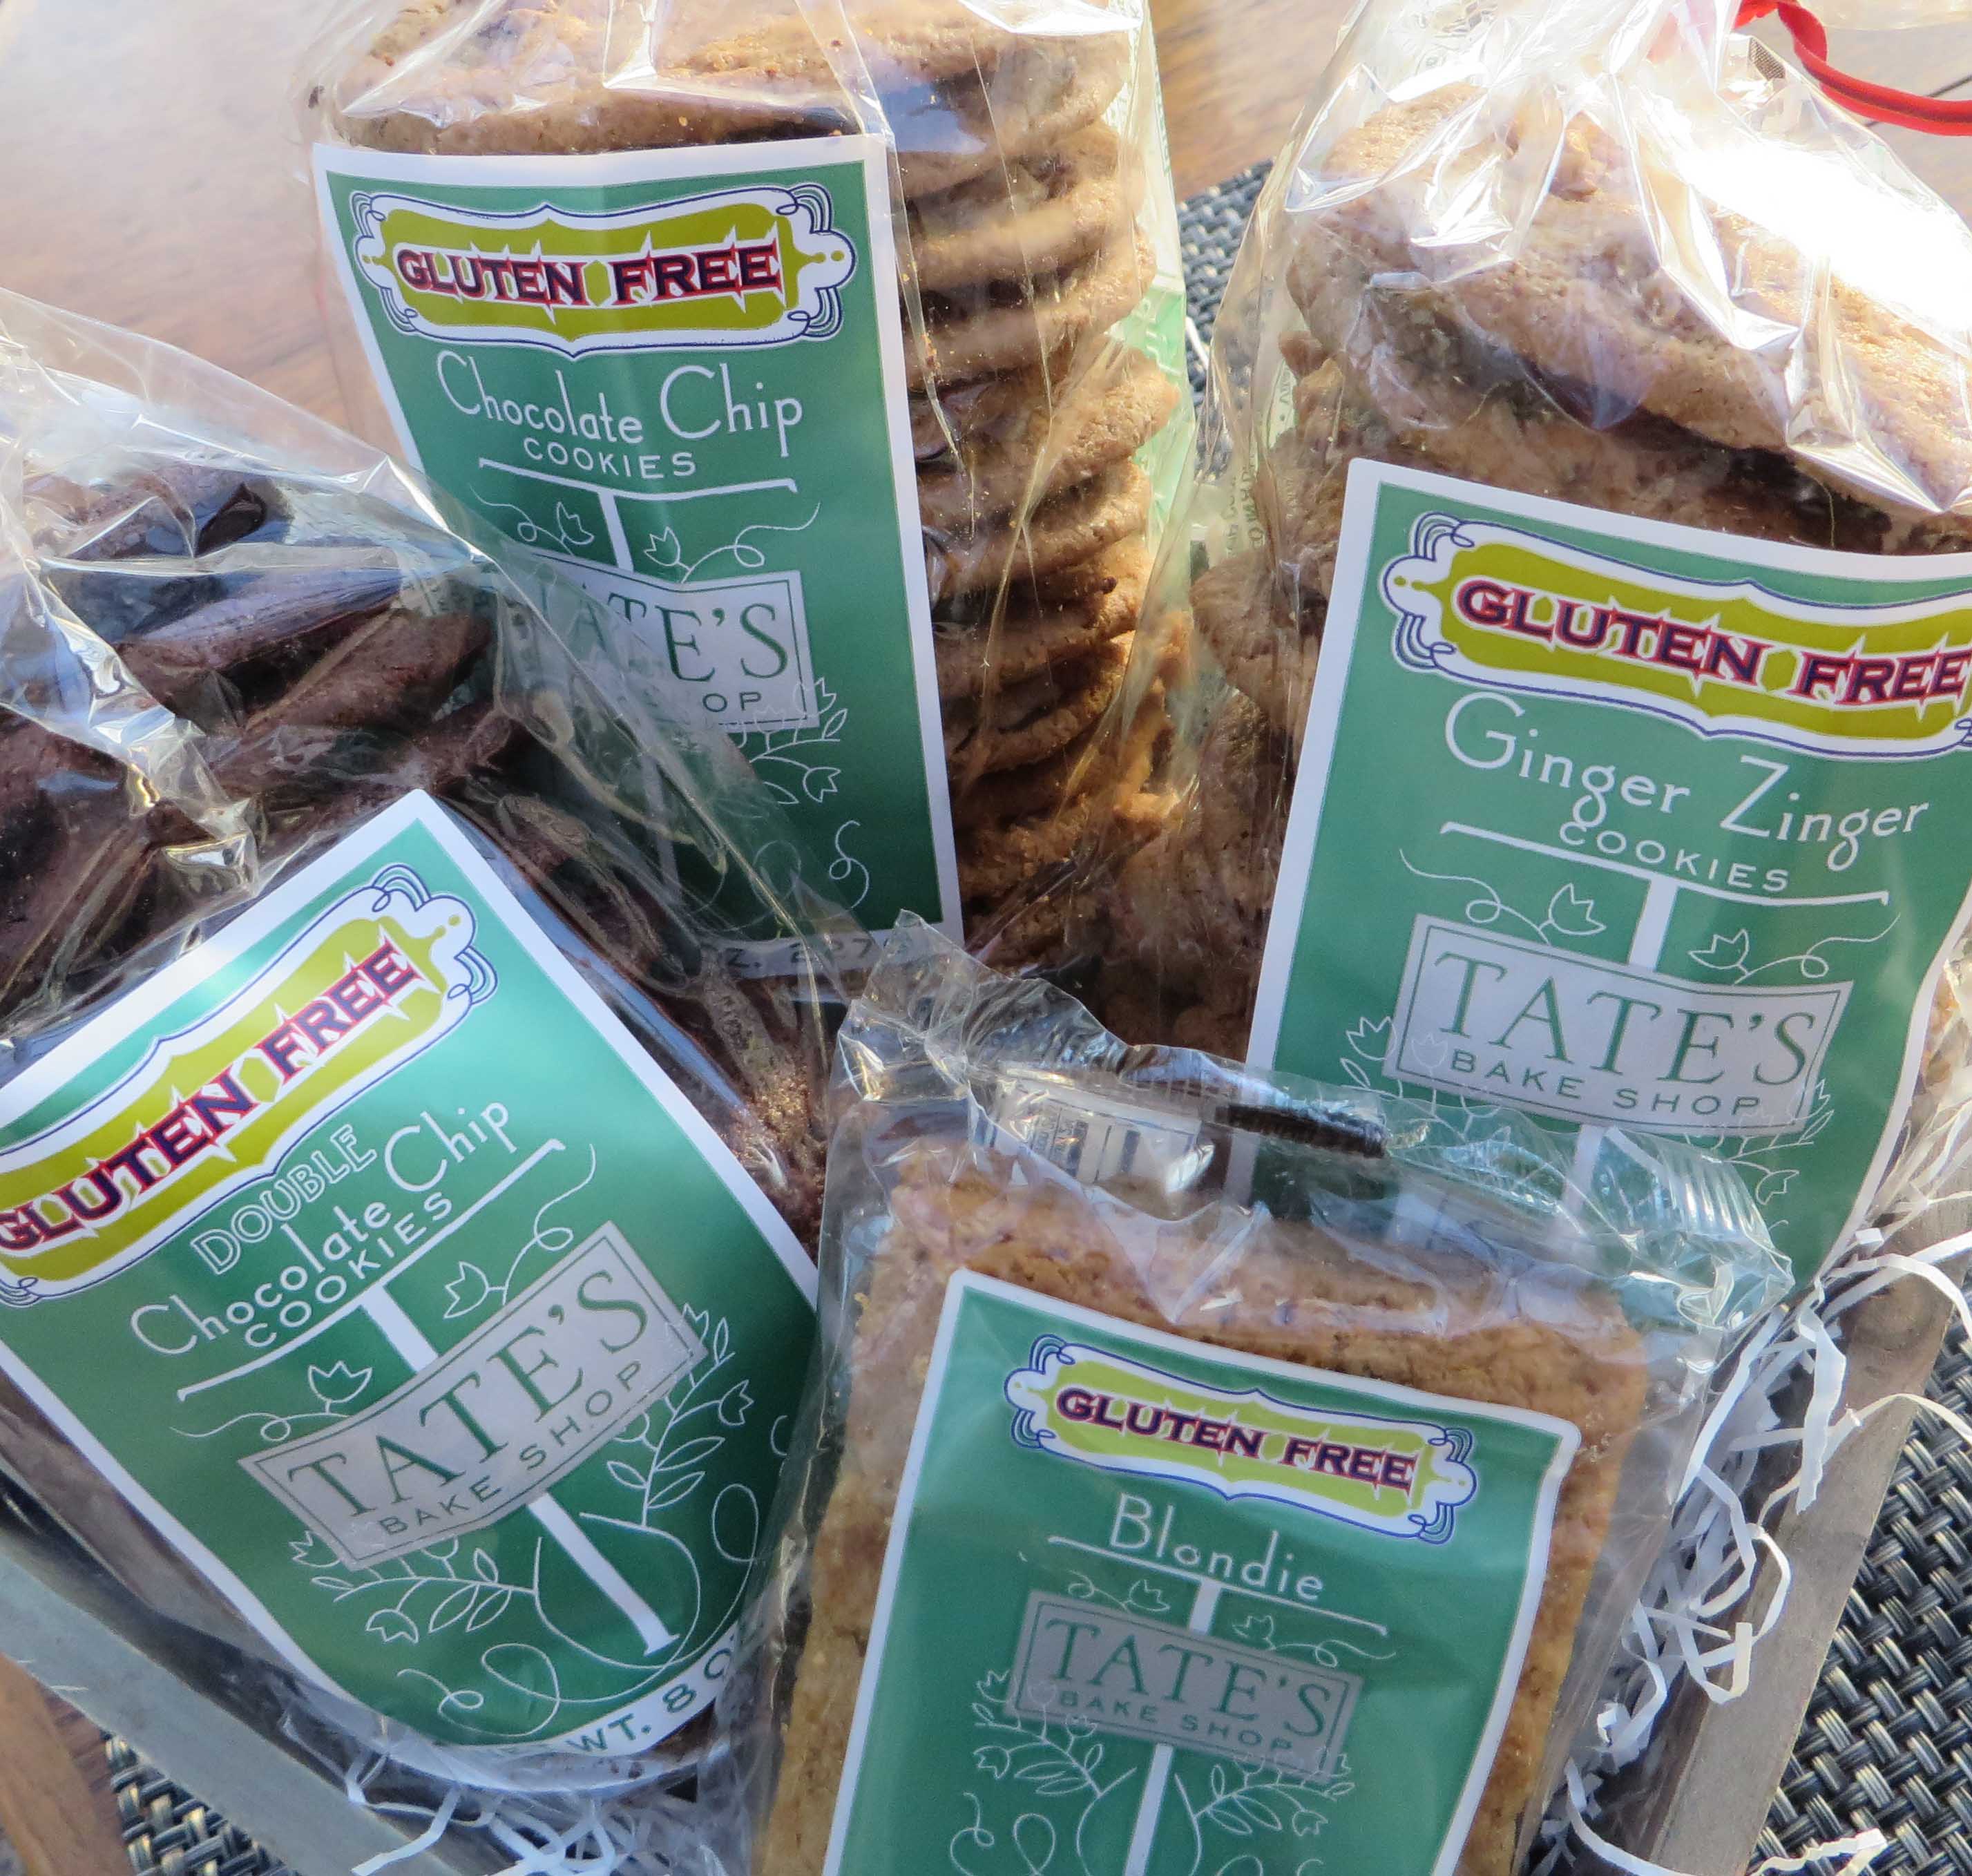
Tate’s has offered to send a gift basket of gluten free goodies to one lucky person reading my blog. Just send me an email at beth@glutenfreemakeovers.com to be entered in this giveaway. Hurry. You’ll have to reply by December 31, 2014.
Categories: Recipes | Tags: easy gluten free recipes, gluten free cookies, Gluten-Free. Desserts | No Comments »
Crêpes were the first recipe I made over after I was diagnosed with celiac disease more than 35 years ago.
A few months earlier, I had been given Julia Child’s first cookbook, “Mastering The Art of French Cooking,” and I was cooking my way through Julia’s wonderful recipes. Her cookbooks opened a door and, whisk in hand, I went through. I cooked and baked and held parties just to have tasters who would help me devour my experiments. Her book was my beacon, my inspiration.
Then a doctor told me to avoid gluten and I was overwhelmed. I could not simply put those books back on the shelf and close my mind to the delicious foods I had discovered. So I went to culinary school and began experimenting again, but this time, I made my recipes with gluten-free flour. As long as I maintained the ratio in a recipe, the balance of wet to dry and fat and sugar, and replaced regular flour with the same amount of gluten-free flour, I had success every time.
I picked crêpes first because the formula called for a few simple ingredients – eggs, milk, and flour. What could be easier? And the batter sits overnight so the mixture is tenderized and softens. It turns out, the ingredients have an affinity for rice flour. The crêpes held together beautifully. The results were delicious. I flamed them with brandy to make Crêpes Suzette. I filled them with ricotta cheese, lemon and currants. No one had any idea they were gluten-free.
With my taste buds engaged and my curiosity in overdrive, I was ready to try more recipes. Today, I am confident that any recipe can be made over with gluten-free ingredients. My cookbook, “Gluten-Free Makeovers,” is filled with many of these successes.
Last week would have been Julia Child’s 100th birthday and the 50th year since “Mastering The Art of French Cooking,” was released. Celebrations large and small were held all over the world. I made crêpes in honor of Julia’s birthday, reserving an extra shot of brandy for a toast. Happy Birthday, Julia and Bon Appetit!
This recipe is a classic French formula. The trick is to make these very thin so they are pliable and easy to roll. Since this is peach season, I made up a quick peach Melba-style filling. Unfilled crêpes freeze well.
Crêpes with Easy Peach Melba-Style Filling
Makes Fifteen to Twenty 6-inch Crêpes
The Crêpe recipe is reprinted from my cookbook, Gluten-Free Makeovers (Da Capo Press) where you’ll find more delicious fillings for them.
2 large eggs
¾ cup rice flour
¼ cup tapioca starch/flour
½ teaspoon salt
¼ teaspoon xanthan gum
1 tablespoon sugar (for dessert crepes)
1¼ cups milk, soy milk, or rice milk
1.Whisk together the eggs in a large bowl. In a separate bowl, combine rice flour, tapioca starch, salt, xanthan gum, and sugar, if using. Whisk into the eggs just until moistened. The mixture will be very thick and gloppy.
2. Add the milk, a little at a time, stirring vigorously until the mixture is smooth and the consistency of heavy cream. Cover and chill for up to 24 hours.
3. Lightly oil one or two 6-inch crêpe pans or heavy frying pans and set over medium heat. Pour about 2 tablespoons of the batter into each pan and swirl until the pan is coated. Pour any excess batter back into the bowl. Cook the crêpe until the edges look very dry, about 1 minute. With a sharp knife, loosen the edges of the crêpe. Using fingers, grab the edges and flip the crêpe. Cook another 30 seconds and remove to a platter. Continue until the remaining batter is used, lightly oiling the pans with a paper towel as necessary.
Peach Melba-Style Filling
1 cup seedless raspberry jam
2 tablespoon brandy
6 medium vine-ripened peaches, peeled and coarsely chopped
confectioners’ sugar
1 peach, skin left on, for garnish
Combine jam with brandy. Spread 1 tablespoon of the mixture over the surface of a crêpe. Add a few pieces of cut up peaches. Roll the crêpe. Repeat until all the crêpes are used. Dust with confectioners’ sugar and serve.
Categories: Recipes | Tags: easy quick gluten-free dessert, gluten-free makeover, gluten-free recipes, Gluten-Free. Desserts, Julia Child | 3 Comments »
I envy Northern California for its long growing season, its verdant farms and endless vineyards. But from June to September, Connecticut is in full bloom and I am content to stay close to home, near the local orchards and farms that rival anything I’ve seen in any other part of the US. Our best chefs know that cooking with fresh, local foods can turn ordinary recipes into three-star meals. I’m reminded of that secret when Connecticut’s harvest smiles. I load up on fresh corn, heirloom tomatoes, zucchini, blueberries, raspberries, strawberries, and herbs. I can never have enough!
And just about now, the orchards are bearing fruit – – pears, apples, and peaches. Ah. Peaches. Perhaps my favorite of all the local produce. Nothing else comes close to that juicy, tree-ripened crop. Their faint fruit perfume floats over the back roads as I drive by the local orchards. I buy them by the bushelful. By the time I get home, I’ve devoured a sizable number and my car seat and steering wheel bear the sticky evidence. It’s a race to reach my saturation point before the trees return to their dormant state. So I eat just as many as I possibly can. But I reserve enough to bake a few special treats.
This peach cake is one. Fresh peach slices, fanned out over the buttery cake, turn this into an elegant dessert that bursts with intense flavor. The cake makes the perfect company dessert that fools most into thinking it’s not gluten-free. Perhaps that’s because I started with a great, gluten-filled recipe. This is a makeover from one I saw in Bon Appetit several years ago. It can also be packed and taken to a picnic or a pot luck meal. Don’t tell, but I make this with frozen peaches when the fresh varieties are not available. They beat the hard, unripened fruit that I find in stores throughout the rest of the year. I’ve also used fresh plums. The purple skin makes for an equally beautiful presentation.
PEACH CAKE
3/4 cup all-purpose gluten-free flour blend *
½ cup sorghum Flour
1½ teaspoons baking powder
½ teaspoon xanthan gum
¾ cup plus 3 tablespoons sugar, divided
8 tablespoons (1 stick) unsalted butter or non-dairy buttery spread, at room temperature
1½ teaspoons finely grated orange zest
2 large eggs or egg replacer of choice
1 tablespoon fresh orange juice
4 ripe, but firm peaches halved and each half cut into 4 slices*
¾ teaspoon ground cinnamon for topping
Whipped cream or whipped dairy-free topping
Second Choice: Cascadian Farms or other brand Organic sliced peaches can be used. Thaw fruit before using. Purchase 2, 10-ounce bags and pick the prettiest slices for this cake. Save the rest for another use.
Preheat the oven to 350°F. Lightly oil a 9-inch spring form pan. Combine the flour blend, sorghum flour, baking powder, and xanthan gum in a bowl; set aside.
Beat ¾ cup of the sugar and butter in a mixing bowl until fluffy. Add the dry ingredients and orange zest and beat until crumbly. Add the eggs, one at a time, beating after each addition. Add the orange juice and beat just to incorporate. Spread the batter evenly in the prepared pan.
Arrange the peach slices on top of the batter so that they touch and form concentric circles that cover the batter. Press into the batter lightly. Don’t worry if the slices are not perfect. The cake will partially cover the fruit as it bakes. Combine the remaining 3 tablespoons sugar and the cinnamon and sprinkle over the batter.
Bake 55 to 60 minutes, until golden and a tester inserted into the center comes out clean. Run a knife along the side of the pan to release and remove the side of the pan. Serve slightly warm or at room temperature with whipped cream or dairy-free topping.
* If the blend you use does not contain salt and gum, add ½ teaspoon salt and ½ teaspoon additional xanthan gum to the dry ingredients.
“I used to serve my family Strawberry Cake before I became gluten-free,” said Alice. Any chance you could create one like that?”
I told her I had seen a bunch of recipes. Some used Jell-O and others used real strawberries. What did she have in mind?
“Not the one with Jell-O. Mine was like a white cake with pureed fruit in it,” she told me.
“I know how to make a gluten-free cake and I’m a sucker for strawberries,” I told Alice. I mean, I’ve been known to plan vacations to coincide with the local strawberry crop, I explained. I was eager to give this a try. But, as it turns out, our local crop of berries has gone by and the fresh strawberries come from across the United States or South America this time of year. I ended up using frozen, whole, unsweetened strawberries. They were easier and tastier. The flavor was more concentrated and more consistent. So, you’ll see that my recipe calls for frozen berries. Unless your local berries are in season, I suggest you do the same. Use fresh berries for garnish and even dip a few in chocolate for an added touch.
And use a good gluten-free cake flour blend, one that includes sorghum and cornstarch. Sorghum is light and less grainy than rice flour. Plus it has nutrients and fiber. Cornstarch lightens the texture and adds structure to the cake. If you are able to have corn products, use it in this recipe. Otherwise, tapioca or potato starch are okay, but a distant second. If you can’t tolerate dairy products, Earth Balance products work well.
Now about color. That’s a matter of preference. I’ve seen versions of strawberry cake that are bright red. That’s not from the berries, I’m afraid. Rather, it’s from red food coloring. If you like that stuff and that color, by all means, add a drop or two to the batter. I prefer the subtle pink and don’t really like food dyes.
So, here’s a really, truly completely from-scratch, fresh strawberry cake. No Jell-O, food coloring, or artificial flavors! Using frozen strawberries makes this easy and means you can celebrate strawberry season anytime of the year.
Strawberry Cake
1, 16-ounce bag frozen, unsweetened whole strawberries
1 cup white rice flour, more to dust pans
¾ cup sorghum flour
½ cup cornstarch
4 teaspoons baking powder
1 ¼ teaspoons xanthan gum
½ teaspoon salt
¼ teaspoon baking soda
12 tablespoons unsalted butter (1 1/2 sticks), at room temperature
1 ¾ cup sugar
3 large eggs, room temperature
2 teaspoons vanilla extract
3 tablespoons milk or milk of choice, at room temperature
Preheat oven to 350 degrees F. Lightly oil 2, 8 or 9 inch round pans. Dust with rice flour. Set aside.
Slightly thaw strawberries. Puree in a food processor. Transfer to a mesh strainer and set over a bowl large enough to set the strainer over the opening. Using a rubber spatula, scrape the puree through the strainer, then scrape the underside of the strainer, catching the puree in the bowl. Repeat until just seeds and pulp remain in the strainer. You should have about 1 ¼ to 1 ½ cups of puree. Set aside and discard the seeds and pulp.
Combine rice flour, sorghum flour, cornstarch, baking powder, xanthan gum, salt, and baking soda. Mix well.
In a large mixing bowl, cream the butter and sugar until smooth and fluffy. Add eggs and vanilla and beat at medium speed for 2 minutes. Add dry ingredients and beat to combine. Fold in ¾ cup strawberry puree. (Reserve remainder for frosting.) Add milk and beat until smooth. If you would like a deeper pink color to the batter, add a drop or two of pink or red food coloring here.
Divide the batter evenly among the pans and smooth tops.
Bake for about 23 to 25 minutes or until a toothpick inserted in the center comes out clean. Let cakes cool in pan for 10 minutes then turn out onto wire racks. Let cakes cool completely before frosting.
Strawberry Cream Cheese Frosting
1 (8 ounce) package of low-fat cream cheese, softened
½ stick of butter, softened
½ cup pureed strawberries from above
1 teaspoon vanilla extract
3 to 4 cups confectioners’ sugar
1 tablespoon milk (if needed)
Beat cream cheese and butter together until smooth.
Slowly add the sugar in 1 cup batches until desired sweetness and consistency is achieved.
Stir in puree and vanilla. Add milk slowly if you need a looser consistency.
Frost cake and garnish with sliced or halved fresh strawberries. Refrigerate until ready to serve.
You can also make 24 cupcakes from this recipe.
Categories: Recipes | Tags: cake, dessert, dessert recipes, Gluten-Free. Desserts, recipes, strawberry desserts, summer dessert recipes | 16 Comments »
May is Celiac Awareness Month
I am celebrating with cupcakes and I hope you’ll join me. I’ll tell you how in a moment, but first, here’s a little background on why this event has far-reaching implications for all of us.
The World’s Tallest Gluten-Free Cake
Last year I was part of the world’s largest gluten-free cake event along with the American Celiac Disease Alliance (ACDA) and the 1in133.org awareness project. Hundreds of us met in Washington, DC to build the world’s tallest gluten-free cake, bring attention to the number of people with celiac disease and convince the FDA to reopen the process for creating gluten-free regulations.
While Jules Shepard and John Forberger headed the confectionery team, Andrea Levario and I headed to Capitol Hill to manage the legislative front. With our sons, media folks and gluten-free manufacturers in tow, we spoke to Congressional leaders about the importance of gluten-free regulations. We asked them to keep the pressure on the FDA to push the regulations forward.
They Heard Us And We Ate Cake
In the early evening, we gathered at a reception for supporters and Congressional folks. To our delight, the Deputy Commissioner of the FDA, Mike Taylor, attended. In front of hundreds of us, Deputy Commissioner Taylor told the group we would have gluten-free regulations. On August 4, the FDA reopened the comment period for the regulations. The comment period closed on October 3 and the FDA promised to issue these regulations by the end of the third quarter of 2012. The countdown is on.
Calling All Cupcake Builders
This May, as we await the forthcoming regulations, I invite everyone to make cupcakes – – one for every year you have been gluten-free. Take a picture and share it with the community by posting to the ACDA’s Facebook page. Then post to your Facebook page, blog and link back to the ACDA’s page. Vote for your favorite cupcake by “liking” the photos on the Alliance Facebook page. Prizes will be awarded in categories like best presentation; most unique decorations; most years being gluten-free; and kids categories. The winners will receive products and coupons from several gluten-free companies. Get out those whisks and mixing bowls. The more likes we receive the more voices will be heard from our virtual community. Go to 1in133 for guidelines.
Let’s Eat Cupcakes 
This weekend, I made 56 chocolate cupcakes with peanut butter frosting; 36 for me and 19 for my son, Jeremy. That’s a lot of cupcakes. Let me tell you. But, I’ve seen, firsthand, the power of community. When a standard for gluten-free on food packaging comes out, I can say I had a hand in making it happen. I hope you’ll join me in that effort. It feels good. And, besides, you get to eat cupcakes!
 Here’s the recipe I used. You are welcome to “borrow” it. The chocolate cupcakes are a variation on those in my book, Gluten-Free Makeovers. The frosting is pure decadence – – a blend of peanut butter and cream cheese. I love peanut butter and chocolate and the slightly tangy cream cheese flavor cuts the sweetness in a lovely, subtle way. To bring it all together, I top these cupcakes with crushed Reese Peanut Butter Cups. If you are allergic to peanut butter, you could use sunflower butter or simply frost these with plain cream cheese frosting.
CHOCOLATE PEANUT BUTTER BLOSSOM CUPCAKES
Makes 24 to 28 cupcakes
2 ¼ cups Cake and Pastry Flour
½ cup unsweetened cocoa
2 ½ teaspoons baking powder
½ teaspoon baking soda
1½ cups granulated sugar
12 tablespoons (1½ sticks) unsalted butter or non-dairy buttery spread, at room temperature
3 large eggs, at room temperature
1½ teaspoons vanilla extract
1 cup milk, soy milk, or rice milk
Preheat the oven to 375°F. Lightly grease or oil two 12-cup muffin tins or line with paper liners. Combine the cake flour, cocoa, baking powder; and baking soda. Set aside.
In a separate bowl, beat the sugar and butter until light and fluffy. Add the eggs one at a time, beating to incorporate. Blend in the vanilla. Add the flour mixture alternately with the milk in 3 batches, beginning and ending with the dry ingredients and mixing until each addition is just incorporated.
Spoon the batter evenly into the muffin cups, filling a little more than half full. Smooth the tops and bake on the center rack for 16 to 18 minutes, until a wooden toothpick inserted in the center comes out clean. Let cool in the pans on a wire rack for 10 minutes. Remove from the pans and cool completely before frosting.
PEANUT BUTTER BLOSSOM FROSTING
1 cup smooth peanut butter (any gluten-free brand)
½ cup milk
4 ounces low-fat cream cheese
1 tablespoon vanilla
3 cups confectioners’ sugar
½ cup (about 6) Reese’s Peanut Butter Cups, crumbled (optional)
Beat the peanut butter, milk, cream cheese, vanilla, and sugar together until smooth and fluffy. Frost cupcakes. Sprinkle with crumbled peanut butter cups. Refrigerate until time to serve.
Cake and Pastry Flour
1 cup sweet white sorghum flour (4 ounces)
1 cup white rice flour (5.4 ounces)
¾ cup cornstarch (3.4 ounces)
1½ teaspoons xanthan gum (or guar gum)
½ teaspoon salt
SHORTCUT: This blend makes very light pastries and cookies with a fine crumb but, if you are pressed for time, you may use 2 ½ cups of any all purpose flour blend. Add the xanthan gum and salt if they are not already in the blend.
Categories: Recipes | Tags: 1in133, celiac awareness, chocolate and peanut butter, cupcakes, gluten free, gluten-free makeover, Gluten-Free. Desserts, recipes | 8 Comments »
No one has ever mistaken me for a shrinking violet. I’m not subdued and I’ve never been one to turn my back on a challenge. You get the picture.
So when a friend who was recently diagnosed with celiac disease asked me if I had done a spritz cookie makeover, I said, “yes.” Truthfully, I hadn’t made spritz cookies in years. I wasn’t even sure I could find my cookie press, the one I inherited from my grandmother a while back. What was I thinking?
But my friend, who I will call Debbie, is still in the pity phase of the gluten-free diet, a place I rarely go. I don’t recall feeling badly even when I was diagnosed with celiac disease more than thirty years ago. Frankly, I didn’t know another soul with this disease back then. So who would have listened, if I did complain?
But Debbie was diagnosed this year. “I miss pizza. I can’t find a beer I like. “And I wish I could bake up a batch of the spritz cookies my family makes for the holidays,” she said.
After thirty-something years of living and baking gluten-free, I have a hard time accepting her glass-nearly-empty outlook. “Look what you can have,” I countered. This is when the stubborn in me goes from simmer to full boil. There is no need to miss out. Today, we have so many choices. And after writing my cookbook, Gluten-Free Makeovers, I am convinced that everything can be made over.
So, when Debbie asked if I had a gluten-free spritz cookie recipe, I didn’t tell her I had no idea what I had done with the recipe or if I ever had one. Nor did I mention that my cookie press had disappeared. I was out to prove a point – – we can eat everything, just gluten free. So what if I had no idea what I was doing? I’d figure it out. After all, isn’t that part of a no-shrinking-violet philosophy? I went to the basement where I store all the gadgets I rarely use. I rummaged in storage closets where they are well wrapped and piled in a heap. Under the back-up coffee maker, the spice grinder, the antique food mill, I found the gold metallic cylinder of a cookie press. I dug deeper and found the levered top. Two piles over, were the discs and finally, in with an old food processor, was the ring that holds the discs in place. I was ready to try my hand at making press cookies.
I did not realize there was more of a challenge ahead. On the surface, spritz cookies look pretty simple – – flour, butter, eggs and sugar. I could replace the flour and create my own cookie press cookies, I reasoned. And, at first, that’s exactly what I did. Little did I realize that these delicate cookies hold their shapes because of the wheat and gluten. Every shape I pushed through the metal cylinder produced the same non-descript blob of dough. I was ready to throw in the kitchen towel, give up the whisk, put my grandma’s cookie press in the tag sale box.
A one-for-one conversion was not doing the trick. How was I going to create a dough that would hold its shape when pressed through the cookie press but still tasted delicate with a pleasant crumb? Little by little I increased the flour, adjusted the xanthan gum. And soon I had reached the exact balance, the ratio of butter to flour that produced the right amount of texture but preserved the delicate crumb. So dust off your cookie press and enjoy!
Spritz Cookies
Makes 60 cookies
These rich, buttery treats are fun to make and decorate.
1 cup white rice flour + 2 tablespoons
¾ cup sorghum flour
½ cup cornstarch
1/3 cup tapioca starch
1 ½ teaspoons xanthan gum
½ teaspoon salt
1 cup (2 sticks) unsalted butter, softened
1 ¾ cups confectioners’ sugar
2 egg yolks
½ teaspoon almond extract
1 teaspoon vanilla extract
Preheat the oven to 400 degrees F. Line 3 to 4 cookie sheets with parchment paper and set aside. In a medium bowl, combine rice flour, sorghum flour, cornstarch, tapioca starch, xanthan gum, and salt. Whisk to combine. Sift and set aside.
In a medium bowl, cream the butter until light yellow. Add the sugar and beat about 3 minutes or until fluffy. Add the egg yolks and extracts and beat to combine. Add the
flour ingredients, a little at a time, beating briefly after each addition. Chill 30 minutes. Scoop into a cookie press and press out cookies, one at a time. If they do not release from the tube, loosen with a dull kitchen knife. Set 1 ½ inches apart.
Decorate with sprinkles or colored sugar and chill on trays for at least 10 and up to 30 minutes so that cookies hold their shape. Bake 8 to 10 minutes. Cool completely before storing.
TIP: Add food color to the dough and beat or divide dough and color each portion with a different color.
For best luck, use cookie press forms with the widest openings and avoid those with small holes in the designs.
Categories: Recipes | Tags: baking, Cookies, Gluten-Free. Desserts, holidays, Makeovers, Sweets | 7 Comments »
Follow Us Online
More Cookbook Stuff
Gluten-Free Makeovers - - Nearly 200 recipe makeovers for everyone to enjoy. Buy it at glutenfreeandmore.com, Amazon.com and barnesandnoble.com.
About This Blog
 Baking guru, Beth Hillson, transforms favorite foods into recipes that are safe for your gluten-free diet.


