
Blog Archives
By Beth Hillson
When I was in college, St. Patrick’s Day was a reason to have a green beer or two anytime of the day. We started early with the Green Beer Parade in Syracuse’s Tipperary Hill, then headed to a local pub near campus to continue the celebration.
I confess, I am no longer a beer drinker. I lost my taste for it when I became gluten free and before great gf beers appeared. These days, I look forward to the festive St. Patty’s Day dishes instead – Irish Soda Bread, Corned Beef and Cabbage, and Grasshopper Brownies.
My first foray into making corned beef was to purchase a cryo-vac product on sale at a big supermarket chain. The package was a slab of beef floating in not-so-appealing beet-red liquid and filled with flavorings and spices. I knew the end results would be amazing so I worked my way past the packing and the extra contents which were quickly discarded. I rinsed the beef and simmered it with pickling spice, garlic cloves and an onion. In the final hour, I added cabbage in wedges, carrots and potatoes. If the aroma wasn’t enough, the taste was surely addictive.
When we moved to Connecticut, I discovered our local market made its own corned beef. That was a game-changer. Flat cuts of brisket bathed in a brine of proprietary spices and flavors. And sold with complimentary potatoes, carrots, and cabbage.
I’ve already given you the simple recipe which I serve with a mixture of horseradish and sour cream and Dijon mustard.
Unfortunately, corned beef is a seasonal item and freezing changes the taste. Get your fill while it’s available.
On the other hand, Irish Soda Bread, aka Soda Bread, is another tradition that can be enjoyed year-round. In fact, I encourage it!
The version served with Corned Beef is usually studded with caraway seeds. I’m not a fan. My preference is the recipe here, laced with orange rind and currants. It is easy and can be made gluten free with equally tasty results by simply changing out the flour for an all-purpose gluten-free flour blend.
Try this formula as delicious scones, too. Scoop the dough into small rounds and bake at 375 for 15 to 18 minutes. The scones are great with soups and portable for school or work, another reason this recipe should not be reserved for St. Patrick’s Day alone. This recipe is inspired by an Ina Garten recipe.
Irish Soda Bread with Orange and Currants 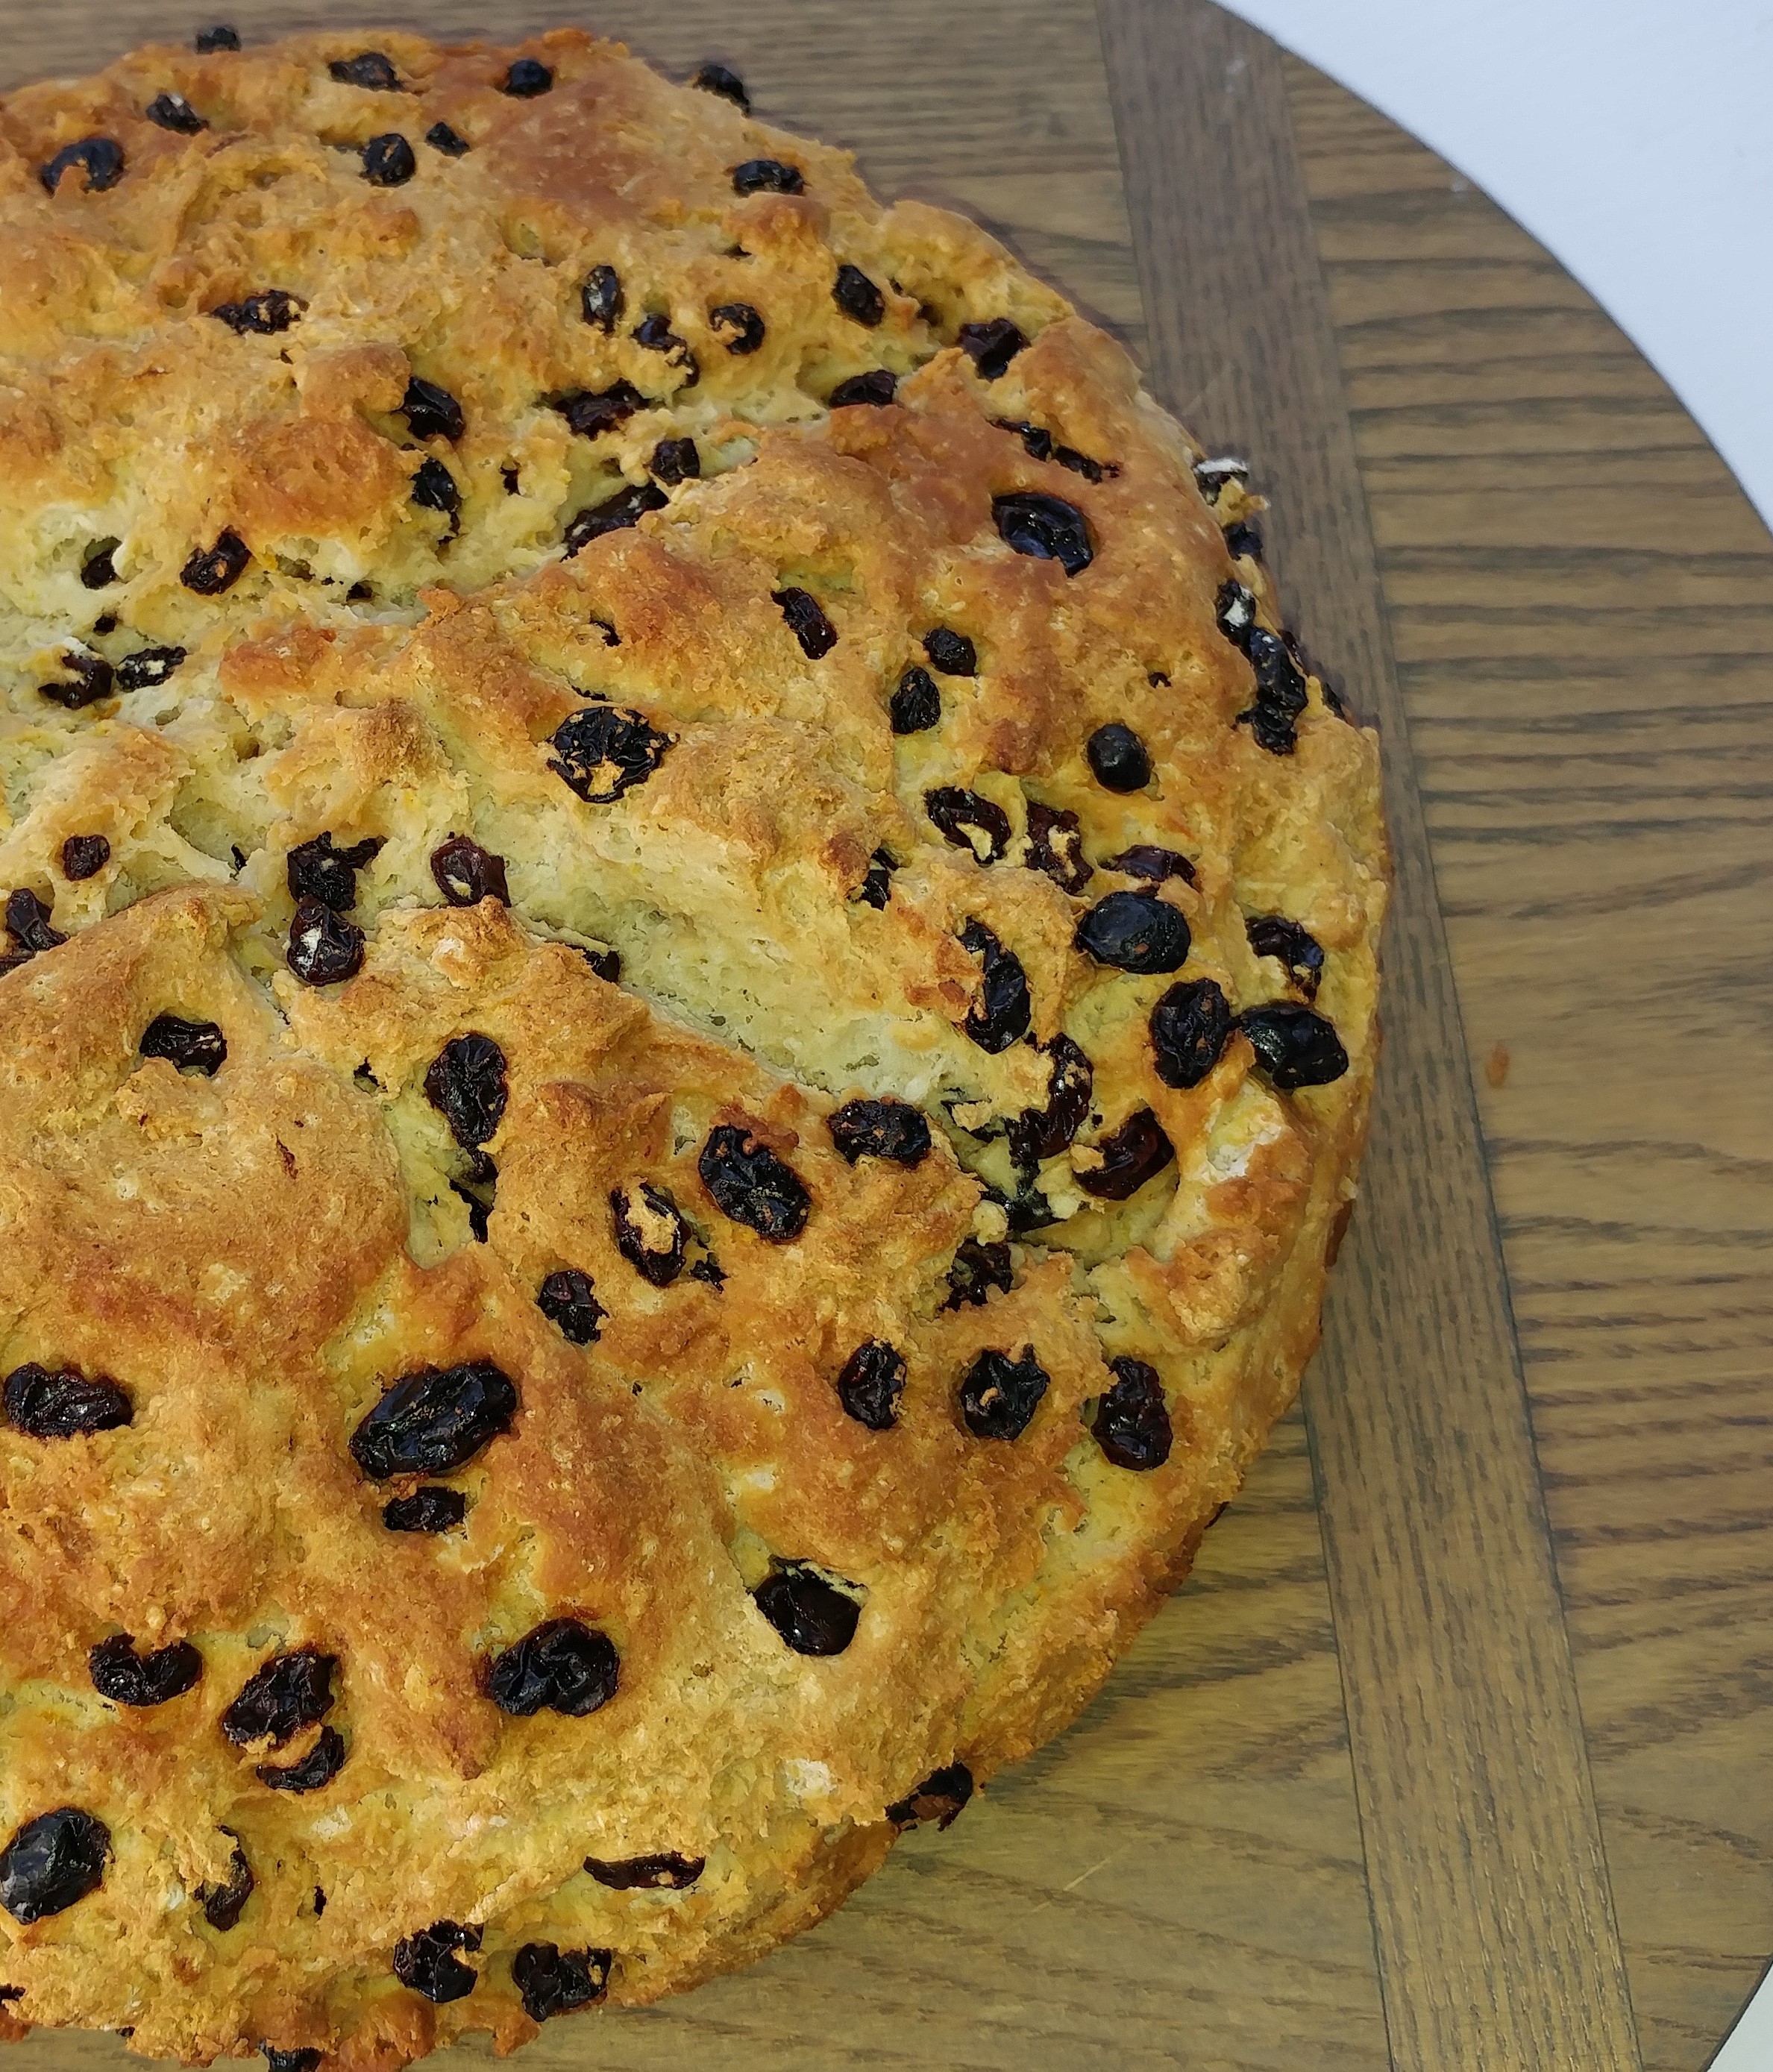
Yield: 1 loaf
4 cups all-purpose gluten-free flour blend, plus 1 tablespoon extra for currants (I use King Arthur GF Measure for Measure Flour Blend)
4 tablespoons sugar
1 teaspoon baking soda
1 ½ teaspoons kosher salt
5 tablespoons cold unsalted butter, cut into small pieces (about the side of peas)
1 ¾ cups cold buttermilk, shaken
1 large egg plus1 egg yolk, lightly beaten
1 teaspoon grated orange zest
1 cup dried currants
Preheat the oven to 375 degrees F. Line a 9-inch round pan with parchment paper. Spray with PAM. Set aside.
Combine the flour, sugar, baking soda, and salt in a mixing bowl.
Add the butter and mix on low speed until the butter is mixed in and flour resembles a coarse meal. With a fork, lightly beat the buttermilk, egg, egg yolk, and orange zest together in a measuring cup. With the mixer on low speed, slowly add the buttermilk mixture to the flour mixture. Combine the currants with 1 tablespoon of flour and mix into the dough. It will be very wet.
Dump the dough onto a well-floured board or a sheet of parchment paper and knead it a few times to form a round loaf about 7 ½ to 8 inches in diameter. Place the loaf on the prepared pan and lightly cut an X into the top.
Bake for 45 to 50 minutes, or until a cake tester comes out clean. When you tap the loaf, it will have a hollow sound. Cool on a baking rack. Serve warm or at room temperature with butter or jam.
Note: For Grasshopper Brownies, make your favorite brownie recipe. (A mix is allowed.) Let the brownies cool and top with this simple mixture.
½ cup unsalted butter softened
2 tablespoons cream cheese, at room temperature
2 tablespoons crème de menthe
½ to 1 teaspoon peppermint extract
Pinch kosher salt
2 cups confectioner’s sugar
Refrigerate for 1 to 2 hours then top with ¾ cup of semisweet or bittersweet chocolate (broken into small pieces) melted in the microwave with 2 to 3 tablespoons of butter. Chill until ready to serve.

Categories: Recipes | Tags: gluten free, Irish Soda Bread, yeast free bread | No Comments »
Makes 4 Servings
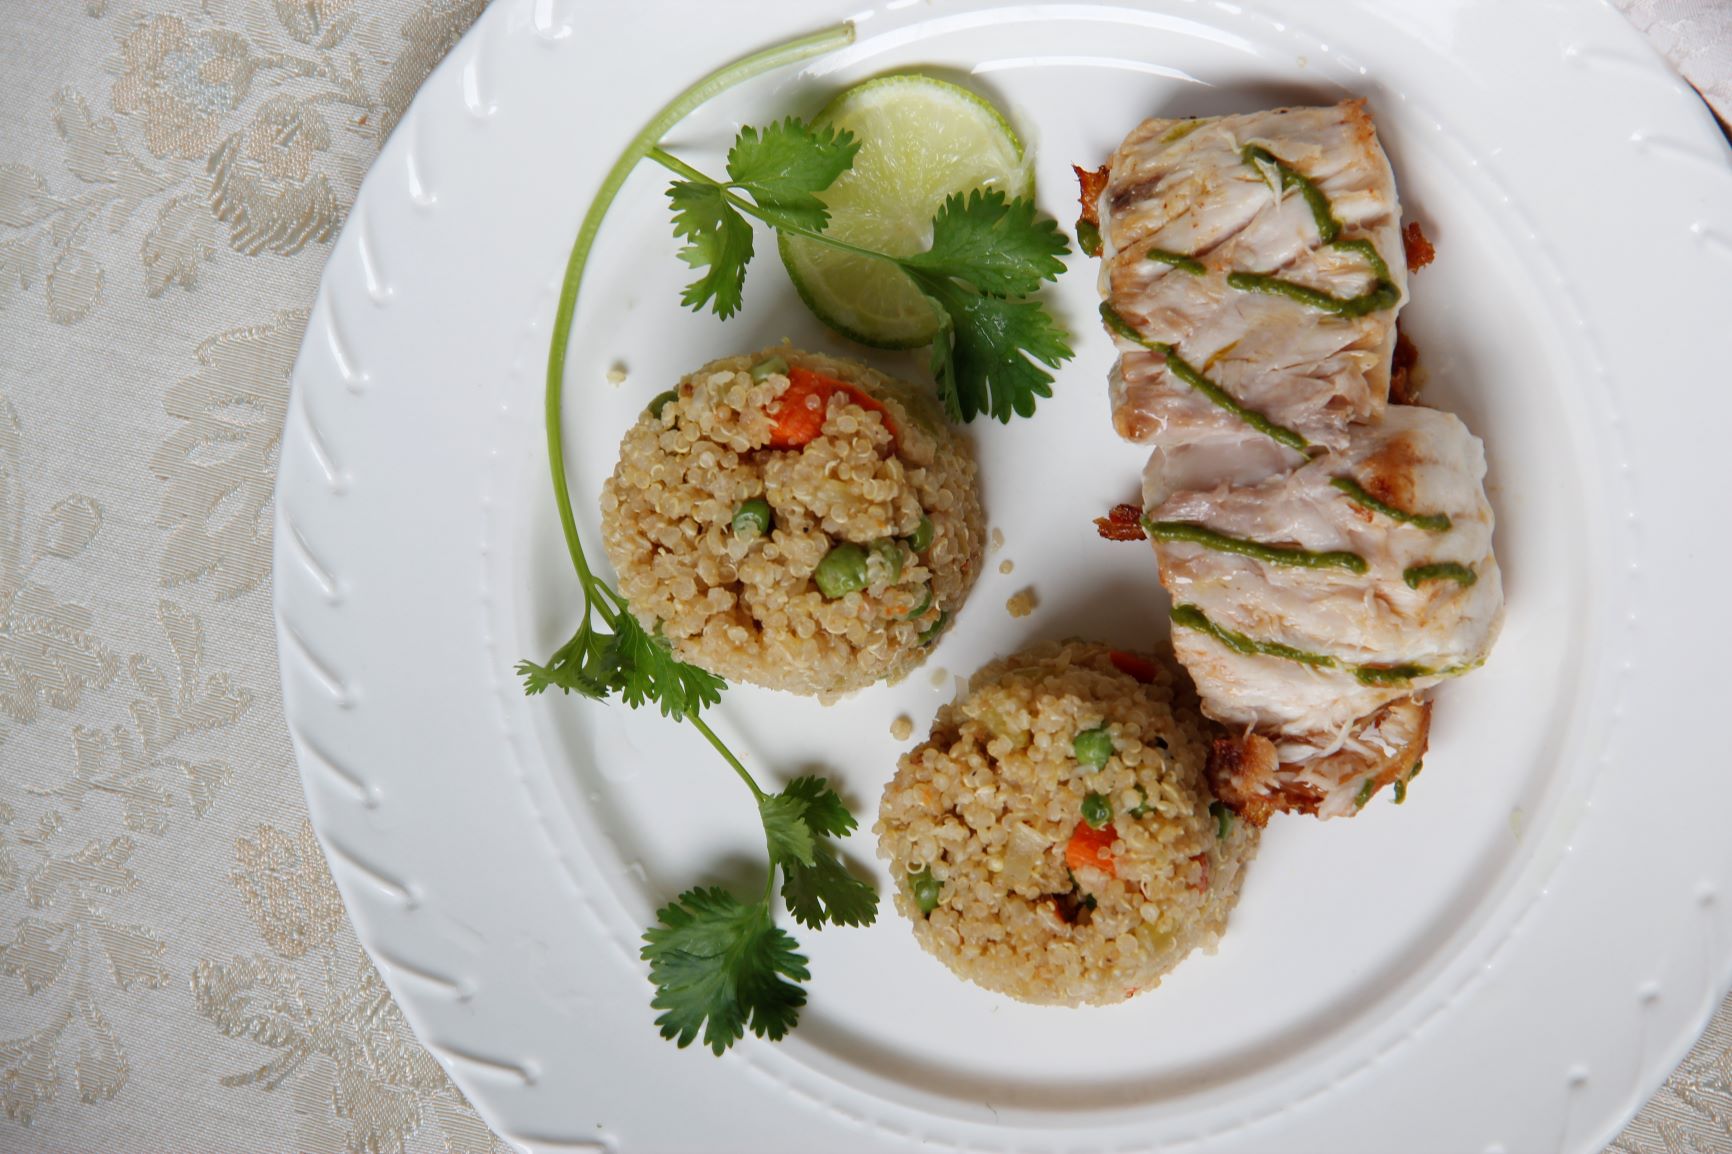
Fresh-caught fish paired with bright lime-infused cilantro pesto brings out the best of this white-flesh fish. The recipe is inspired by one I enjoyed at Mirador in Arenas del Mar Resort in Manuel Antonio, Costa Rica. Arenas del Mar prides itself on being entirely gluten-free.
The red snapper is delicious served with quinoa pilaf and cilantro pesto drizzled over the top and around the fish. Great made with pan-seared or grilled boneless chicken breast instead of fish.
Cilantro Pesto
2 large bunches fresh cilantro, about 3 cups of leaves (not packed)
2 tablespoons olive oil
Juice of 1 lime
1-2 pinches of salt, to taste
To make Cilantro Pesto, wash cilantro, remove leaves and pat them dry between paper towels. Place leaves in a food processor and process about 1 minute.
Add 2 tablespoons olive oil and lime juice. Process until smooth. Add salt and blend. Set aside to serve with red snapper.
Red Snapper
 1 tablespoon olive oil
1 tablespoon butter or olive oil
1 1/3 pounds red snapper, striped bass or similar white flesh fish filets, cut into 4 portions
Salt and pepper, to taste
To prepare Red Snapper, place olive oil and butter in a pan and warm over medium heat. Add 4 pieces of snapper, skin-side down, and cook until crispy, about 4 minutes. Turn the fish and sauté the other side until browned, about 3 minutes (internal temperature should register 125°F).
Transfer fish filets on a serving platter. Drizzle with Cilantro Pesto.
Categories: Healthy Plate, Recipes | Tags: dairy-free, gluten free, healthy dinner, meal, quick meals | No Comments »
Recipe from Beth Hillson
Makes 20 to 22 cookies
These shortbread cookies dipped in chocolate make for delightful treats and great holiday gifts. They look just like the Keebler Cookies but taste even better! I used RYZE Blue Flour Blend in place of my own blend. I discovered that this blend makes fabulous cookies – better than any other flour blend I’ve tried. So, maybe I’ve given away Keebler’s trade secret (not), but this little discovery about RYZE is just between us gluten free bakers. If you prefer, omit the chocolate step and use this recipe for cutout holiday cookies.
2 cups RYZE Blue Flour Blend 
2 teaspoons baking powder
¼ teaspoon salt
1 cup butter, at room temperature
3/4 cup powdered sugar
2 teaspoons pure vanilla extract
16 ounces chocolate chips, melted*
For the Cookies:
Preheat oven to 350°F. Line two baking sheets with parchment paper and set aside.
In a medium bowl, combine RYZE flour, baking powder and salt. Set aside.
Beat butter and sugar on medium speed until fluffy, about 2 minutes. Add vanilla and beat to combine.
On low speed, slowly add flour mixture, stopping to scrape the sides of the bowl until a soft dough forms.
Turn dough onto a sheet of plastic wrap. Cover with a second sheet of plastic wrap and roll to 1/4-inch thickness.
Use a 2 ½ inch biscuit or other circle cutter to cut out cookies. Use a ¼ to ½ inch circle to cut out the centers. Gather the extra dough from around the sides of the cutouts. Slide the piece of plastic with the cut out cookies onto a cutting board or the back of a baking sheet and refrigerate for 15 minutes so the cookies can be lifted without tearing.
Place cookies on prepared baking sheets, 2 inches apart. Bake for 10-12 minutes until edges are just barely golden brown.
Let cookies cool on sheets for 5 minutes before removing to wire rack to cool completely.
Gather remnants of dough into a ball, roll out and cut into more circles as above.
To make the Fudge Stripes and Bottoms:
Spread wax paper on your countertop. Dip bottoms of cookies in melted chocolate, allowing excess to drip off before placing on wax paper.
Once all of the cookies have been coated in chocolate on one side, transfer the remaining chocolate to a small pastry bag fitted with a small, plain tip or a plastic baggie with a hole snipped off one corner.
Drizzle each cookie with stripes. Let chocolate firm up before serving cookies.
*Here’s a tip for melting the chocolate: Melt ¾ of the chocolate in a large heat-proof bowl over boiling water. Remove from the heat and add 1 to 2 teaspoons of the hot water (or more) until chocolate is smooth but not too thin. Add remaining chocolate to melted chocolate and stir until smooth. Add more boiling water if necessary.
Categories: Recipes | Tags: easy gluten free holiday cookies, easy gluten free recipes, gluten free, gluten free cookies | No Comments »
Recipe From Beth Hillson
Makes one 9-inch springform pie or two 9-inch pies
What’s easy as pie and three times more decadent? How about a Cherry Chocolate Hot Fudge Sundae Pie nestled in a chocolate macaroon crust? I drool just thinking about this incredible treat. Besides, the preparation is quick. Just assemble and freeze until about 20 minutes before serving. Your guests will be impressed!
I’ve made this as a dairy-free ice cream pie (yup, dairy-free) by using Coconut Bliss Cherry Amaretto Frozen Dessert. However, I’ve also made it with Ben & Jerry’s Cherry Garcia ice cream or frozen yogurt. The results are always amazing. Perfect for all the summer picnics at hand or make this for a festive winter party, too. Cut the crust into biscuit-size circles and layer with ice cream and hot fudge sauce in pretty glasses, too.
Macaroon Crust 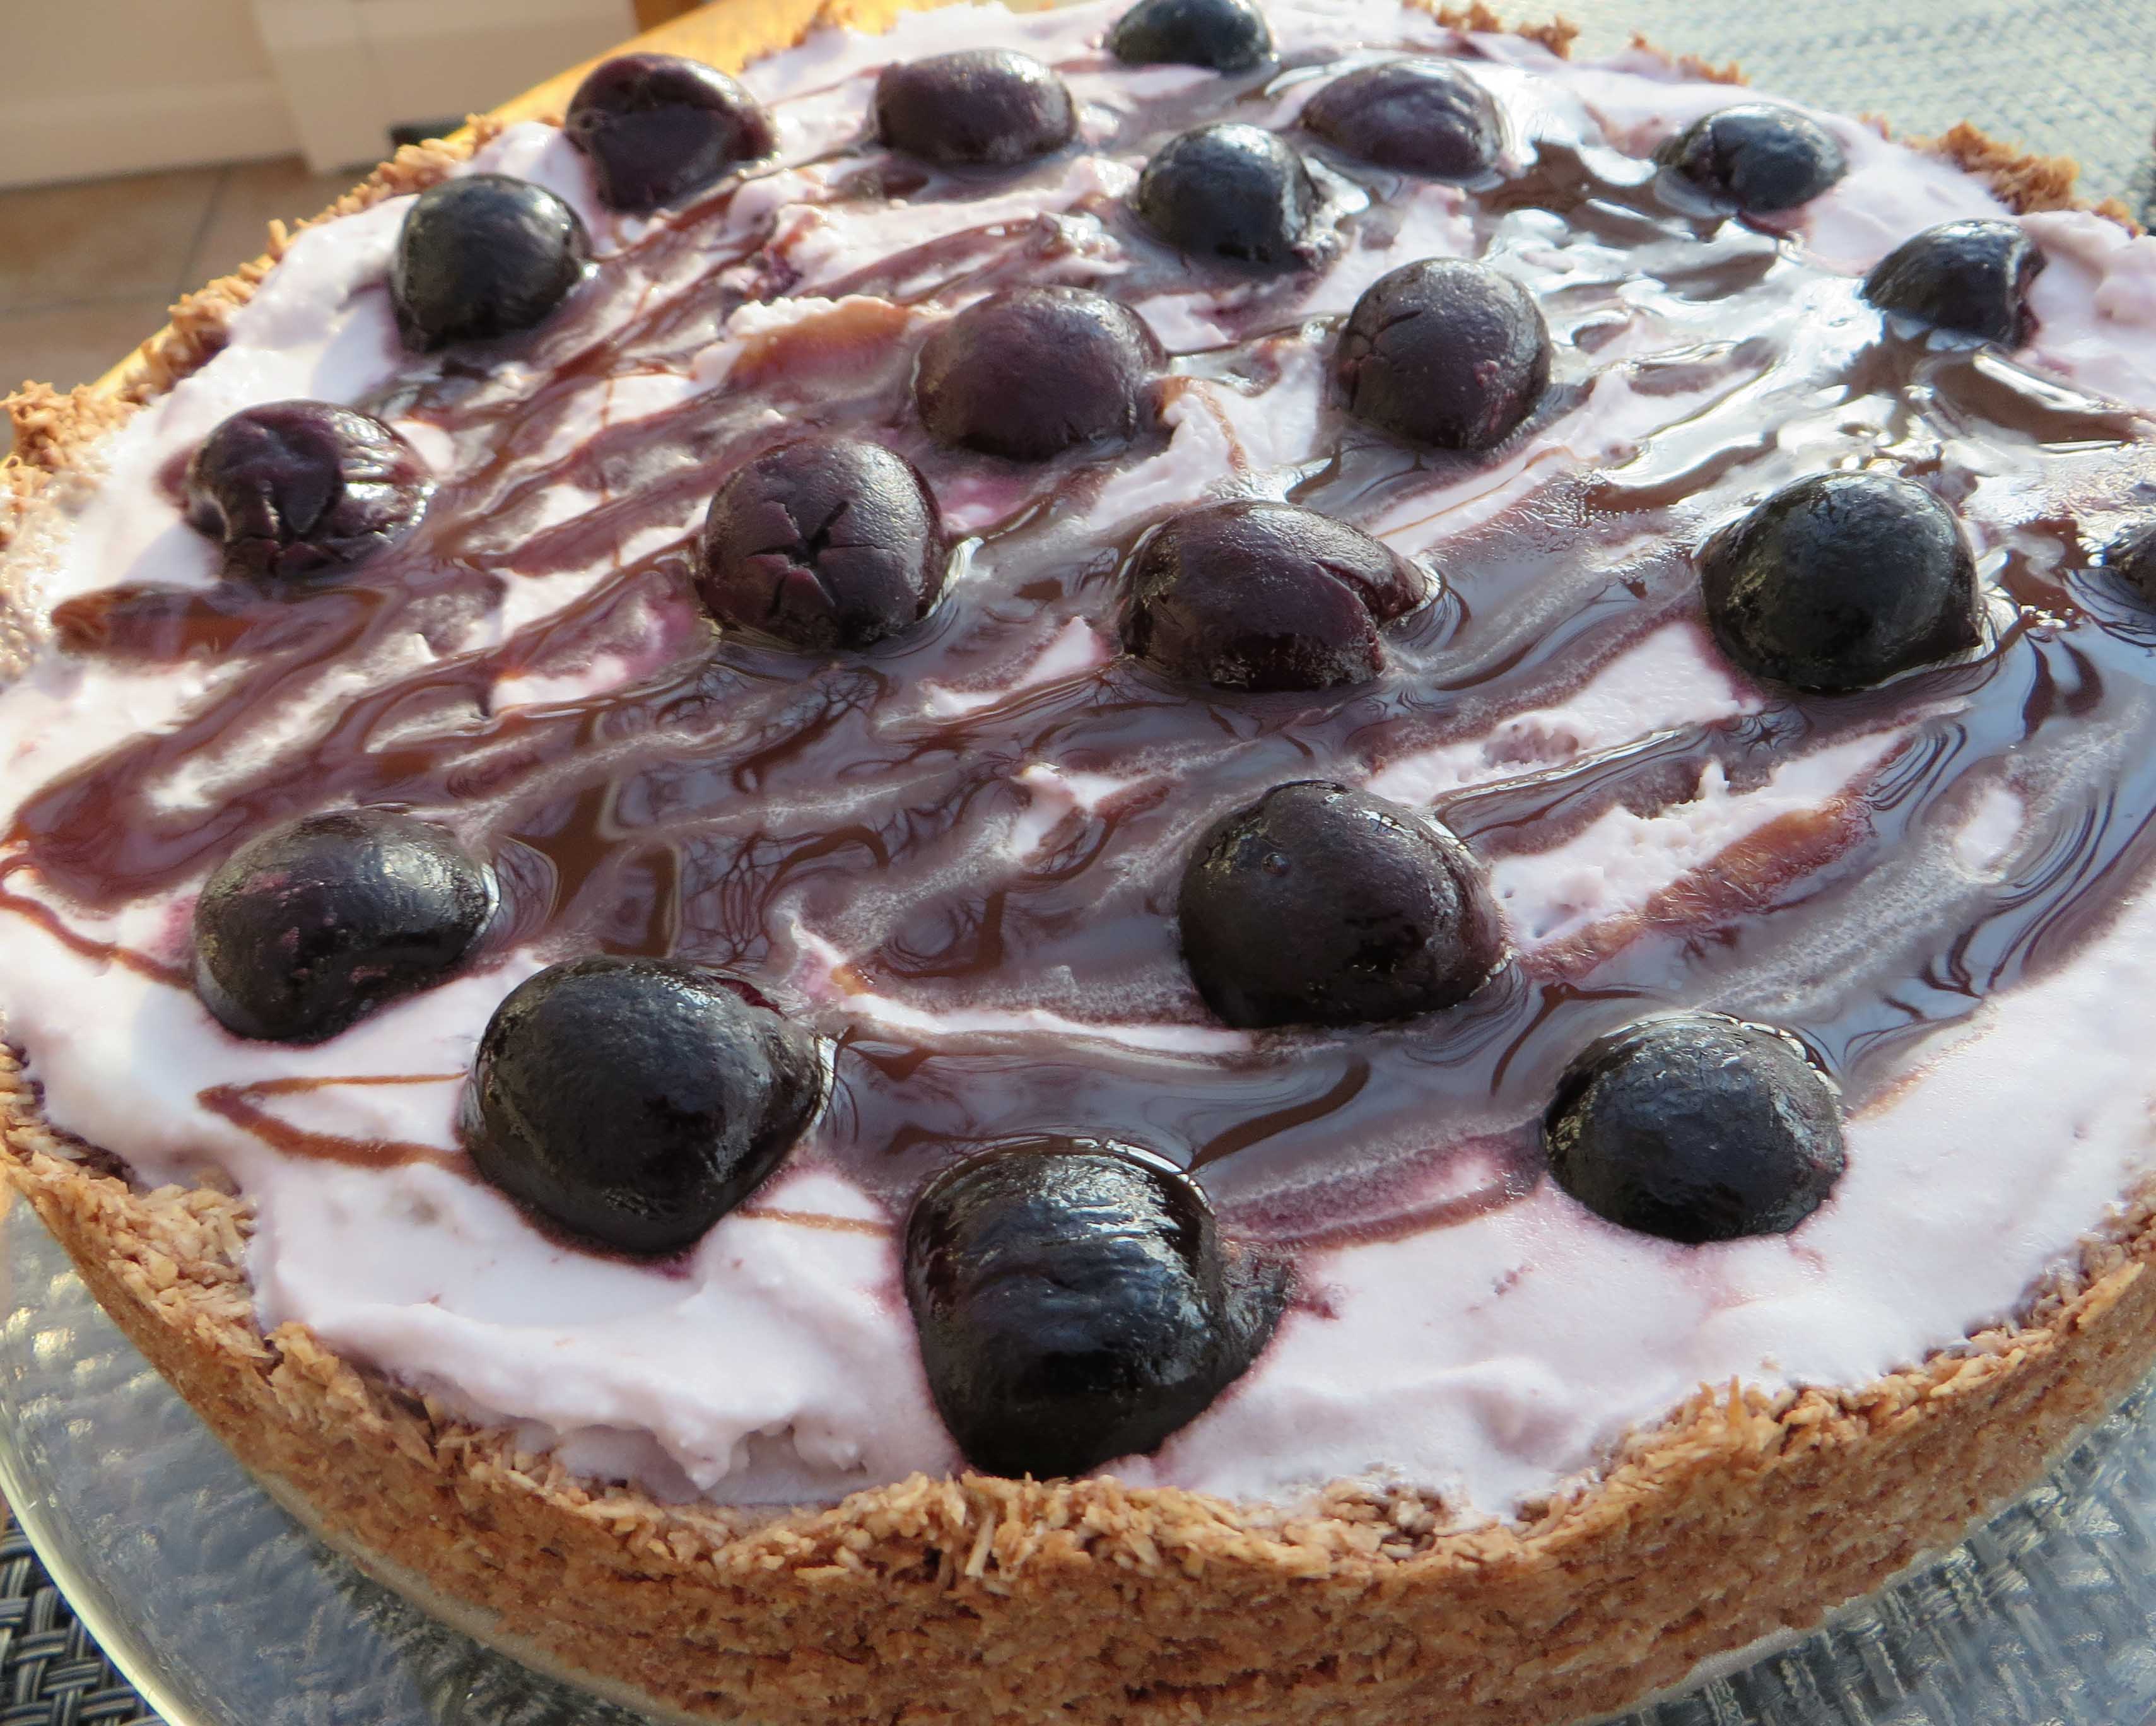
1 tablespoon safflower or coconut oil
1/3 cup chocolate chips, melted
3 1/4 cups unsweetened, shredded coconut
1/3 cup sugar
2 large egg whites
1/4 teaspoon salt
To Make the Crust
Preheat the oven to 325 degrees F. In a microwavable bowl, combine oil and chocolate chips. Microwave on medium power for 30 second intervals until chips are just melted. Set aside.
In a large bowl, combine the coconut, sugar, egg whites, and salt, mixing until all of the coconut is moistened. Fold in the melted chocolate mixture. Press the mixture into a 9-inch springform pan pressing evenly over the bottom of the pan and up the sides. Alternatively, press into the bottom of 2, 9-inch pie pans. Place the pan (s) on a baking sheet and bake for 20-25 minutes, or until golden and slightly crispy. Let cool completely.
To Make the Filling
2 pints Coconut Bliss Cherry Amaretto Frozen Dessert or use your favorite ice cream
Gluten-free hot chocolate fudge sauce, warmed or Hershey’s Chocolate Sauce
Pitted dark cherries, frozen or fresh, for topping
While preparing the crust, set the ice cream on the counter to soften slightly. Spread one pint of ice cream over the cooled crust. Smooth the top. Spread the second pint over the first layer. Spread evenly on top. (You may not need all of the second pint.) Freeze until the ice cream is totally frozen, about 4 to 6 hours or overnight. Right before serving, drizzle with warm hot fudge sauce. Top with cherries, if desired.
To slice, let sit at room temperature for a few minutes. Use a large knife dipped in warm water to cut the slices. Serve immediately with extra chocolate fudge sauce and cherries.
Categories: Recipes | Tags: dairy free dessert, easy quick gluten-free dessert, gluten free, gluten free ice cream pie, gluten free picnic foods | No Comments »
From Beth Hillson
Makes 1 loaf (14 servings)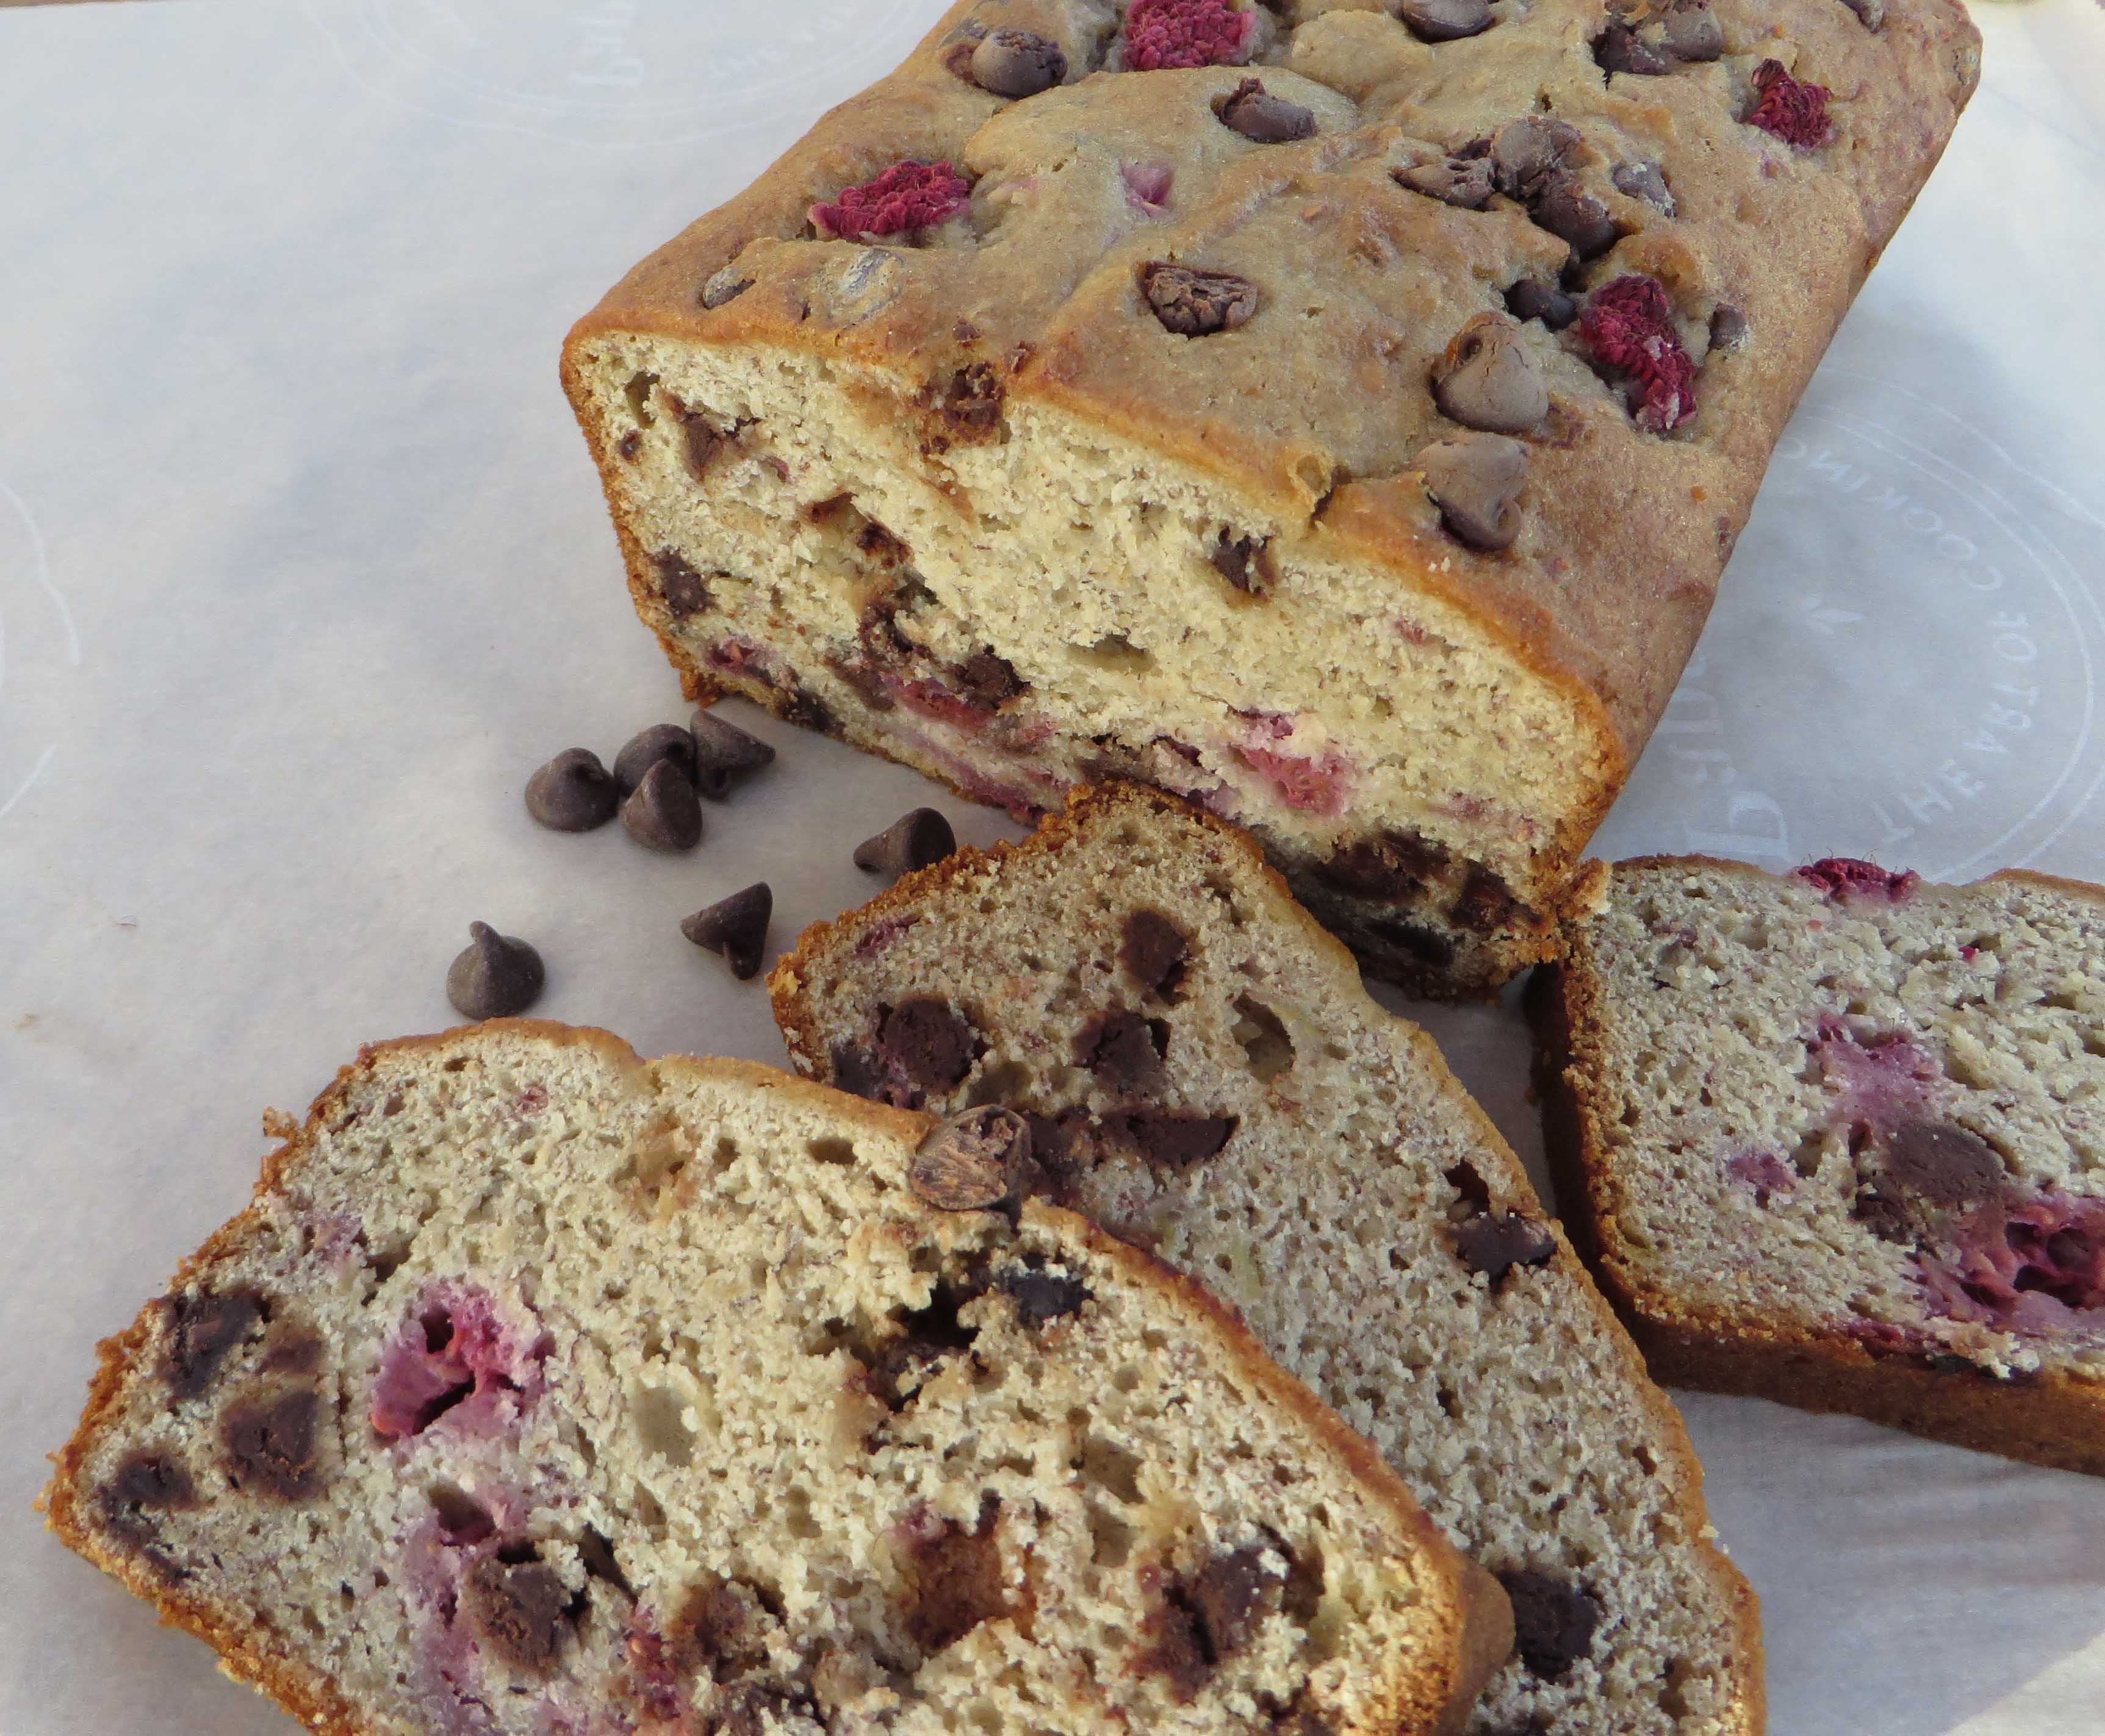
Could anything be better than having three favorite flavors packed into one recipe? In this loaf, raspberries, banana and chocolate blend together to make a slightly sweet loaf that is as pretty as it is delicious. Leftovers can be sliced and frozen. Thaw and reheat in a 350 degree oven for 10 minutes.
2 cups Beth’s Gluten-Free Quick Bread Flour Blend + 1 tablespoon (next)
3/4 teaspoon baking soda
1 cup granulated white sugar
4 tablespoons (1/2 stick) unsalted butter, at room temperature
2 large eggs
1 1/4 cups mashed ripe banana (about 3 medium bananas)
1/3 cup plain low fat yogurt
1 teaspoon vanilla extract
1 cup dark or semisweet chocolate chips
1 cup halved raspberries
Additional raspberries and chocolate chips for topping, optional
Preheat oven to 350°F. Spray a 9×5-inch loaf pan with cooking spray. In a medium bowl, whisk together the 2 cups of flour blend and baking soda.
In a separate large bowl, beat the sugar and butter with an electric mixer at medium speed until well blended (about 1 minute). Add the eggs one at a time, beating well after each addition. Add the banana, yogurt, and vanilla; beat until blended. Stir in the flour mixture. Mix just until moist. Fold in the chocolate chips. Gently toss the raspberries with the remaining 1 tablespoon of flour blend and fold into batter.
Spoon the batter into the prepared pan. Top with a few additional chocolate chips and raspberries, if desired.
Bake for 60 to 65 minutes or until a wooden pick inserted in center comes out clean and the top feels firm to the touch.
Cool 15 minutes in the pan on a wire rack. Remove from pan and cool completely on the wire rack.
Beth’s Gluten-Free Quick Bread Flour Blend
Several flours are interchangeable in this flour blend. You’ll see them noted here. I prefer using cornstarch as it produces a lighter quick bread loaf. However, potato starch produces a chewier texture in the beer bread. Take your pick according to preference and food sensitivities.
Combine these ingredients. Blend well, then scoop out the amount needed for your recipe.
1 cup sorghum flour (or corn or brown rice flour)
¾ cup rice flour (or buckwheat flour)
¾ cup cornstarch (or potato starch or tapioca starch flour)
½ cup amaranth flour (or quinoa, buckwheat, or millet flour)
2 ½ teaspoons xanthan gum
1 ¼ teaspoons salt
Categories: Recipes | Tags: gluten free, gluten free baking, gluten free quick breads, gluten free quick recipes, yeast free breads | No Comments »
From Beth Hillson
The best thing about quick breads is suggested in the name. With no yeast to coax into rising and no long waits or kneading, quick breads reach lofty limits via fast-acting baking powder or baking soda or both. Once liquids and leavening touch, the action begins; quick bread goes right into the oven to maximize the chemical reaction that is beginning. Best yet, quick breads can be enjoyed by those who are gluten free and yeast free and miss their bread. Owing to the light texture and sumptuous flavor of this bread, no one misses out!
Honey Beer Bread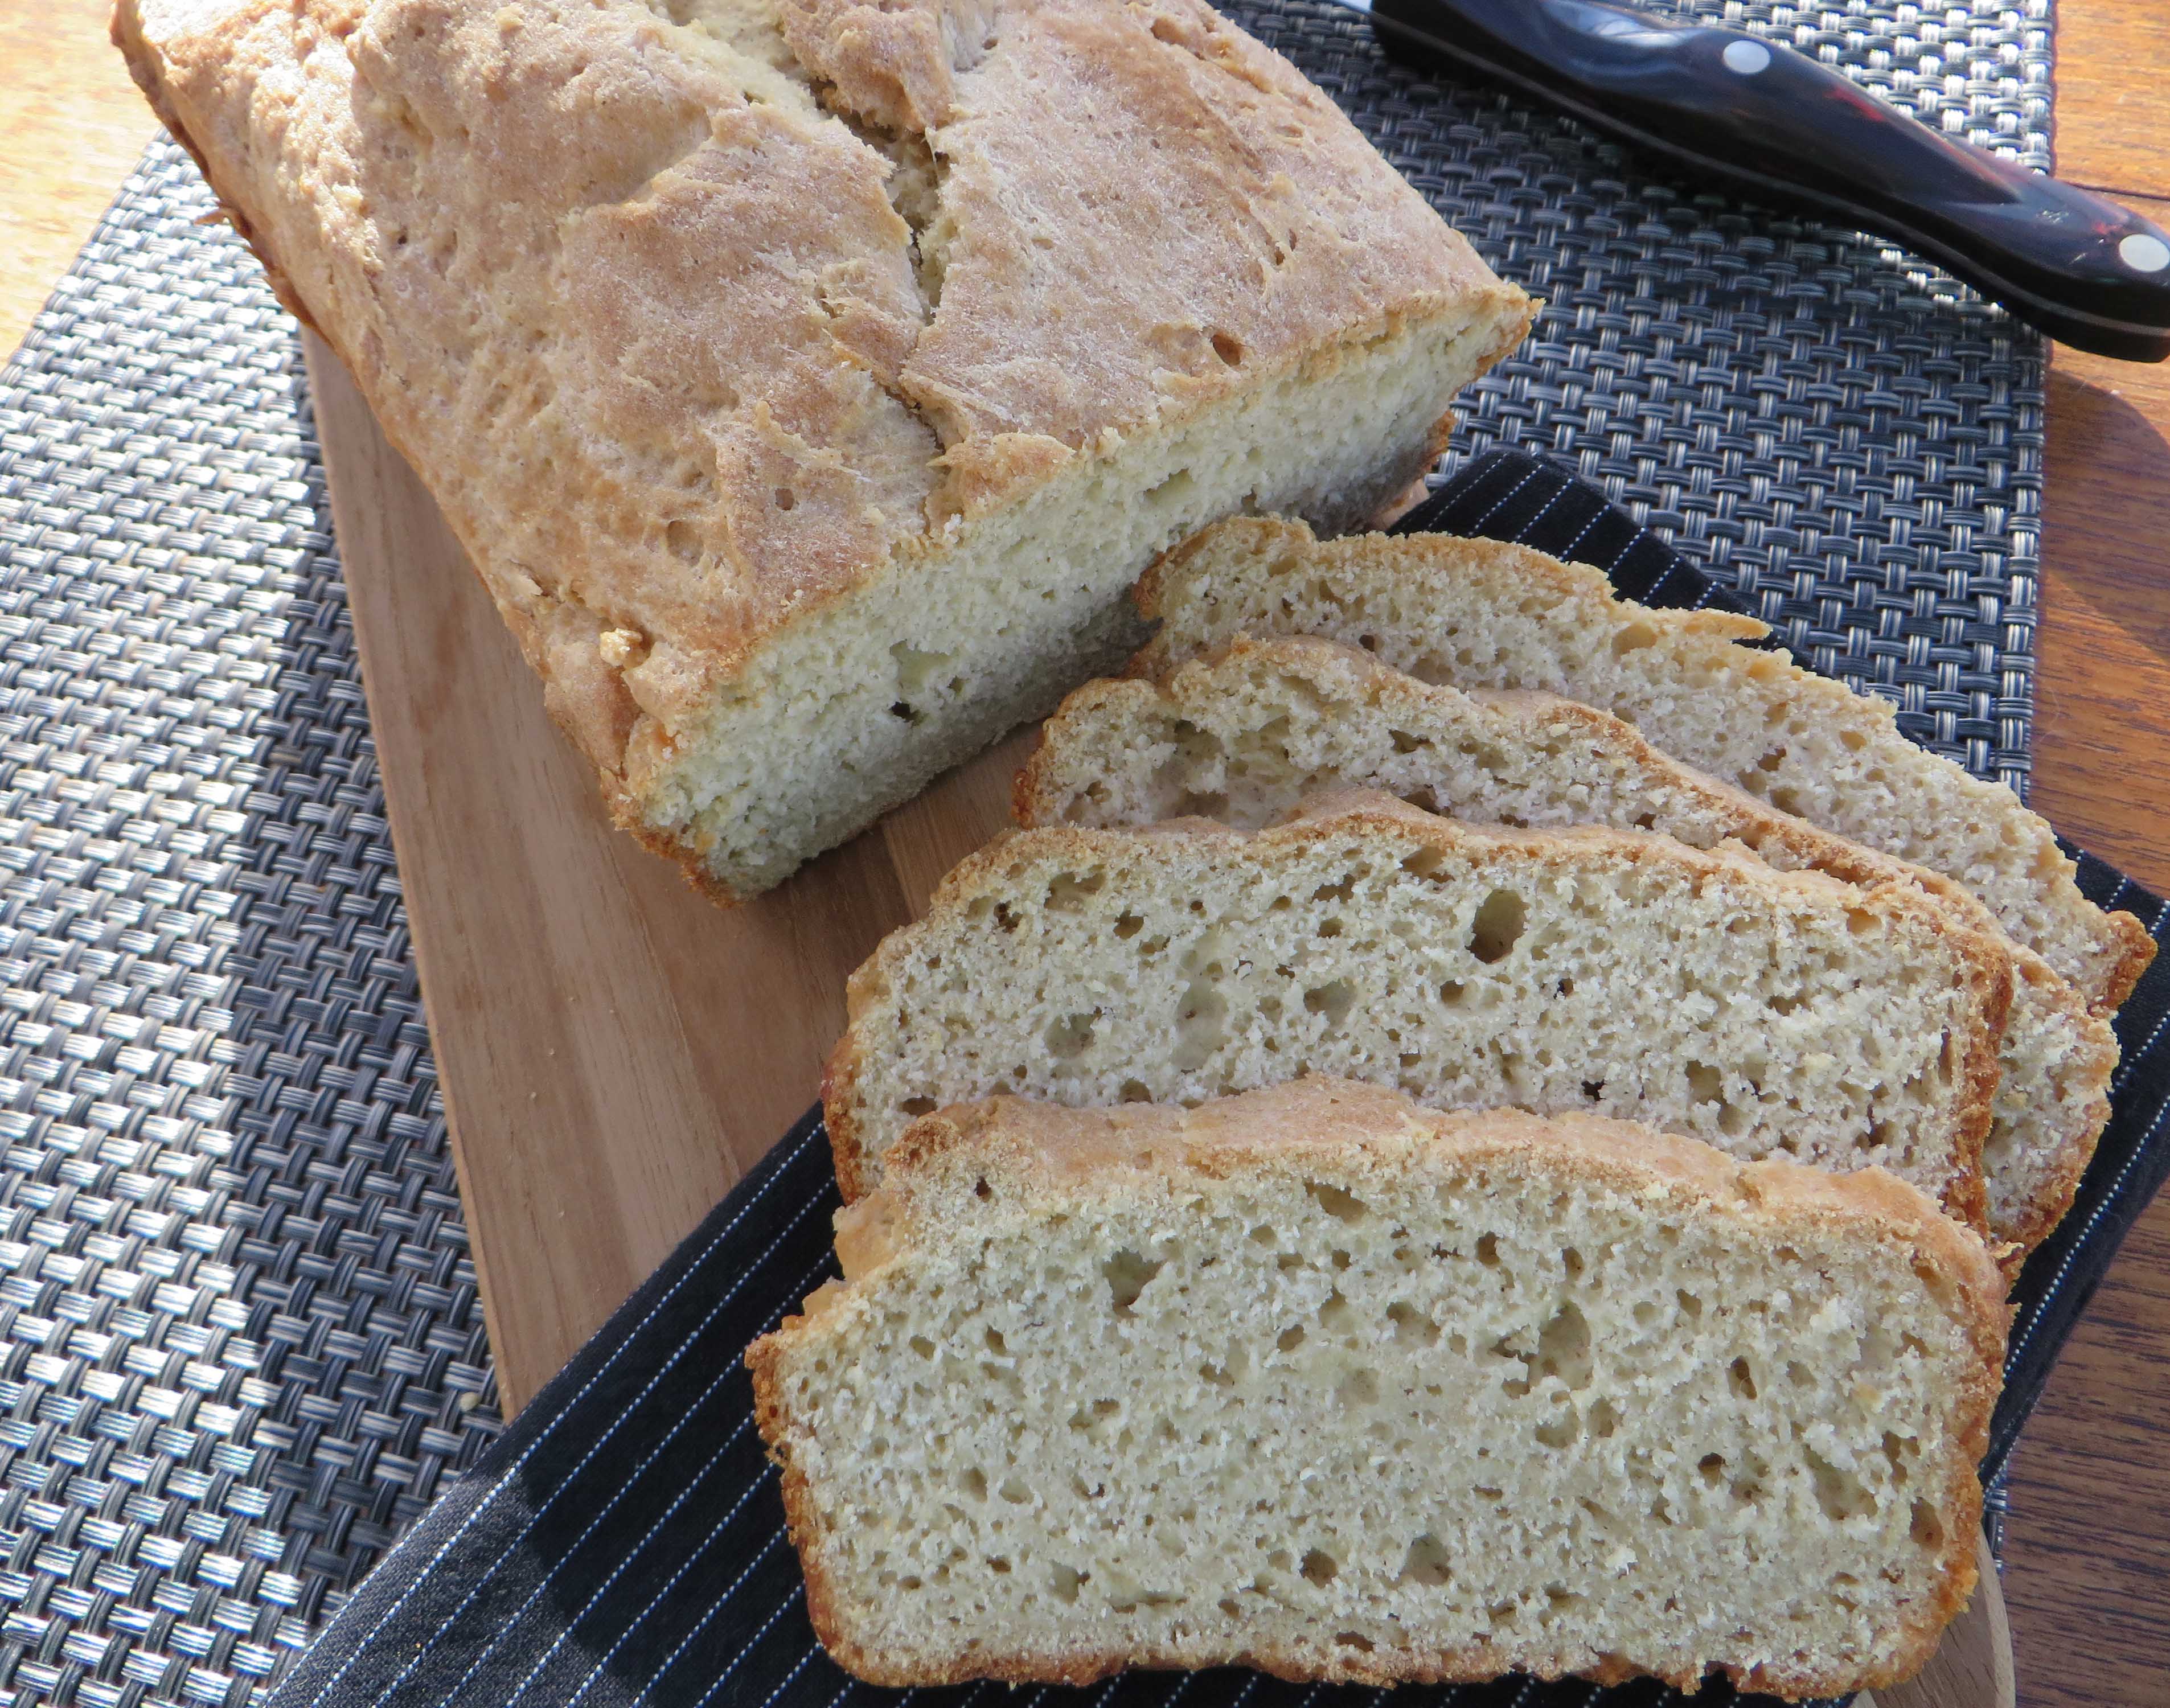
Makes 1 loaf (14 servings)
This recipe produces a light and moist loaf. You can replace the beer with an equal amount of seltzer water to turn this into a wonderful, yeast-free sandwich bread.
3 cups Beth’s Gluten-Free Quick Bread Flour Blend (next)
1 tablespoon baking powder
1 tablespoon white sugar, optional
3 large eggs at room temperature
3 tablespoons olive oil
3 tablespoons honey
1 1/3 cups gluten-free beer or seltzer water at room temperature
2 teaspoons melted butter or dairy-free buttery spread for topping
Preheat oven to 375 degrees F (190 degrees C). Grease a 9x5x3-inch loaf pan.
Mix flour blend, baking powder, and sugar, if used, together in a bowl.
Beat eggs, olive oil, and honey together in a separate large bowl; add flour mixture and beat with an electric mixer until you get a smooth batter. Stir beer into the batter and beat batter until smooth. Transfer to prepared loaf pan. Brush the top of the loaf with melted butter.
Bake in preheated oven until cake tester comes out clean, about 45 to 50 minutes.
Cool in pan on a wire rack for 10 minutes. Turn bread out onto wire rack to cool completely before slicing.
Beth’s Gluten-Free Quick Bread Flour Blend
Several flours are interchangeable in a flour blend. You’ll see them noted here. I prefer using cornstarch as it produces a lighter quick bread loaf. However, potato starch produces a chewier texture in the beer bread. Take your pick according to preference and food sensitivities.
Combine these ingredients. Blend well, then scoop out the amount needed for your recipe.
1 cup sorghum flour (or corn or brown rice flour)
¾ cup rice flour (or buckwheat flour)
¾ cup cornstarch (or potato starch or tapioca starch flour)
½ cup amaranth flour (or quinoa, buckwheat, or millet flour)
2 ½ teaspoons xanthan gum
1 ¼ teaspoons salt
Categories: Recipes | Tags: easy gluten free recipes, gluten free, yeast free bread | No Comments »
I am grateful for good, gluten-free pizza and this one tops my list. It’s chewy, thanks to the addition of millet flour, and flavorful, thanks to the use of high protein flours. You can use any blend that contains one or more of these flours. (Chickpea, teff, and sorghum are all good.) Of course, you have to make this yourself, but it’s not difficult and these pizzas (par-baked or fully baked) can be frozen.
Using a pizza stone enhances the texture and fills the crust with a slightly smoky flavor. It’s yumminess to the 10th power. But, if you don’t have a stone, don’t fret. Use a heavy baking sheet or pizza pan and set it on the lowest rack in the oven.
The recipe is versatile, too. Use the dough to make pizza, pizza pockets, and focaccia. No need to let the dough rise. It will puff up nicely in the oven. However, if you like a thicker crust, let it rise for 10 minutes before adding toppings and bake an addition 3 to 4 minutes. I’ve suggested some of my favorite toppings. However, feel free to use whatever suits your fancy.
The Dough
Makes 2, 12-inch pizzas
2 ½ cups high protein blend of choice or my recipe, below
½ cup millet flour
1 tablespoon xanthan gum
1 teaspoon salt
2 teaspoons chopped dry or 1 tablespoon chopped fresh rosemary
5 teaspoons instant active dry yeast
1 1/3 cups warm water
2 tablespoons olive oil
1 tablespoon honey
1 teaspoon cider vinegar
Place the pizza stone on the lowest rack of the oven and preheat the oven to 450 degrees. (Do this 30 to 60 minutes ahead so the stone is very hot.) If you are not using a stone, it is not necessary to preheat the oven for an extended amount of time.
In the bowl of a heavy duty mixer fitted with the paddle attachment, combine the
high protein blend, millet flour, xanthan gum, salt, and rosemary. Blend well. Add the yeast and blend. Combine water, oil, honey, and vinegar. Beat at medium high speed for 3 to 5 minutes or until the dough thickens. Follow preparation instructions below.
Gourmet Toppings For One Pizza
Makes 1, 12-inch pizza
1 to 2 teaspoons good quality olive oil
2 tablespoons good quality pizza sauce (such as Muir Glen)
4 medium tomatoes (red, yellow and orange) thickly sliced
A handful of small, pitted cured black olives such as Nicoise
¼ cup cubed Manchego or other cheese (optional)
Freshly grated Parmesan cheese
Fresh rosemary for garnish
Preparation
Scoop half the dough onto a lightly oiled sheet of parchment paper. Cover with a sheet of lightly oiled plastic wrap. Use finger tips and palm to lightly press the dough into a 12-inch circle. Use finger tips to create a rim of dough around the edge that will become a pretty crust. Drizzle olive oil of the surface and top with a light coating of pizza sauce. Scatter tomato slices, olives and cheese over the sauce. Sprinkle with freshly grated Parmesan.
Slide onto pizza paddle and transfer to the preheated stone, sliding the parchment off the paddle and onto the stone or slide parchment onto a baking sheet and set in the lowest rack of the preheated oven. Bake 20 to 24 minutes depending on the thickness. The bottom of the pizza will be brown. Slide the pizza paddle under the parchment and slide the pizza out of the oven. Don’t worry if the paper tears a little. Sprinkle with fresh rosemary and serve.
Note: Double ingredients and repeat with remaining dough or prepare the crust and par-bake for 12 minutes (without toppings). Store the crust in the freezer for a later use. Thaw before adding toppings.
High Protein Blend (from Gluten-Free Makeovers)
Blend well and scoop out 2 ½ cups for the pizza recipe above. Reserve the rest for later use.
1¼ cups white or brown rice flour
1¼ cups sweet white sorghum flour
½ cup amaranth flour
¾ cup cornstarch or tapioca starch
Categories: Recipes | Tags: gluten free, gluten free pizza, gluten free pizza from scratch, gluten free pizza recipe, gluten free recipe | 2 Comments »
As with so many great recipes, this one passed through several channels, but rather than the old-fashioned grandmother to mother to daughter or son kind of hand-me-down, this one went through an internet-compressed timeline. One day, I read an account from Mark Bittman in the New York Times Magazine about his friend Jean-Georges Vongerichten’s squash on toast. It was not a recipe, per se, but an account, like someone passing along the gist of a recipe, the flavor, the texture, but never the amounts.
The mention of winter squash and caramelized onions caught my attention. What great flavors and there was nothing unhealthy or fattening, at least in the description. So I created a recipe from what I thought Jean-Georges might have told Mark and that Mark was recounting to his readers. I made the recipe for a Thanksgiving appetizer and served it with gluten-free French bread. Needless to say, it was a huge hit. Even my son wanted the recipe.
So, I figured I would copy the account from the New York Times online and fill in the details with my notes. But what came up was the original recipe from Jean-Georges Vongerichten. In some places, it was quite different than what I had created. It called for cheese, chili flakes, and mint. By then, I was hooked on my version. Here it is, a perfect dip or spread or appetizer that I’ll be serving at all our winter gatherings, especially for the Super Bowl.
Butternut Squash Spread 
1 medium butternut squash, peeled and cubed
4 tablespoons extra-virgin olive oil, divided
2 teaspoons kosher salt, divided
2 large yellow onions, peeled and thinly sliced
1/4 cup apple cider vinegar
2 tablespoons maple syrup
Gluten-free baguette, thinly sliced and lightly toasted
Extra salt, to taste
Heat the oven to 400. Toss the squash cubes with 2 tablespoons olive oil and 1 teaspoon of salt and spread the mixture over a parchment-lined baking sheet. Bake, stirring every few minutes, until tender and slightly colored, about 20 to 25 minutes. Edges should be golden brown and squash should be very tender. Remove from the oven.
Meanwhile, heat remaining 2 tablespoons olive oil over medium-high heat, add the onions and remaining teaspoon salt and cook, stirring frequently, until the onions are well softened and darkening, at least 15 minutes. Add the vinegar and syrup, stir and reduce until broken down, an additional 15 minutes or so. The mixture should be jammy.
Combine squash and onions in a bowl and smash with a fork until combined. Adjust seasoning. Serve with gluten-free toast or crackers.
Note: The original recipe says to spread this mixture on toasted bread, top with ricotta, goat cheese or mascarpone cheese, coarse salt and mint. I did not do this, but now that I’m passing this on, you can try your own version of this wonderful recipe!
Categories: Recipes | Tags: gluten free, gluten free and super bowl, gluten-free appetizers, gluten-free recipes | 1 Comment »
Christine from New Zealand wrote to say, “I haven’t had a Crumpet for years and wondered if you had a recipe for gluten free crumpets?”
She piqued my interest as I had never had one. So I did a bit of research. Crumpets are made with a rather thin yeast batter and are cooked on a bake stone or griddle in crumpet or English muffin rings. The distinguishing feature of real crumpets is their pliable texture and the characteristic holes into which butter deliciously melts and oozes.
After reading a mainstream formula, I developed this recipe makeover. These crumpets are soft, light in texture and quite tasty. You will not be disappointed. Add your favorite jam or slather with butter. I like both. If you are not able to get one of the all-purpose flour blends I mentioned here, you can use any flour blend you have available.
Crumpets by Beth Hillson 
This recipe makes 8 to 10 crumpets.
1 ½ cups all-purpose gluten-free flour blend such as Gluten-Free Pantry All-Purpose Flour or King Arthur Multi-Purpose Flour
½ cup sorghum flour
2 ¼ teaspoons dry active yeast
1 teaspoon of sugar
½ teaspoon cream of tartar
¾ cup warm milk (about 110 degrees)
½ cup warm water (about 110 degrees)
1 ½ teaspoon baking powder
1 teaspoon baking soda
1 tablespoon melted butter
TIP: If using a blend that does not contain gum and salt, add 1 teaspoon xanthan gum and ½ teaspoon salt.
1) Combine flours, yeast, sugar, cream of tartar and blend. Add warm milk and water and beat for 3 minutes. Cover with plastic wrap and let stand in a warm place for about 20 minutes. The thick batter should double in size.
2) Add baking powder, baking soda and butter and beat for 1 minute or until well mixed. Cover and let stand 10 minutes.
3) Preheat a griddle to 350 degrees. Coat 8 to 10, 3 ½ inch English muffin rings well with vegetable spray. Set on griddle, bake stone or large skillet (see note below).
4) Place enough mixture into the center of each ring to come halfway to the top of the ring. Cook for 4-6 minutes over medium heat, until bubbles appear over the entire surface, and the dough appears ‘dry’.
5) Use tongs to remove the ring. Turn the crumpet over and cook an additional 2 to 4 minutes to brown the top. Remove from the pan and cool on a baking rack. Split and enjoy. Or, if thin enough, do not split before eating.
Notes: Alternatively, make thinner crumpets by filling only one-third of the way up the rings. These do not need to be cooked on the second side. If you don’t have a griddle, heat a heavy cast iron skillet and line it with as many rings as possible. You’ll need to make these in more than one batch.
Categories: Recipes | Tags: gluten free, gluten free bread, gluten free crumpets, gluten free recipe, gluten-free makeover | 2 Comments »
In celebration of reaching 1,500 “Likes” on Facebook, I am sharing this collections of holiday recipes with all of you. Here’s to a happy, healthy, and tasty holiday season!
Categories: Recipes | Tags: gluten free, gluten-free holiday dishes, gluten-free recipes | 6 Comments »
Follow Us Online
More Cookbook Stuff
Gluten-Free Makeovers - - Nearly 200 recipe makeovers for everyone to enjoy. Buy it at glutenfreeandmore.com, Amazon.com and barnesandnoble.com.
About This Blog
 Baking guru, Beth Hillson, transforms favorite foods into recipes that are safe for your gluten-free diet.


