
Blog Archives
A Recipe by Beth Hillson
Yield: 24 bars
This is my latest go-to dessert. I take it to pot luck dinners, bake sales, you name it! It’s easy, delicious and amazingly versatile. Use whatever fruit is in season. Vary the sweetness of this recipe by adding more or less sugar depending on your tastebuds and the natural sweetness of the fruit. The bars freeze well.
I made these using RYZE Blue Flour Blend. Instead of measuring out a bunch of flours, I use 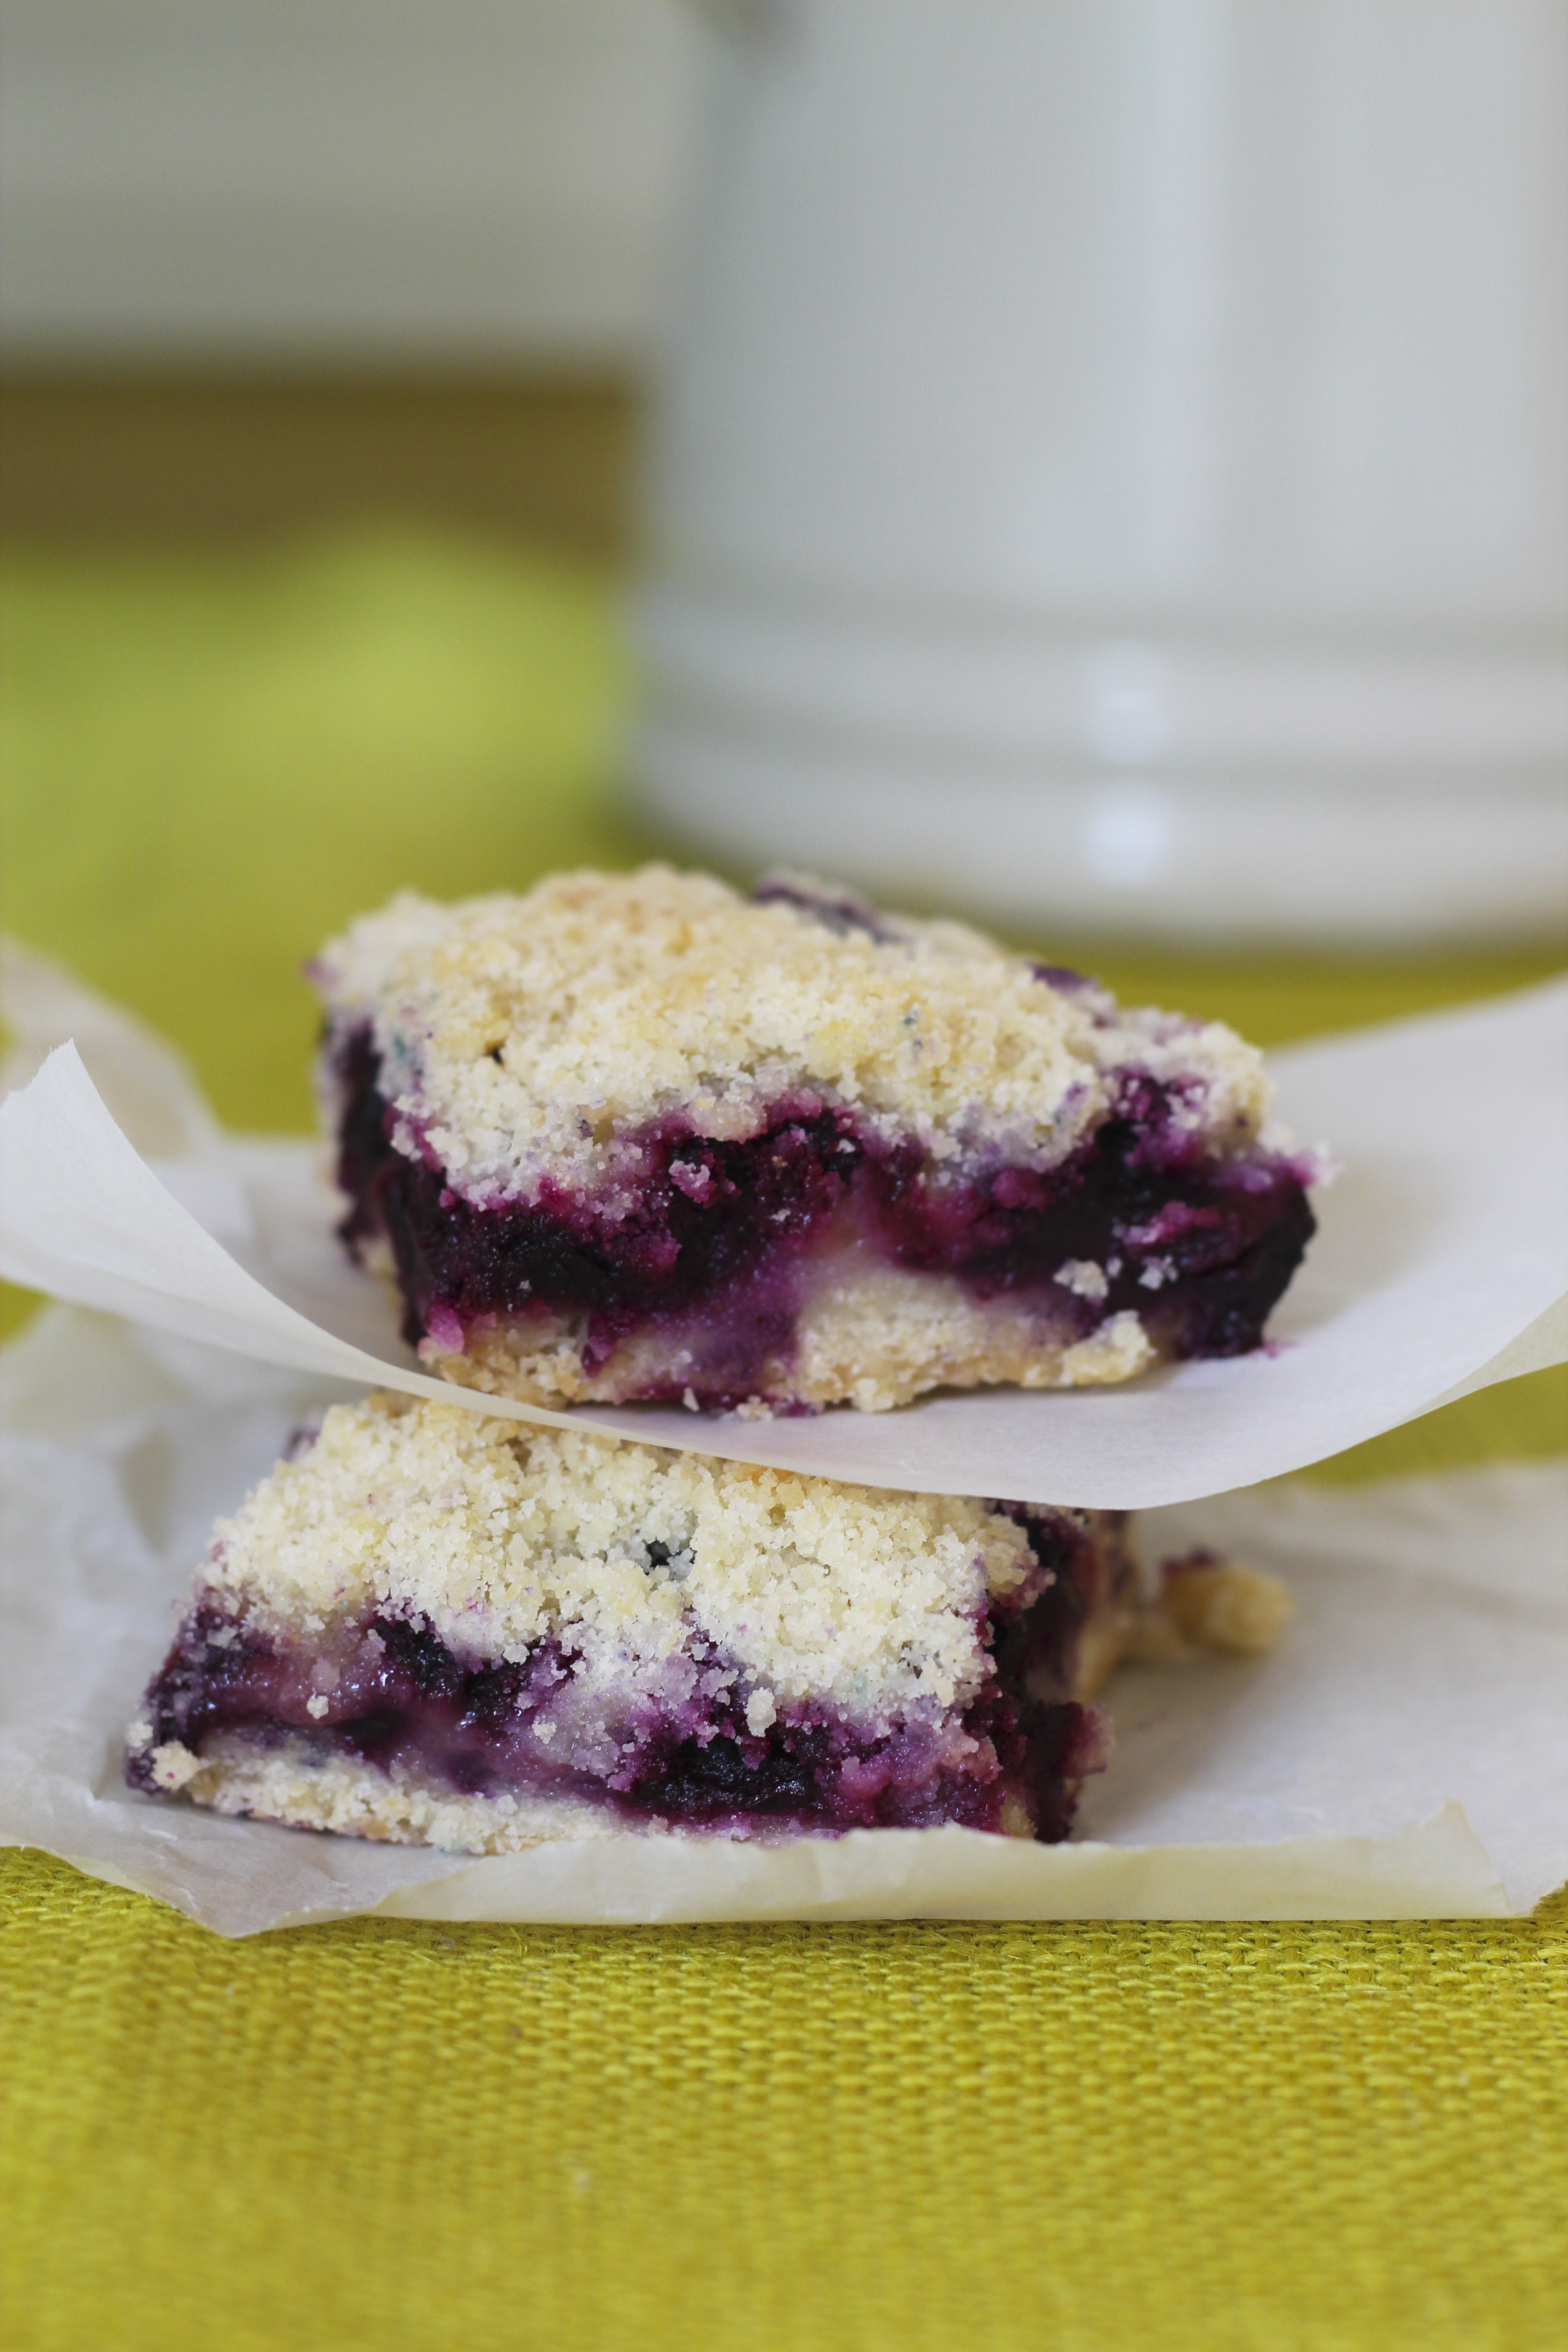 one ingredient. However, you could certainly make this with any A/P flour blend. Make sure it contains xanthan gum or add 1 teaspoon xanthan gum to the recipe.
For the Dough
3 cups RYZE Blue Flour Blend or an A/P Gluten-Free Flour Blend that contains xanthan gum
1 cup granulated sugar
1 teaspoon baking powder
¼ teaspoon salt
1 cup (2 sticks) unsalted butter, cold, cut into small pieces
1 large egg, lightly beaten
For the Filling
4 cups (2 pints) fresh blueberries of 5 cups peeled, sliced peaches or apples (about 6-7)
1 tablespoon lemon juice
1 teaspoon vanilla
½ cup RYZE Blue Flour Blend or an A/P Gluten-Free Flour Blend that contains xanthan gum
½ to ¾ cup granulated sugar
¼ teaspoon salt
½ teaspoon ground cinnamon
¼ teaspoon ground nutmeg
Preheat the oven to 375 degrees F. Line a 9×13-inch baking pan with aluminum foil and coat with vegetable spray.
Make the Dough: In the bowl of a food processor fitted with the knife blade, add the flour, sugar, baking powder and salt. Pulse several times to combine. Add butter and pulse until mixture resembles coarse meal (about 10 pulses). Add the egg and pulse briefly. Empty contents into a large bowl. With a fork, mix the dough until egg is distributed evenly. Dough will be crumbly. Or combine dry ingredients in a medium bowl. Use a pastry blender to cut in the butter, and then the egg.
Pat half of the dough into the prepared pan. Place the pan and the remainder of the dough in the refrigerator to stay cold while preparing the filling.
Make the Filling: Place the washed and drained blueberries in a large bowl and sprinkle with lemon juice and vanilla. Mix gently. In a separate bowl, whisk together the flour, sugar, salt, cinnamon and nutmeg. Sprinkle over the fruit and toss gently with a wooden spoon.
Spread the fruit mixture evenly over the crust. Crumble the remaining dough over the blueberries.
Bake in the preheated oven for 45 minutes, or until the top is slightly brown. Cool completely before cutting into squares.

Categories: Recipes | Tags: baking, blueberries, dessert recipes, easy quick gluten-free dessert, gluten free baking, gluten-free recipes, Sweets | No Comments »
Recipe by Beth Hillson
Serves 6
Gluten-Free whole-grain sorghum is a newcomer to our great grain choices. A powerhouse of nutrients, vitamins and fiber, sorghum is rich in B vitamins and minerals, it promotes digestion, lowers blood sugar levels and reduces cholesterol. Whole-grain sorghum takes an hour to cook. Pearled sorghum contains fewer nutrients and less fiber but cooks in less time (about 40 minutes). Either way, prepare sorghum a day ahead and refrigerated until ready to use. Add delicious veggies like corn, tomatoes and kale and you’ve got a full meal.
This recipe is part of my Healthy Plate Project, a wellness program to make life healthier one meal at a time.

3 cups water
1 cup uncooked sorghum or pearled sorghum
½ teaspoon salt
6 teaspoons olive oil
1 tablespoon fresh tarragon
2 tablespoons white balsamic vinegar
2 teaspoons sugar, optional
2 teaspoons Dijon mustard
2 teaspoons crushed garlic
½ teaspoon kosher salt
¼ teaspoon black pepper
2-3 cups lightly sautéed chopped kale or baby kale
2 cups halved cherry tomatoes
1 ½ cups fresh corn kernels*
Combine water, sorghum, and ½ teaspoon salt in a medium saucepan. Bring to a boil; cover, reduce heat to low, and simmer 1 hour or until. tender. Drain; cool.
Combine olive oil, tarragon, vinegar, mustard, garlic, salt, and pepper in a large bowl. Whisk well . Add cooked sorghum, kale, tomatoes, and corn kernels; toss.
*Grill corn on the cob. Cool and scrape the kernels off the cob.
Recipe from Beth Hillson
Serves 16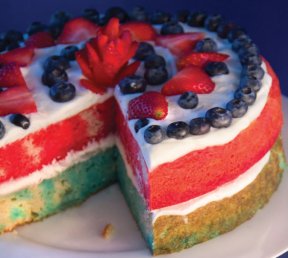
Here’s a great way to celebrate the Fourth of July. Layers are colored red and blue with the help of Jell-O. Fresh strawberries and blueberries are a no-fuss decoration and whipped cream makes the cake look luscious. The cake can be stored, well wrapped, for 3 days in the refrigerator. Do not freeze.
Make this easy, decorative dessert for any celebration by varying the Jell-O flavors and colors to match the holiday. This works with natural gelatin products, too. If you can’t find the color you want, use unflavored gelatin and color with natural food dye. Add a few drops of a flavor extract of your choice, if desired.
1 recipe (2 layers) baked Perfect Layer Cake (below)
2 cups boiling water, divided
1 (3-ounce) package Jell-O raspberry or strawberry gelatin
1 (3-ounce) package Jell-O berry blue gelatin
1 (8-ounce) container very cold heavy cream, coconut cream or prepared whipped topping, divided
1 cup confectioners’ sugar
½ teaspoon pure vanilla extract
1 cup fresh blueberries
1 cup sliced fresh strawberries
Prepare Perfect Layer Cake. Cool the 2 baked layers in their pans. Pierce each cake with a fork at ½-inch intervals.
Using 2 medium bowls, add 1 cup boiling water to each Jell-O flavor. Stir well to dissolve. Pour raspberry-flavored Jell-O over 1 cake layer and berry blue over other cake layer. Refrigerate several hours until firm.
Make whipped cream by beating heavy cream on medium speed, then high speed until thick. Add confectioners’ sugar and vanilla and beat until mixture is very thick. Refrigerate until ready to use. (If using prepared dairy-free whipped topping, skip this step.)
To unmold cake layers, place each pan in a sink with hot water touching just the bottom of the pan for 15 to 30 seconds. Unmold one layer by inverting it onto a cake plate. Spread 1 cup whipped cream on top. Unmold other layer and place on top of whipped cream.
Frost top of cake with more whipped cream. If desired, use extra whipped cream to frost sides of the cake. Decorate with berries. Refrigerate about 1 hour before serving.
Perfect Gluten-Free Layer Cake
Makes 2, 9-inch layers
This makes a great layer cake that can be decorated any way you wish. For other cakes, you’ll want to dust the layer cake pans with white rice flour. For the Fourth of July Cake, do not dust the pans.
2½ cups Cake & Pastry Flour Blend (follows)
4 teaspoons baking powder
1¼ teaspoons xanthan gum
½ teaspoon baking soda
½ teaspoon salt
¾ cup (1½ sticks) unsalted butter, room temperature
1 ½ cups sugar
4 large eggs
2 teaspoons pure vanilla extract
¾ cup milk of choice
Preheat oven to 350°F. Lightly grease two 9-inch round cake pans that are 2 inches deep. Do not dust with flour if making Fourth of July Cake.
Combine flour blend, baking powder, xanthan gum, baking soda and salt in a large bowl. Whisk until well blended. Set aside.
In a large mixing bowl, beat together butter and sugar until smooth and fluffy. Add eggs and vanilla and beat on medium speed 2 minutes or until batter is smooth. Mix in dry ingredients. Add milk and beat until smooth.
Divide batter evenly between prepared pans and smooth tops. Place in preheated oven and bake 23 to 25 minutes or until tops are golden brown and a toothpick inserted in the center comes out clean.
Remove from oven and let cool in the pans. Follow directions above to make Fourth of July Cake or let cool 10 minutes in pans and turn layers out onto a wire rack to cool completely before frosting.
Baker’s Tip: Use this recipe to make 24 cupcakes. To make cupcakes, spoon batter evenly into cups, filling about 2/3 full, and bake in preheated oven 15 to 18 minutes or until tops are golden brown and a toothpick inserted in the center comes out clean. Cool 10 minutes in pans before turning onto a wire rack to cool completely. Frost when cool.
Cake & Pastry Flour Blend
MAKES 2½ CUPS
1 cup white rice flour
¾ cup sorghum flour
¾ cup cornstarch, tapioca starch/flour or potato starch (not potato flour)
Whisk ingredients together. Store in a tightly covered container in the refrigerator. Bring to room temperature before using.
Recipe by Beth Hillson
Makes 14 to 16 cookies
These yummy, not-too-sweet cookies are healthy and satisfying – great for breakfast on the go, brunch or snacking. 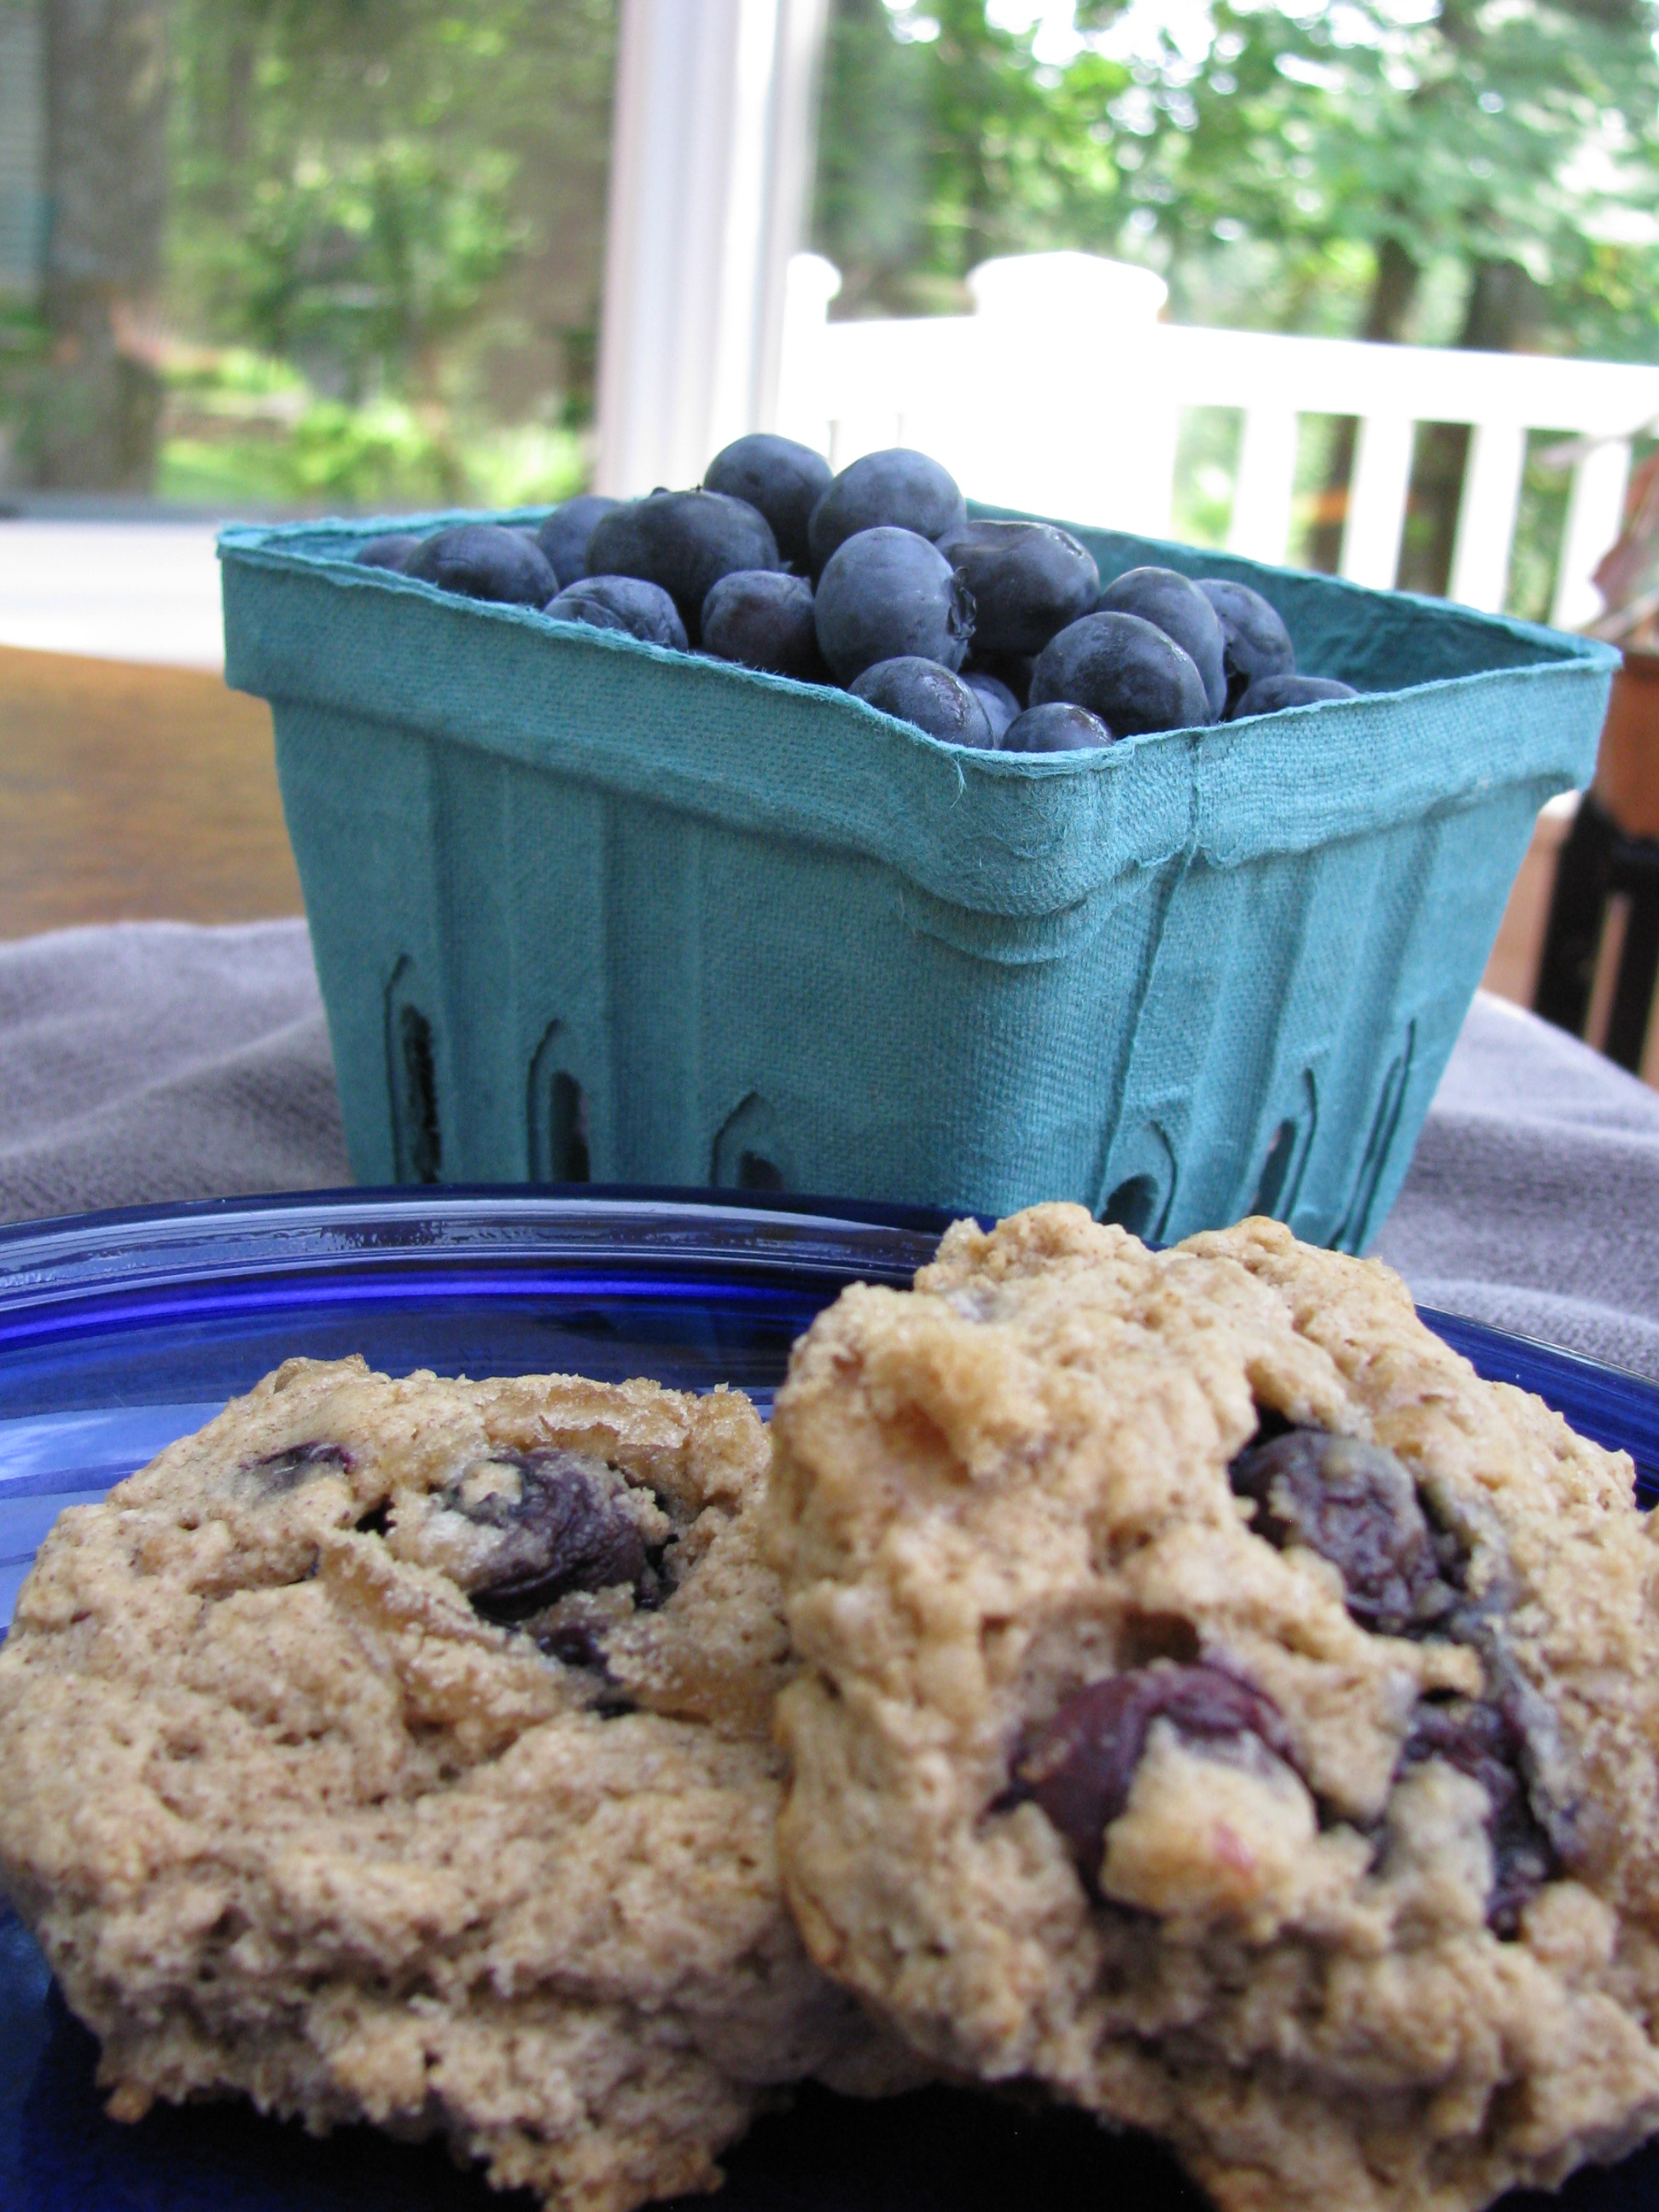 Double the recipe, wrap well, and store in the freezer.
1 1/2 cups all-purpose gluten-free blend
1/2 cup whole grain gluten-free flour (like amaranth, buckwheat, or sorghum)
1 teaspoon xanthan gum
1/4 teaspoon salt
1⁄3 cup packed light brown sugar, more for sprinkling on top
1 tablespoon baking powder
½ teaspoon baking soda
1 teaspoon ground cinnamon
5 tablespoon cold unsalted butter or buttery non-dairy spread, cut into small pieces
2 large eggs
½ cup yogurt, soy or coconut yogurt plus 2 tablespoons for brushing tops of cookies
2 teaspoons vanilla extract
¾ cup fresh blueberries, rinsed and drained
½ cup coarsely chopped walnuts or crispy gluten-free cereal
Preheat the oven to 350°F. Line two cookie sheets with parchment paper.
Combine the flour blend, whole grain flour, xanthan gum, salt, brown sugar, baking powder, baking soda, and cinnamon in a large bowl. Mix until the brown sugar is blended into the ingredients. Cut in the butter until the mixture resembles coarse meal.
In a separate bowl using a mixer, beat the eggs, yogurt and vanilla for 1 minute. Add to the dry ingredients and beat until smooth. Fold in the blueberries and nuts.
Using a medium scoop, scoop the dough onto the prepared cookie sheets, leaving about 1 inch between each. Use a sheet of plastic wrap to gently press and smooth the cookies into ½ -inch-thick disks. Brush with additional yogurt, sprinkle with brown sugar, and bake for 19 to 20 minutes. Serve warm.
The cookies may be reheated. These freeze well.
From Beth Hillson
When I was diagnosed with celiac disease in 1976, I lived in Europe. Glorious food was everywhere, but I didn’t know what I could and couldn’t eat. Sure, I stayed away from the obvious like brioche, croissant and pizza. (It brings tears to my eyes to think about all the goodies I missed.) But the subtle hidden sources of gluten were a problem and for that I went to culinary school – Cordon Bleu and Dieppe Cooking School for starters – to better understand the important components of baking and cooking. Along with learning important questions to ask (Is the fish dusted in flour? Is the sauce thickened?), I also learned to bake flaky crusts and brioche that, of course, I couldn’t eat.
Being a pioneering woman, I started to make over those recipes, maintaining the ratios but replacing the flour with rice flour and cornstarch, the only two ingredients I had in my pantry at the time. The results were decent enough to keep me returning to my mixing bowls. But I knew there was room for improvement – sometimes those crusts were more crumbly than flaky and rolls often bounced or served as doorstops. I shudder to think of how many gluten free sandwiches have fallen apart in my hands depositing mayonnaise, cold cuts and chunks of dry bread in my lap.
I knew I had a long way to go to replicate those rich baked goods that Chef La Court had taught us to make in France. But I was willing to try. After all, I reaped the benefits!
Admittedly, my Gluten-Free Pantry (GFP) mixes were light years ahead of anything else available in the eighties and nineties – revolutionary, almost. They provided many, many celiac patients with delicious homemade breads, muffins, brownies and such, and raised the standard we came to expect of our gluten free baked goods.
Since creating GFP in 1993, each iteration of gluten free baking has come closer to perfect. Don’t get me wrong. I’ve consumed my share of gritty, crumbly and dry food in my quest for excellent products. I’ve also tasted some amazing food along the way.
So, when RYZE Gluten Free asked me to try their new products (think, baking blends), I didn’t know what to expect – more gritty muffins and cookies or a product that might raise the bar once again.
I tried their flour in my favorite biscotti recipe – chocolate pistachio biscotti, a recipe I know is already great. It seemed like that would be a good benchmark, a great way to compare something new with something tried and true.
I replaced my complicated flour blend with an equal amount of RYZE flour. Yup, just one ingredient (well, actually two- whole grain brown rice and white rice), no gums, no starches. Without starches and gums, RYZE also has a better nutritional profile than most flour blends.
I wondered how RYZE would stand up to a pantry-full of flours. I mixed up the recipe and formed it into a log. Then I popped it into the oven for the first baking. Here comes the tricky part. Gluten free biscotti is difficult to cut. I always lose some slices to breakage and crumbling. I cooled the log, transferred it to a cutting board and began to slice. The first slice came away whole – no breakage; no crumbled edges. The second was the same. I was able to cut the third, fourth, and fifth without losing a single slice. Hmmm. Pretty amazing.
When I finished cutting the biscotti, I baked them again, cooled them and stored them. I brought some to my sister who is also a gluten free baker. The biscotti recipe is really hers. Her first question was, what did you do to keep them from crumbling?
I knew then that I was on to something– something revolutionary.
I’ve since made focaccia, biscuits, cookies and much more. All are moist, light and have a delicate crumb. I’ll share more recipes another time. For now, I have to say that RYZE Gluten Free raises the bar … and lucky for all of us gluten free bakers.
Here’s my recipe to Chocolate Pistachio Biscotti and a picture of the RYZE packages.
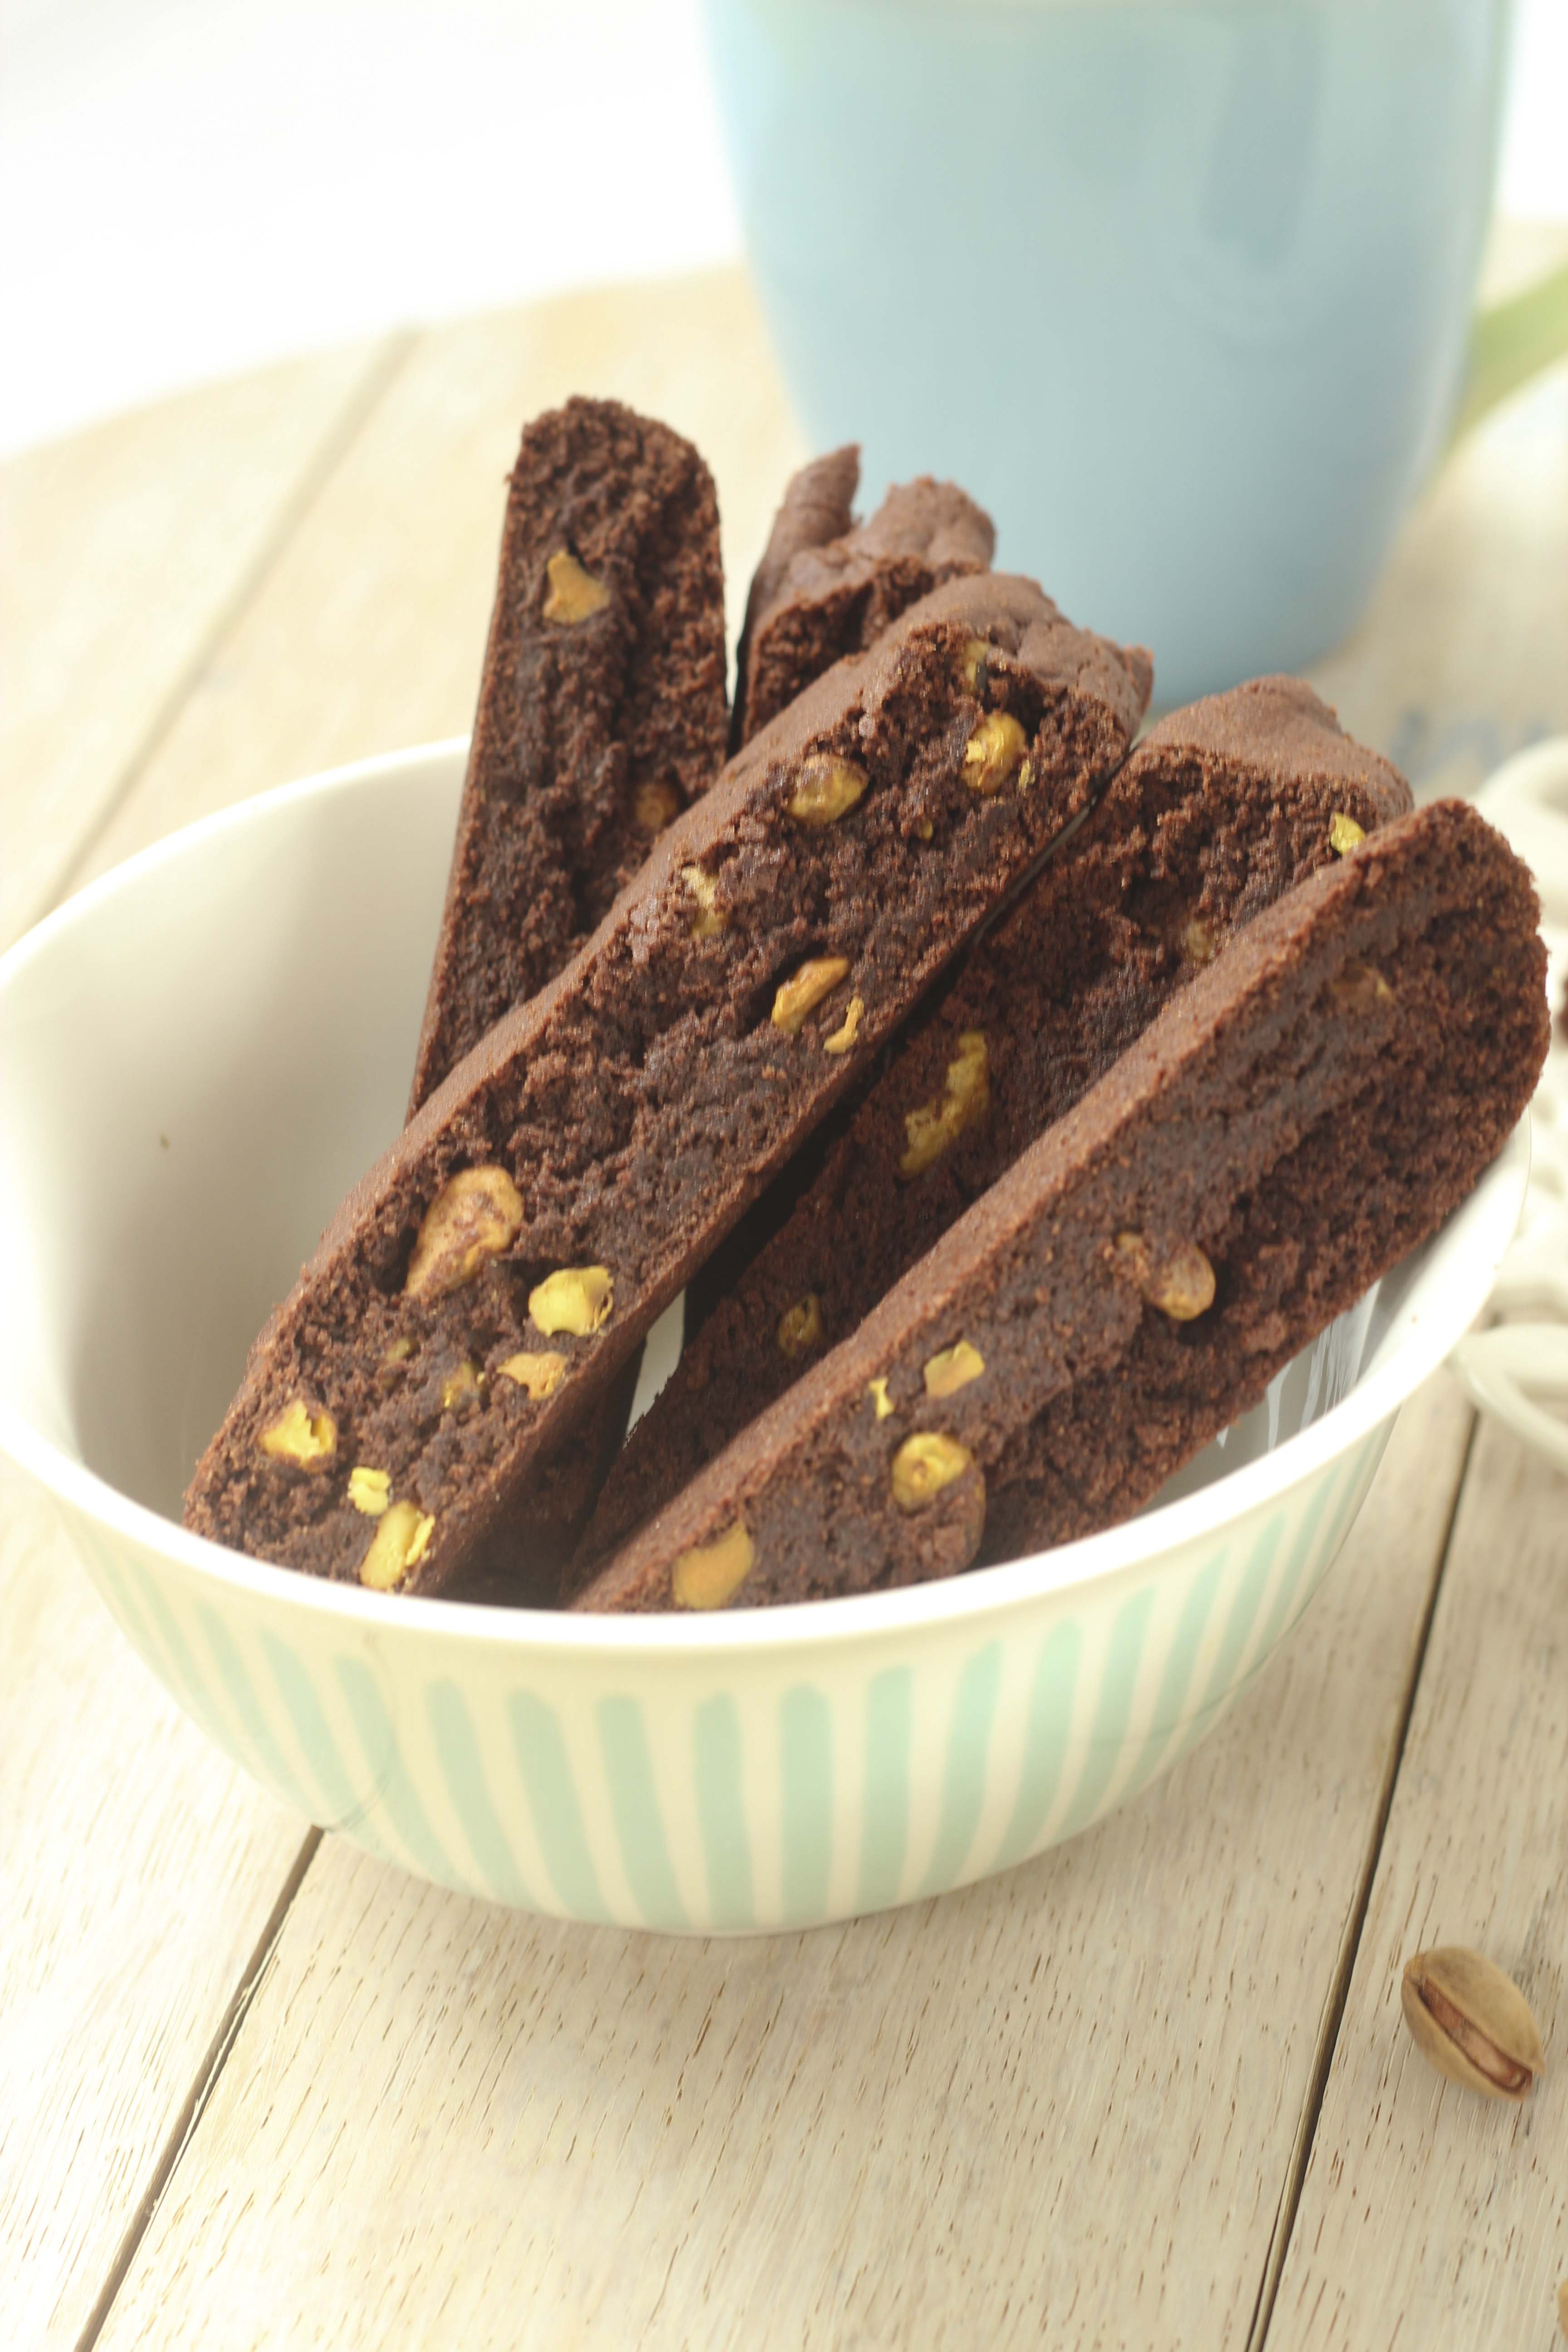
Chocolate Pistachio Biscotti
Makes 20 Biscotti
I’ve made the biscotti with pistachios and with hazelnuts. Both are equally tasty.
1 ½ cups RYZE Blue Blend
¾ cup unsweetened cocoa powder
1 teaspoon baking powder
½ teaspoon baking soda
1/4 teaspoon salt
½ cup unsalted butter (1 stick) softened
1 cup sugar
2 large eggs
1 teaspoon pure vanilla extract
¾ cup shelled pistachios or chopped toasted hazelnuts
Preheat the oven to 350 degrees F. Line a shallow baking sheet with parchment paper.
Whisk together the dry ingredients: RYZE Blend, cocoa powder, baking powder, baking soda, and salt.
In a medium bowl, beat the butter with the sugar until light and fluffy (about 3 minutes).
Add the eggs and vanilla to the butter mixture and beat until blended. Add the dry ingredients and beat until incorporated.
Fold in the nuts. Knead mixture with your hands until smooth and nuts are well incorporated.
On prepared baking sheet, form the mixture into a log that is about 16 inches long and about 5 inches wide.
Bake 30 minutes. Remove from the oven to cool for 10 minutes. Maintain the oven temperature.
When cool enough to touch, gently transfer the log to a cutting board. Cut into about 20 slices of even thickness. Turn the biscotti on their sides on the baking sheet and bake 20 minutes.
Cool and store in an airtight container for several days or in the freezer for up to 3 months.
RYZE has two formulas – blue and yellow. Both are simply whole grain brown rice and white rice – no gums, no starches. They are designed for specific types of baking, spelled out on each package. The web site, just launched, has lots more recipes to try. In addition, you’ll have good luck replacing your flour blend with one of the RYZE blends in a 1 to 1 replacement for all your favorite recipes. RYZE products will be available at Amazon.com beginning in May.
Categories: Recipes | Tags: gluten free baking, gluten-free recipes, RYZE Gluten Free | 1 Comment »
Makes 6 Burgers
Recipe By Beth Hillson

Memorial Day signals the unofficial start of summer. It’s time to start your barbecues! Here’s one of my go-to recipes that is part of every barbecue at my house. Vary the add-ins and add-ons to suit your taste. Try adding chopped shiitake mushrooms when you sauté the onions. Top the burgers with fresh sauerkraut, tangy pickles or fruit slaw. Serve these with your favorite condiments, too. Whatever way you present these, they are sure to be a hit.
The secret is to use ground turkey. (I prefer the dark meat.) It pairs well with so many flavors. Sautéing the onions (and other veggies) first lends a nice punch to the burgers as well. Don’t forget to pick up some of your favorite gluten free buns.
1 small onion, chopped
1 tablespoon olive oil
3 slices gluten free bread
1 ½ pounds ground dark meat turkey
¼ cup flavorful gluten-free barbecue sauce, smoked or tangy is best, more to top burgers
1 cup shredded cheddar cheese
Salt and pepper to taste
Gluten-free coleslaw
6 gluten free hamburger rolls (Udi’s or Canyon Bakehouse are my two faves)
Heat a grill to medium heat or preheat oven to 375 degrees.
Set a large lightly oiled ovenproof skillet on the stovetop or on the grill and heat to medium high. Sauté onion (other veggies, too) in olive oil until soft and slightly caramelized. Set aside to cool. Keep the skillet handy. You’ll need it for the burgers.
Microwave bread for 30 to 45 seconds or just until soft. Tear into small pieces. In a large mixing bowl, combine bread pieces, ground turkey, barbecue sauce, cheese, and salt and pepper. Add onions (other veggies, too) and mix well.
Form into six burgers. Put the skillet back on the stovetop or on the grill. The skillet should still have a coating of oil. If not, add a tiny bit more (1 to 2 teaspoons). Add burgers and brown for about 3 minutes. Flip to brown the other side.
Close the lid on the grill to finish cooking the burgers, about 10 minutes or until they are no longer pink in the center or set skillet with burgers in the oven and bake 10 to 15 minutes or until center is no longer pink.
Here’s another way to grill the burgers: Start burgers in the cast iron skillet placed on the grill with the temperature set at medium heat. Cover the grill and cook for 5 minutes. The outside will become firm, preventing the burger from sticking to the grids. Turn the burgers onto the grid to grill and brown for an additional 10 minutes, flipping midway through.
Toast or warm rolls. Serve one burger on each roll with coleslaw and extra barbecue sauce.
Categories: Recipes | Tags: gluten free barbecue, gluten free bread, gluten free burgers, gluten free rolls, gluten-free recipes, summer recipes | 1 Comment »
A Recipe From Beth
Serves 10 to 12
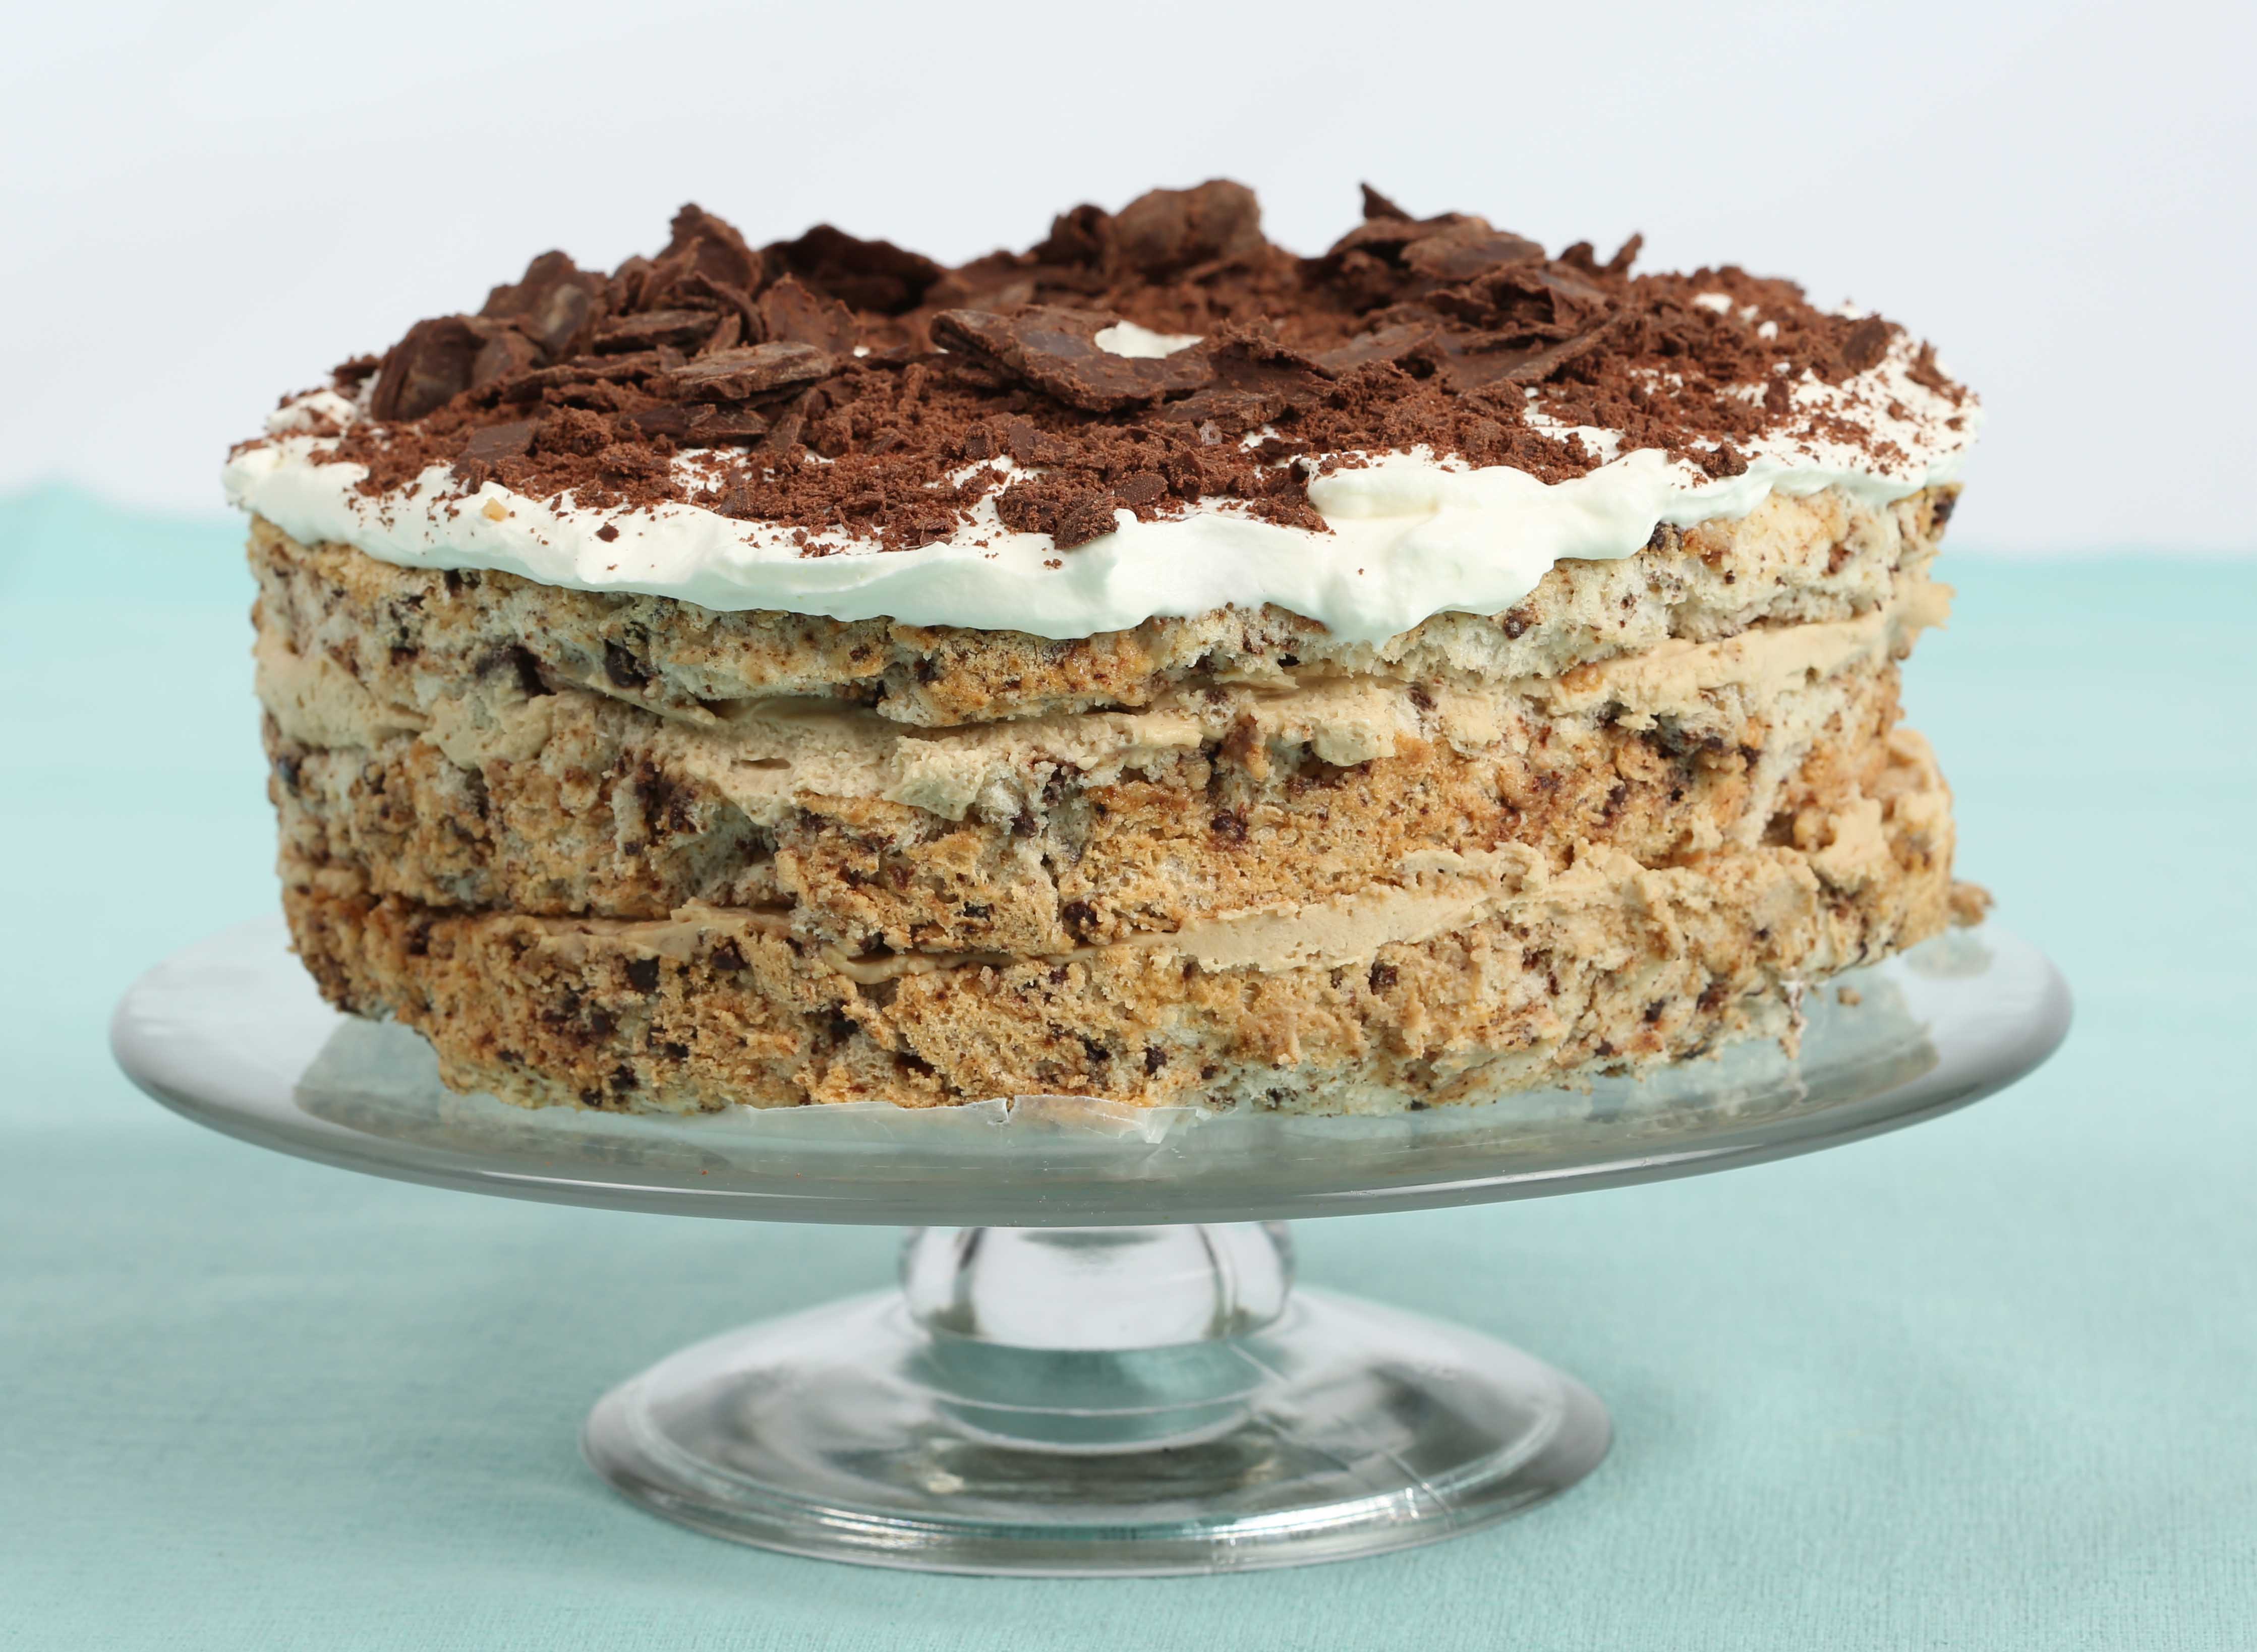
Is there anyone alive who doesn’t love Tiramisu? When I make this, it literally disappears when I turn my back for one second. Delicious doesn’t begin to describe this decadent Italian dessert. The rich flavors of mascarpone and cream cheese (or dairy-free alternatives) marry well with the light, airy texture of angel food cake. Make this at least a day ahead to guarantee that all the flavors blend together. Start with the Espresso Chocolate Chip Angel Food Cake as the base for this yummy dessert, as it boasts flavors of coffee and chocolate. However, any angel food or yellow cake recipe can be used.
 1 cup very cold heavy cream*
1 (8-ounce) container coffee-flavored or plain mascarpone (Italian cream cheese) or 8 ounces softened cream cheese*
4 ounces low-fat cream cheese, softened*
1/3 cup confectioners’ sugar
½ cup strong coffee, divided
2 teaspoons pure vanilla extract
3 tablespoons Cognac or brandy
1 Espresso Chocolate Chip Angel Food Cake (or other cake)
1/3 cup shaved (curled) semisweet chocolate shavings
Line the bottom and sides of a 9-inch springform pan with waxed paper or parchment paper.
With stand or hand mixer, whip heavy cream until stiff and set aside.
In a large bowl, beat mascarpone, cream cheese, confectioners’ sugar, 1/4 cup espresso and vanilla. Fold 1 cup whipped cream into the mascarpone mixture, reserving the rest of the whipped cream for topping.
In a small bowl, mix remaining 1/4 cup espresso with Cognac.
With a serrated knife, cut cake horizontally to yield three even layers. Set one layer in the bottom of the prepared springform pan, pressing it to the edges of the pan. Brush the surface with some of the espresso-Cognac mixture. Spread half the mascarpone mixture over the first layer of cake and top with the middle layer of cake. Brush with espresso mixture and top with remaining mascarpone mixture. Top with remaining layer of cake and brush with espresso mixture. Spoon the reserved whipped cream over the top.
Cover with plastic wrap. Chill for at least 6 hours. Unmold and sprinkle with shaved chocolate curls.
* For dairy-free Tiramisu, replace all the cream cheese with a total of 12 ounces dairy-free cream cheese and use So Delicious CocoWhip in place of whipped cream
To Make Chocolate Curls
Melt 1/2 cup semi-sweet chocolate chips with 1 tablespoon of unsalted butter. Spread in a thin layer over the bottom of a cookie sheet or plate and chill for 30 minutes. Using a spatula or a knife, scrape away pieces of the chocolate from the surface of the pan or plate in strips. These should curl slightly as you scrape them from the surface. Top the Tiramisu just before serving.
This recipe is part of a comprehensive article on how to successfully make angel food cake that will appear in the Spring Baking Guide from Gluten Free & More. Pick up a copy on newsstands in March 2015.
Categories: Recipes | Tags: gluten free Valentine's Day, gluten-free recipes | 4 Comments »
By Beth Hillson
Serves 8 to 12
During the bone-chilling winter months, I make hearty gluten-free soups for lunch and dinner. Here’s a chowder that is a favorite in our house. It is a wholesome soup with big chunks of veggies suspended in a milk-based broth. But, instead of milk, I use coconut milk. It creates a wonderful creaminess and a filling potage. Puree half the vegetables and add them back to make this soup both creamy and chunky. Light a fire, warm up some gluten free biscuits and enjoy. This keeps for 3 to 5 days in the refrigerator. 
3 ounces hickory-smoked bacon, chopped
2 to 3 tablespoons olive oil, divided
1 large leek, chopped
3 medium carrots, peeled, roughly chopped
1 medium red bell pepper, cored, roughly chopped
3 pounds of sweet potatoes, peeled and cubed
5 cloves garlic, chopped
½ teaspoon chipotle chili powder
4 – 6 cups gluten-free chicken broth
Salt and freshly ground pepper to taste
1 (13.6 ounce) can light coconut milk
Garnish
2 tablespoons olive oil
2 ½ cups corn kernels, frozen and thawed, or fresh
Salt and freshly ground pepper to taste
½ cup finely chopped red pepper
Heat 1 tablespoon of the oil in a very large Dutch oven or stockpot. Add the bacon and sauté until it begins to brown. Remove the bacon with a slotted spoon and reserve. Add remaining oil and sauté the leeks, carrots, and bell pepper. Cook over medium-high until vegetables begin to soften, about 5 minutes. Add sweet potatoes, garlic and chipotle. Cook and stir for about 5 minutes.
Add enough broth to cover the vegetables. Check seasonings and add salt and pepper and the cooked bacon. Simmer, partly covered, over low heat, stirring often, until sweet potato is very tender, 15 to 20 minutes. Remove from heat. Use a slotted spoon to scoop out 3-4 cups of vegetables and set aside.
Use an immersion blender to puree remaining soup or ladle some of the soup into a blender and puree in batches. Add back the chunks of vegetables and stir in coconut milk. Return the soup to low heat. Check seasonings and add more salt and pepper if desired. If the chowder is thicker than you like, add additional chicken broth until you reach desired consistency.
For the garnish, heat olive oil in a large cast-iron skillet over medium-high heat. Add the corn and sauté until the corn is lightly charred, about 5 minutes. Add salt and pepper. Stir into chowder.
To serve, heat the chowder until hot. Ladle into bowls; top with diced red pepper.
Categories: Uncategorized | Tags: gluten free hearty winter soup, gluten free soup, gluten-free recipes | 2 Comments »
My friends at Attune Foods asked several bloggers to create recipes that would delight Mom’s, especially those who are gluten-free. I am honored that my recipe for Turkey Strata Muffins is among them. For the entire booklet, follow this link to Attune Foods.
Here’s my recipe to whet your appetite.
Turkey Crunch Strata Cups with Orange Slices and Balsamic Glaze
Serves 6
These delicious, muffin-size strata are packed with flavor and a little crunch. They make a hearty, attractive breakfast for Mom and leftovers can be frozen or refrigerated for an ideal weekday breakfast on the go. Maple syrup lends some sweet notes that work nicely with the turkey and cheese. However, if you don’t want that touch of sweetness, it can be omitted.
2 tablespoons olive oil 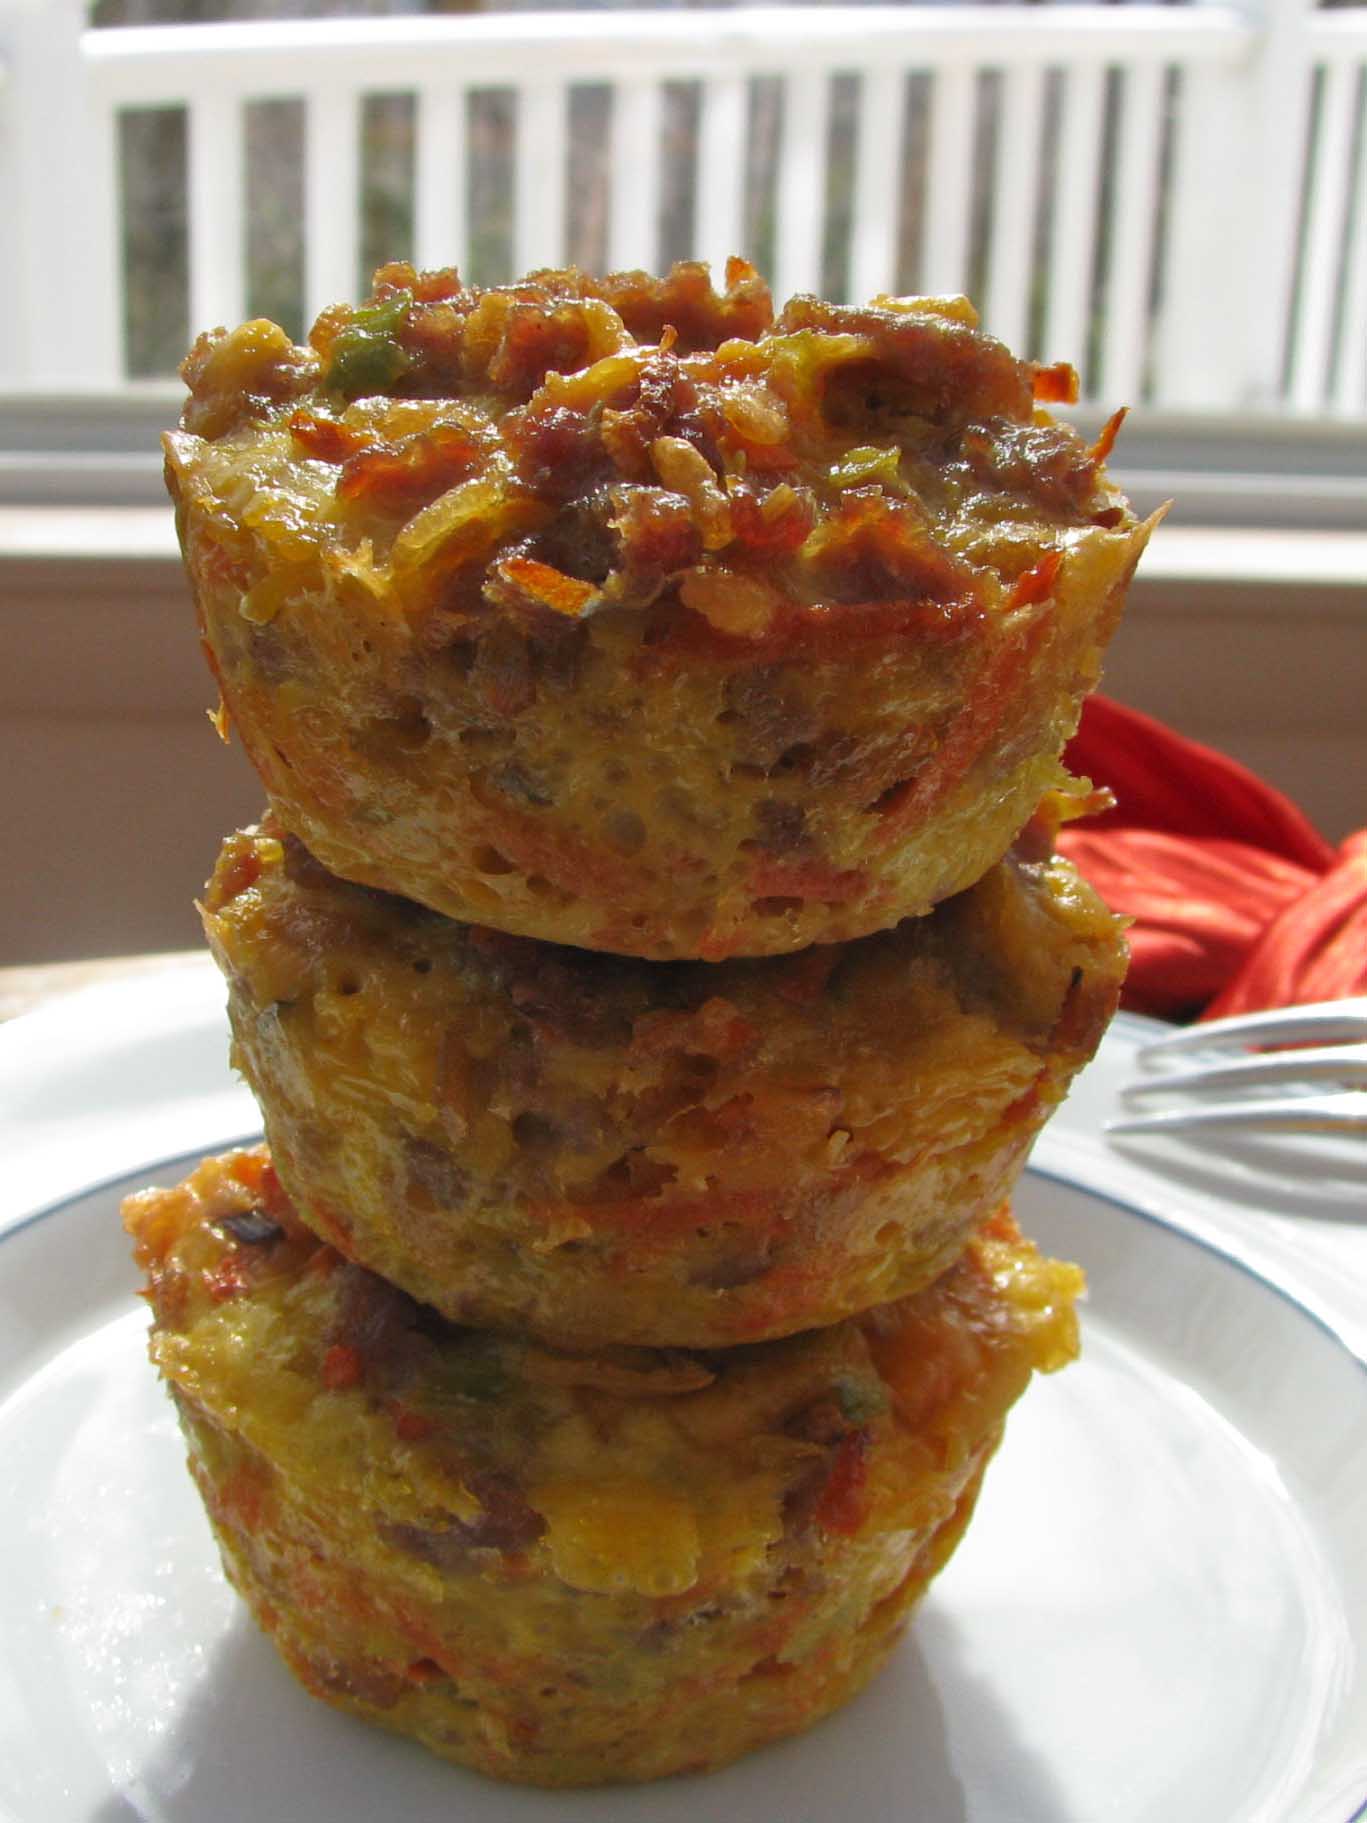
1 medium leek, white part only, cleaned and chopped
3 uncooked turkey sausage (about 1 pound)
1 cup shredded carrots
1 cup Erewhon Brown Rice Cereal
1 ½ cups shredded cheddar cheese
5 large eggs, beaten
2 to 3 tablespoons pure maple syrup
Orange segments or slices (peel removed) for garnish
Maple Balsamic Glaze for drizzle (recipe follows)
Lightly oil 12 muffin cups. Preheat oven to 350 degrees.
Heat olive oil in a large skillet. Add leek and sauté 2 minutes or until fragrant.
Remove casing from sausage. Add sausage to leeks and sauté, crumbling the sausage with the back of a spoon as it cooks. Sauté until sausage is cooked and no pink is visible. Remove from heat and cool. Break apart any lingering chunks of sausage (or chop with a knife) and transfer mixture to a large bowl.
Add carrot, cereal and cheese and mix well. Taste and add salt and pepper if desired. (Usually, the sausage has plenty of flavor without additional seasonings.)
Combine eggs and maple syrup. Add to sausage mixture and mix well.
Scoop into muffin cups and press gently. The filling will be above the tops of the cups, but it shrinks during baking.
Bake 23 to 25 minutes. Remove from oven. Let sit 5 minutes to set and turn onto a cooling rack. Cool to room temperature or serve warm.
To serve, set two strata muffins on a plate and garnish with 3 to 4 orange slices and a drizzle of Maple Balsamic Glaze.
Strata can be refrigerated for up to 3 days and reheated or frozen for future use. This makes a nice grab and go breakfast for Mom’s busy work week, too.
Maple Balsamic Glaze
3 tablespoons real maple syrup
2 teaspoons dark balsamic vinegar
Combine and warm briefly in the microwave. Drizzle over orange slices and strata cups before serving.
About Leeks: Leeks grow in mounds of dirt. The best way to clean them is to remove and discard the green top of the stalk. Rinse any visible dirt from inside the layers of the leek and chop finely. If leeks still seem sandy, transfer the chopped leek to a bowl and add cool water. Any leftover dirt will sink to the bottom while the chopped leek will rise to the top. Scoop out with your hand and transfer to a strainer. Discard any leeks that remain in the bottom of the bowl.
Do ahead: Sauté leeks and sausage and refrigerate overnight. Add remaining ingredients in the morning and prepare as above. Or make the strata cups the night before. Just before serving, reheat gently in a 350 degree oven for 5 to 7 minutes.
Categories: Recipes | Tags: gluten-free breakfast, gluten-free Mother's Day, gluten-free recipes | No Comments »
As with so many great recipes, this one passed through several channels, but rather than the old-fashioned grandmother to mother to daughter or son kind of hand-me-down, this one went through an internet-compressed timeline. One day, I read an account from Mark Bittman in the New York Times Magazine about his friend Jean-Georges Vongerichten’s squash on toast. It was not a recipe, per se, but an account, like someone passing along the gist of a recipe, the flavor, the texture, but never the amounts.
The mention of winter squash and caramelized onions caught my attention. What great flavors and there was nothing unhealthy or fattening, at least in the description. So I created a recipe from what I thought Jean-Georges might have told Mark and that Mark was recounting to his readers. I made the recipe for a Thanksgiving appetizer and served it with gluten-free French bread. Needless to say, it was a huge hit. Even my son wanted the recipe.
So, I figured I would copy the account from the New York Times online and fill in the details with my notes. But what came up was the original recipe from Jean-Georges Vongerichten. In some places, it was quite different than what I had created. It called for cheese, chili flakes, and mint. By then, I was hooked on my version. Here it is, a perfect dip or spread or appetizer that I’ll be serving at all our winter gatherings, especially for the Super Bowl.
Butternut Squash Spread 
1 medium butternut squash, peeled and cubed
4 tablespoons extra-virgin olive oil, divided
2 teaspoons kosher salt, divided
2 large yellow onions, peeled and thinly sliced
1/4 cup apple cider vinegar
2 tablespoons maple syrup
Gluten-free baguette, thinly sliced and lightly toasted
Extra salt, to taste
Heat the oven to 400. Toss the squash cubes with 2 tablespoons olive oil and 1 teaspoon of salt and spread the mixture over a parchment-lined baking sheet. Bake, stirring every few minutes, until tender and slightly colored, about 20 to 25 minutes. Edges should be golden brown and squash should be very tender. Remove from the oven.
Meanwhile, heat remaining 2 tablespoons olive oil over medium-high heat, add the onions and remaining teaspoon salt and cook, stirring frequently, until the onions are well softened and darkening, at least 15 minutes. Add the vinegar and syrup, stir and reduce until broken down, an additional 15 minutes or so. The mixture should be jammy.
Combine squash and onions in a bowl and smash with a fork until combined. Adjust seasoning. Serve with gluten-free toast or crackers.
Note: The original recipe says to spread this mixture on toasted bread, top with ricotta, goat cheese or mascarpone cheese, coarse salt and mint. I did not do this, but now that I’m passing this on, you can try your own version of this wonderful recipe!
Categories: Recipes | Tags: gluten free, gluten free and super bowl, gluten-free appetizers, gluten-free recipes | 1 Comment »
Follow Us Online
More Cookbook Stuff
Gluten-Free Makeovers - - Nearly 200 recipe makeovers for everyone to enjoy. Buy it at glutenfreeandmore.com, Amazon.com and barnesandnoble.com.
About This Blog
 Baking guru, Beth Hillson, transforms favorite foods into recipes that are safe for your gluten-free diet.


