
Category Archives: Uncategorized
From Beth Hillson
Move over lazy summer days. Now that school is back in session, our lives are frantic again. We are pulled between school schedules, sports practice, and our own routines. The last thing we need to do is stop to fix a nutritious breakfast. But maybe it’s the first thing we need to do, too.
Here are three nutritious grab-and-go breakfast and snack recipes that will help to fill hungry tummies with healthy food and jump-start the day.
(1) 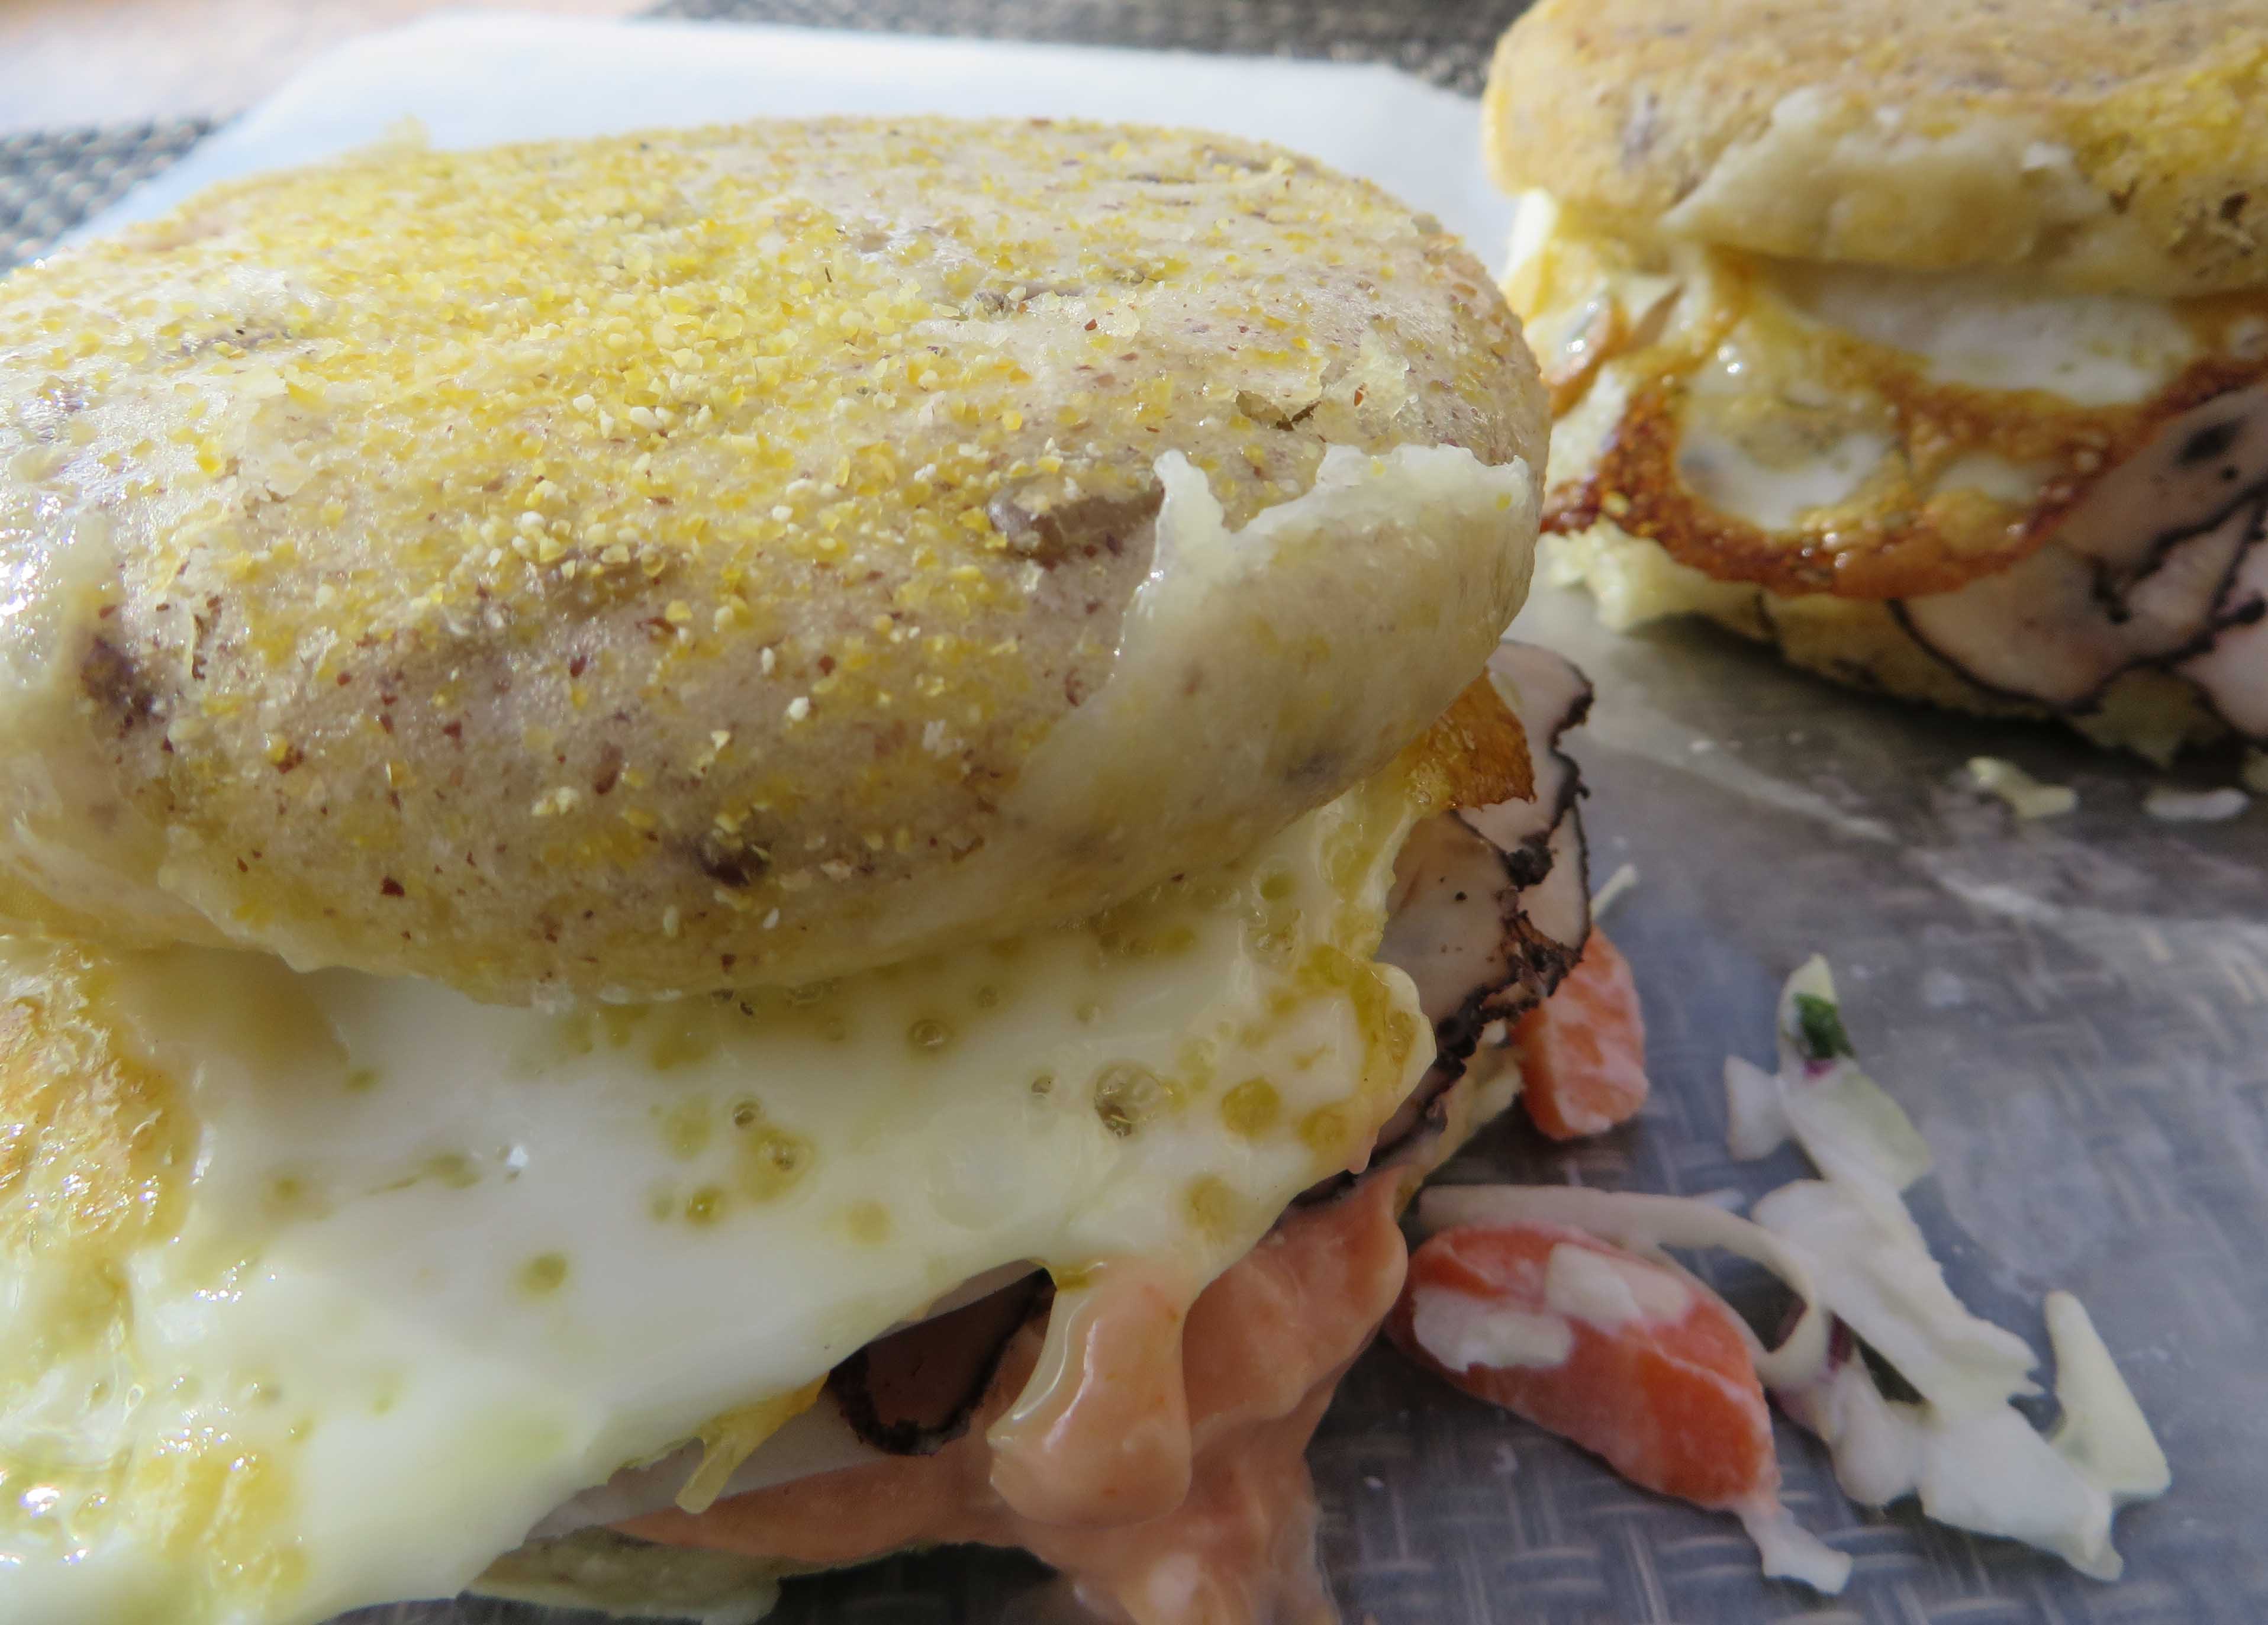 Check out the Balanced Breakfast Sandwiches I whipped up with Glutino English Muffins (one of my favorite prepared foods), fried eggs and breakfast meat. This quick and delicious meal has lots of possibilities. Add cheese, turkey, guacamole – you name it.
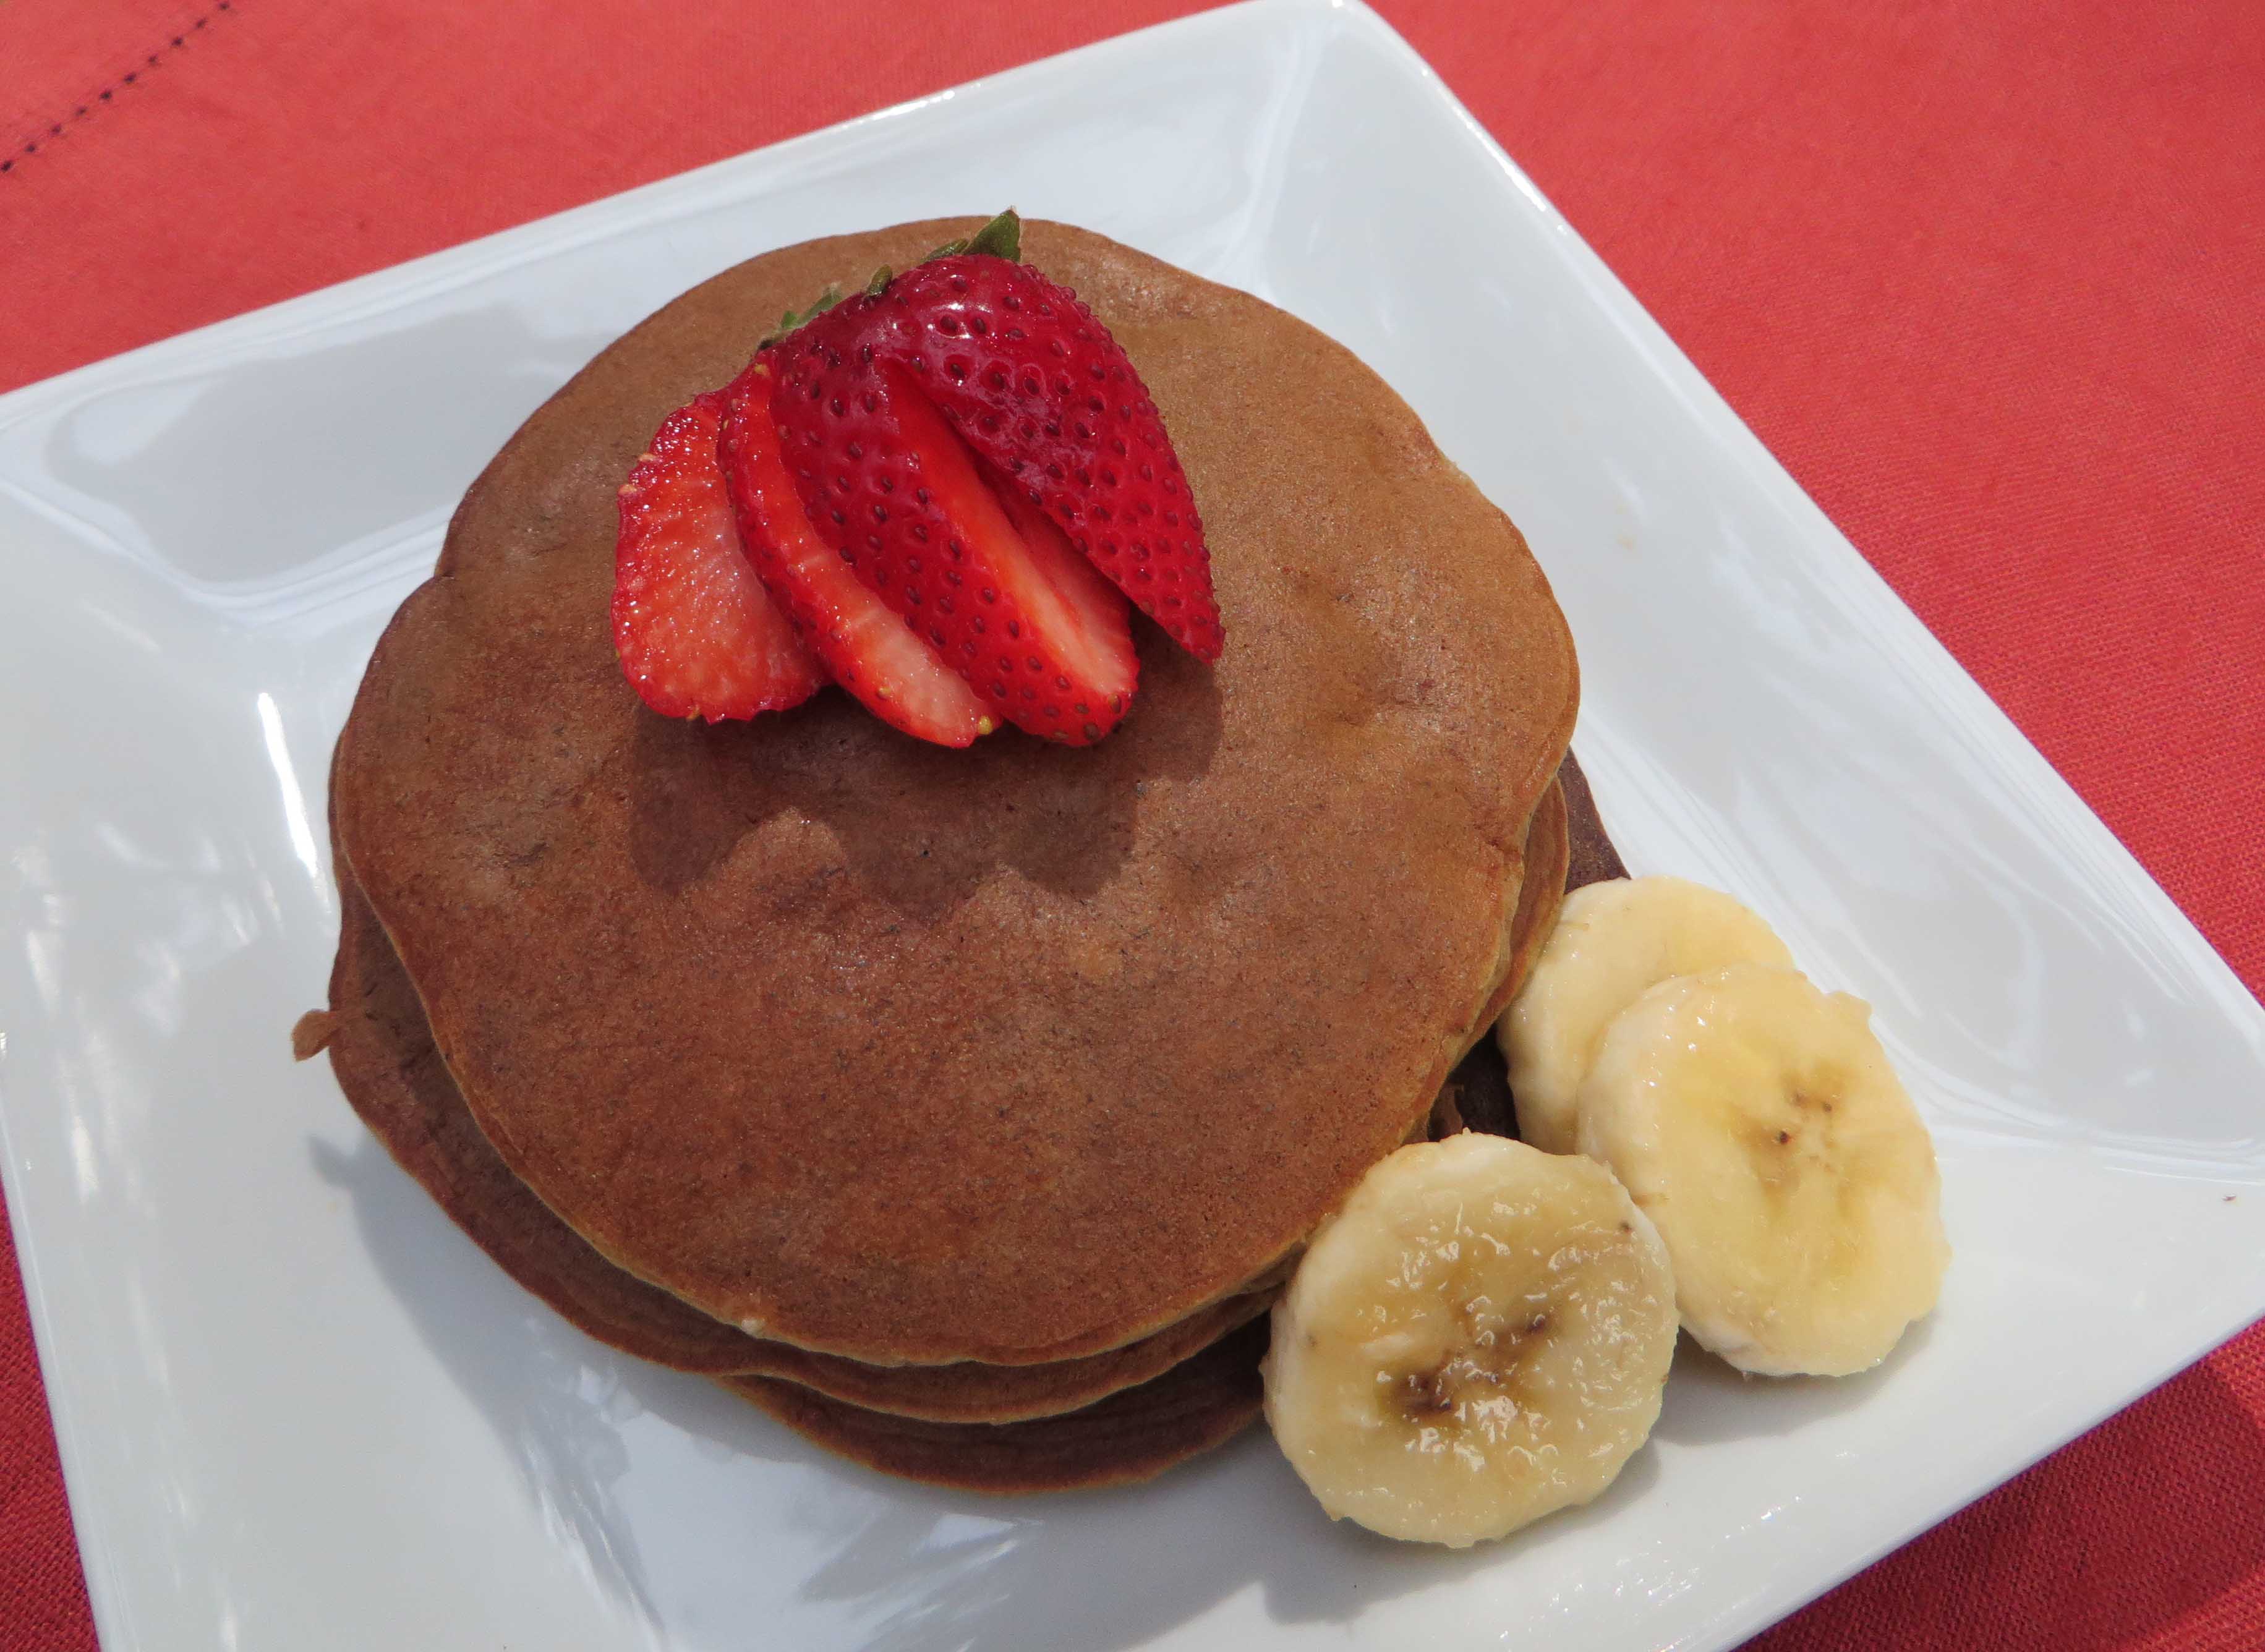 (2) Don’t think you need to pull up a seat and load the plate with a stack of pancakes to enjoy my Healthy Banana Pancakes. A mixture of banana, eggs and a small amount of nutritionally-dense flours, these sugar-free pancakes can be grabbed from the freezer or the fridge and eaten on the go.
(3) Banana Go-Sticks are ready when you need a quick, healthy breakfast and don’t have a minute to spare. Grab one or two from the freezer to eat on the way to work or school. These filling treats will see you through to lunch. 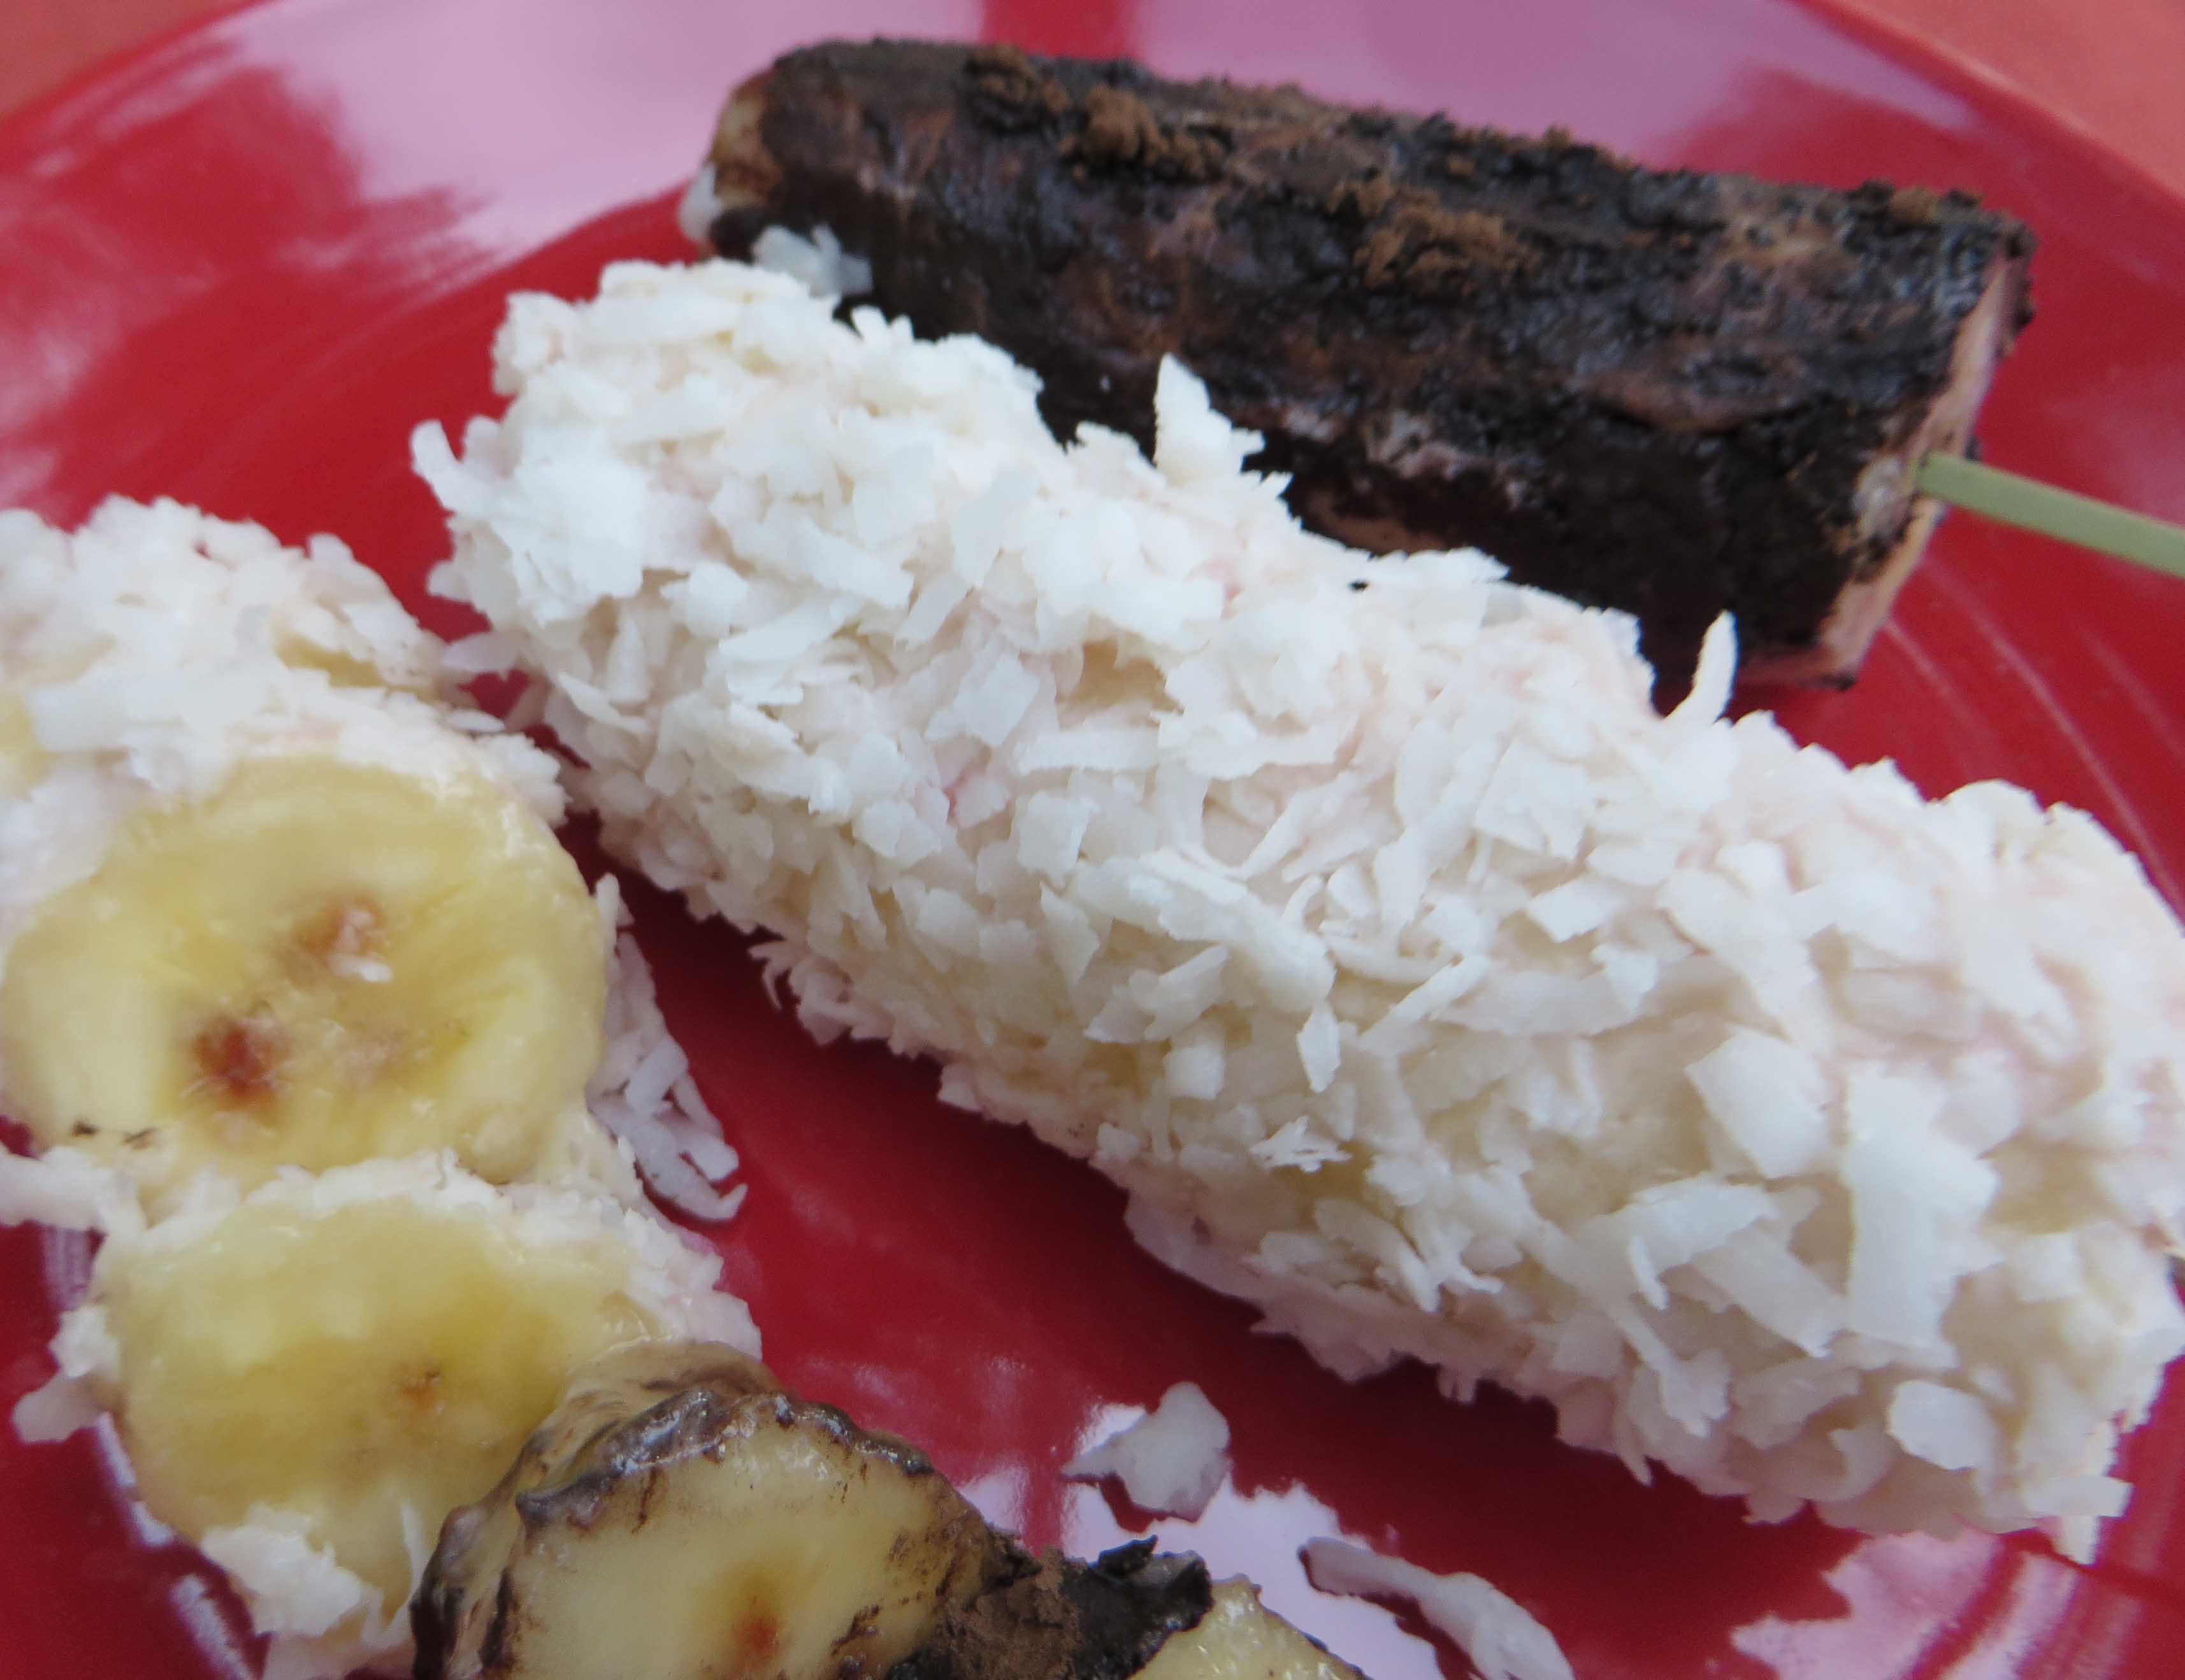
Enjoy and Happy Fall!

By Beth Hillson
This time of year, rising high school juniors and seniors are starting to visit college campuses as they consider where they would like to spend the next four years. In addition to curriculum, size, and geographical location, students who have celiac disease or are gluten sensitive also have to consider if campus food service can accommodate their diet. Read on to see if your college prospects make the grade.
I interview Rob Landolphi, Manager of Culinary Development at the University of Connecticut. Rob instituted a gluten-free dining option in all the campus dining facilities beginning in 2002. (UCONN was voted the #1for gluten-free-friendly campus on UDI’s web site this year.)
Here are some of Rob’s tips to consider when you are looking at colleges:
- Contact Dining Services or Residential Life directly. (The name of the office will vary from college to college.)
- Ask how they handle gluten-free diets.
- Ask to set up a tour of the dining hall and the kitchen.
- If their guard goes up or if they seem hesitant, be wary.
- If they show you the kitchen and serve you a gluten-free lunch, that should put your mind at ease.
- Ask if the college offers gluten-free foods in all the dining facilities. If not, find out how far the gluten-free dining hall is from your dorm and the buildings where you will be taking most of your classes.
- Check the hours of operations.
- Find out if gluten-free food is prepared in a designated area.
- Does the college label all the food so it’s not necessary to locate a chef each time you eat in the dining hall?
- Does the dining hall have a gluten-free zone?
- Can you eat in the same area as your friends or is gluten-free food only served in a separate dining room?
- What gluten-free brands are used? Are they willing to bring in other brands?
- What happens if you don’t like the option for that day? Can you order something else?
- Can you call ahead and order food?
- Is there a web site where you can find out the options for the day?
- Does the gluten-free option cost more money or is it included in meal plan? (It should be included.)
- What restaurants near campus have gluten-free choices? Do they deliver? (For times when your friends are ordering out and you don’t want to be left out.)
- Ask to speak with a student who has been taking the gluten-free option. Chances are at least one or two have offered to serve as a resource.
Reprinted with permission from Complete Guide to Living Well Gluten Free, by Beth Hillson, 2014, page 248.
Categories: Uncategorized | Tags: gluten free accomodations, gluten free diet, gluten free in college | No Comments »
By Beth Hillson
If you love salmon, you’ll want to try this easy and flavorful recipe from Silvana’s Gluten-Free and Dairy-Free Kitchen by Silvana Nardone. You might know Silvana from her blog, Silvana’s Kitchen or from her previous book, Cooking for Isaiah. Released earlier this month, Silvana’s Gluten-Free and Dairy-Free Kitchen contains125 gluten-free, dairy-free recipes for breakfast, brunch, breads, appetizers, salads, soups, homemade pasta, fake-out takeout, TV dinners, restaurant classics, dessert classics, reinvented baking mixes and reinvented dairy-free favorites.
Congratulations, Silvana! Pick up a copy of the book at Amazon.com or anywhere books are sold.
Sticky Sesame Salmon with Orange Sauce 
Serves 4
For the Sauce
1⁄4 cup ketchup
1⁄4 cup orange juice, preferably freshly squeezed
2–4 tablespoons sugar
2 tablespoons chili paste, such as sambal oelek, or to taste
1 tablespoon sesame oil
For the Fish
4 6-ounce salmon fillets, skin removed
Salt and black pepper
3 tablespoons olive oil
1∕3 cup sesame seeds
Preheat the oven to 350 ̊F.
Make the sauce: In a large bowl, stir together the ketchup, orange juice, sugar, chili paste
and sesame oil. Set aside.
Make the fish: Season the salmon generously with salt and pepper, then drizzle with 2 tablespoons of the olive oil. Place the seeds on a plate and dredge the tops of the fillets in the sesame seeds to coat.
In an ovenproof skillet, heat the remaining 1 tablespoon olive oil over medium-high heat.
Add the salmon, sesame seed side down, to the pan and sear, turning once, until golden
brown, about 3 minutes on each side.
Transfer the skillet to the oven and roast the salmon until cooked through, about 6 minutes.
Generously brush with the orange sauce and serve.
Excerpted from Silvana’s Gluten-Free and Dairy-Free Kitchen © 2014 by Silvana Nardone. Reproduced by permission of Houghton Mifflin Harcourt. All rights reserved.
Categories: Uncategorized | | No Comments »
When food writer and chef, Robin Asbell asked me to take part in a blog potluck to introduce her new Gluten-Free Pasta book (Running Press) I was all ears. “Can you make Crêpe Cannelloni with Roasted Veggies and Chèvre?” she asked.
We eat a lot of roasted veggies in my house so I was hooked immediately and Robin is a champion of all things vegetable. Then I received a copy of Robin’s gorgeous book. It’s filled with more than 100 ways to make pasta including easy, homemade noodle recipes like these Crêpe Cannelloni. And she’s included low-carb (and no-carb) options and dishes with an Asian flare as well. I mean, there is something for everyone in this book. And, of course, it’s all gluten free.
As a food writer, I love browsing through cookbooks and this one is great for window shopping. But there are several recipes I want to try right off the bat.
The recipe I picked to reprint here has several steps. But it’s worth it. I did not make the Veggie Spaghetti Sauce, however, although I included the recipe here. It sounds delish. Instead, I used a good quality commercial product (Muir Glen). That’s the one shortcut I would recommend if time is limited.
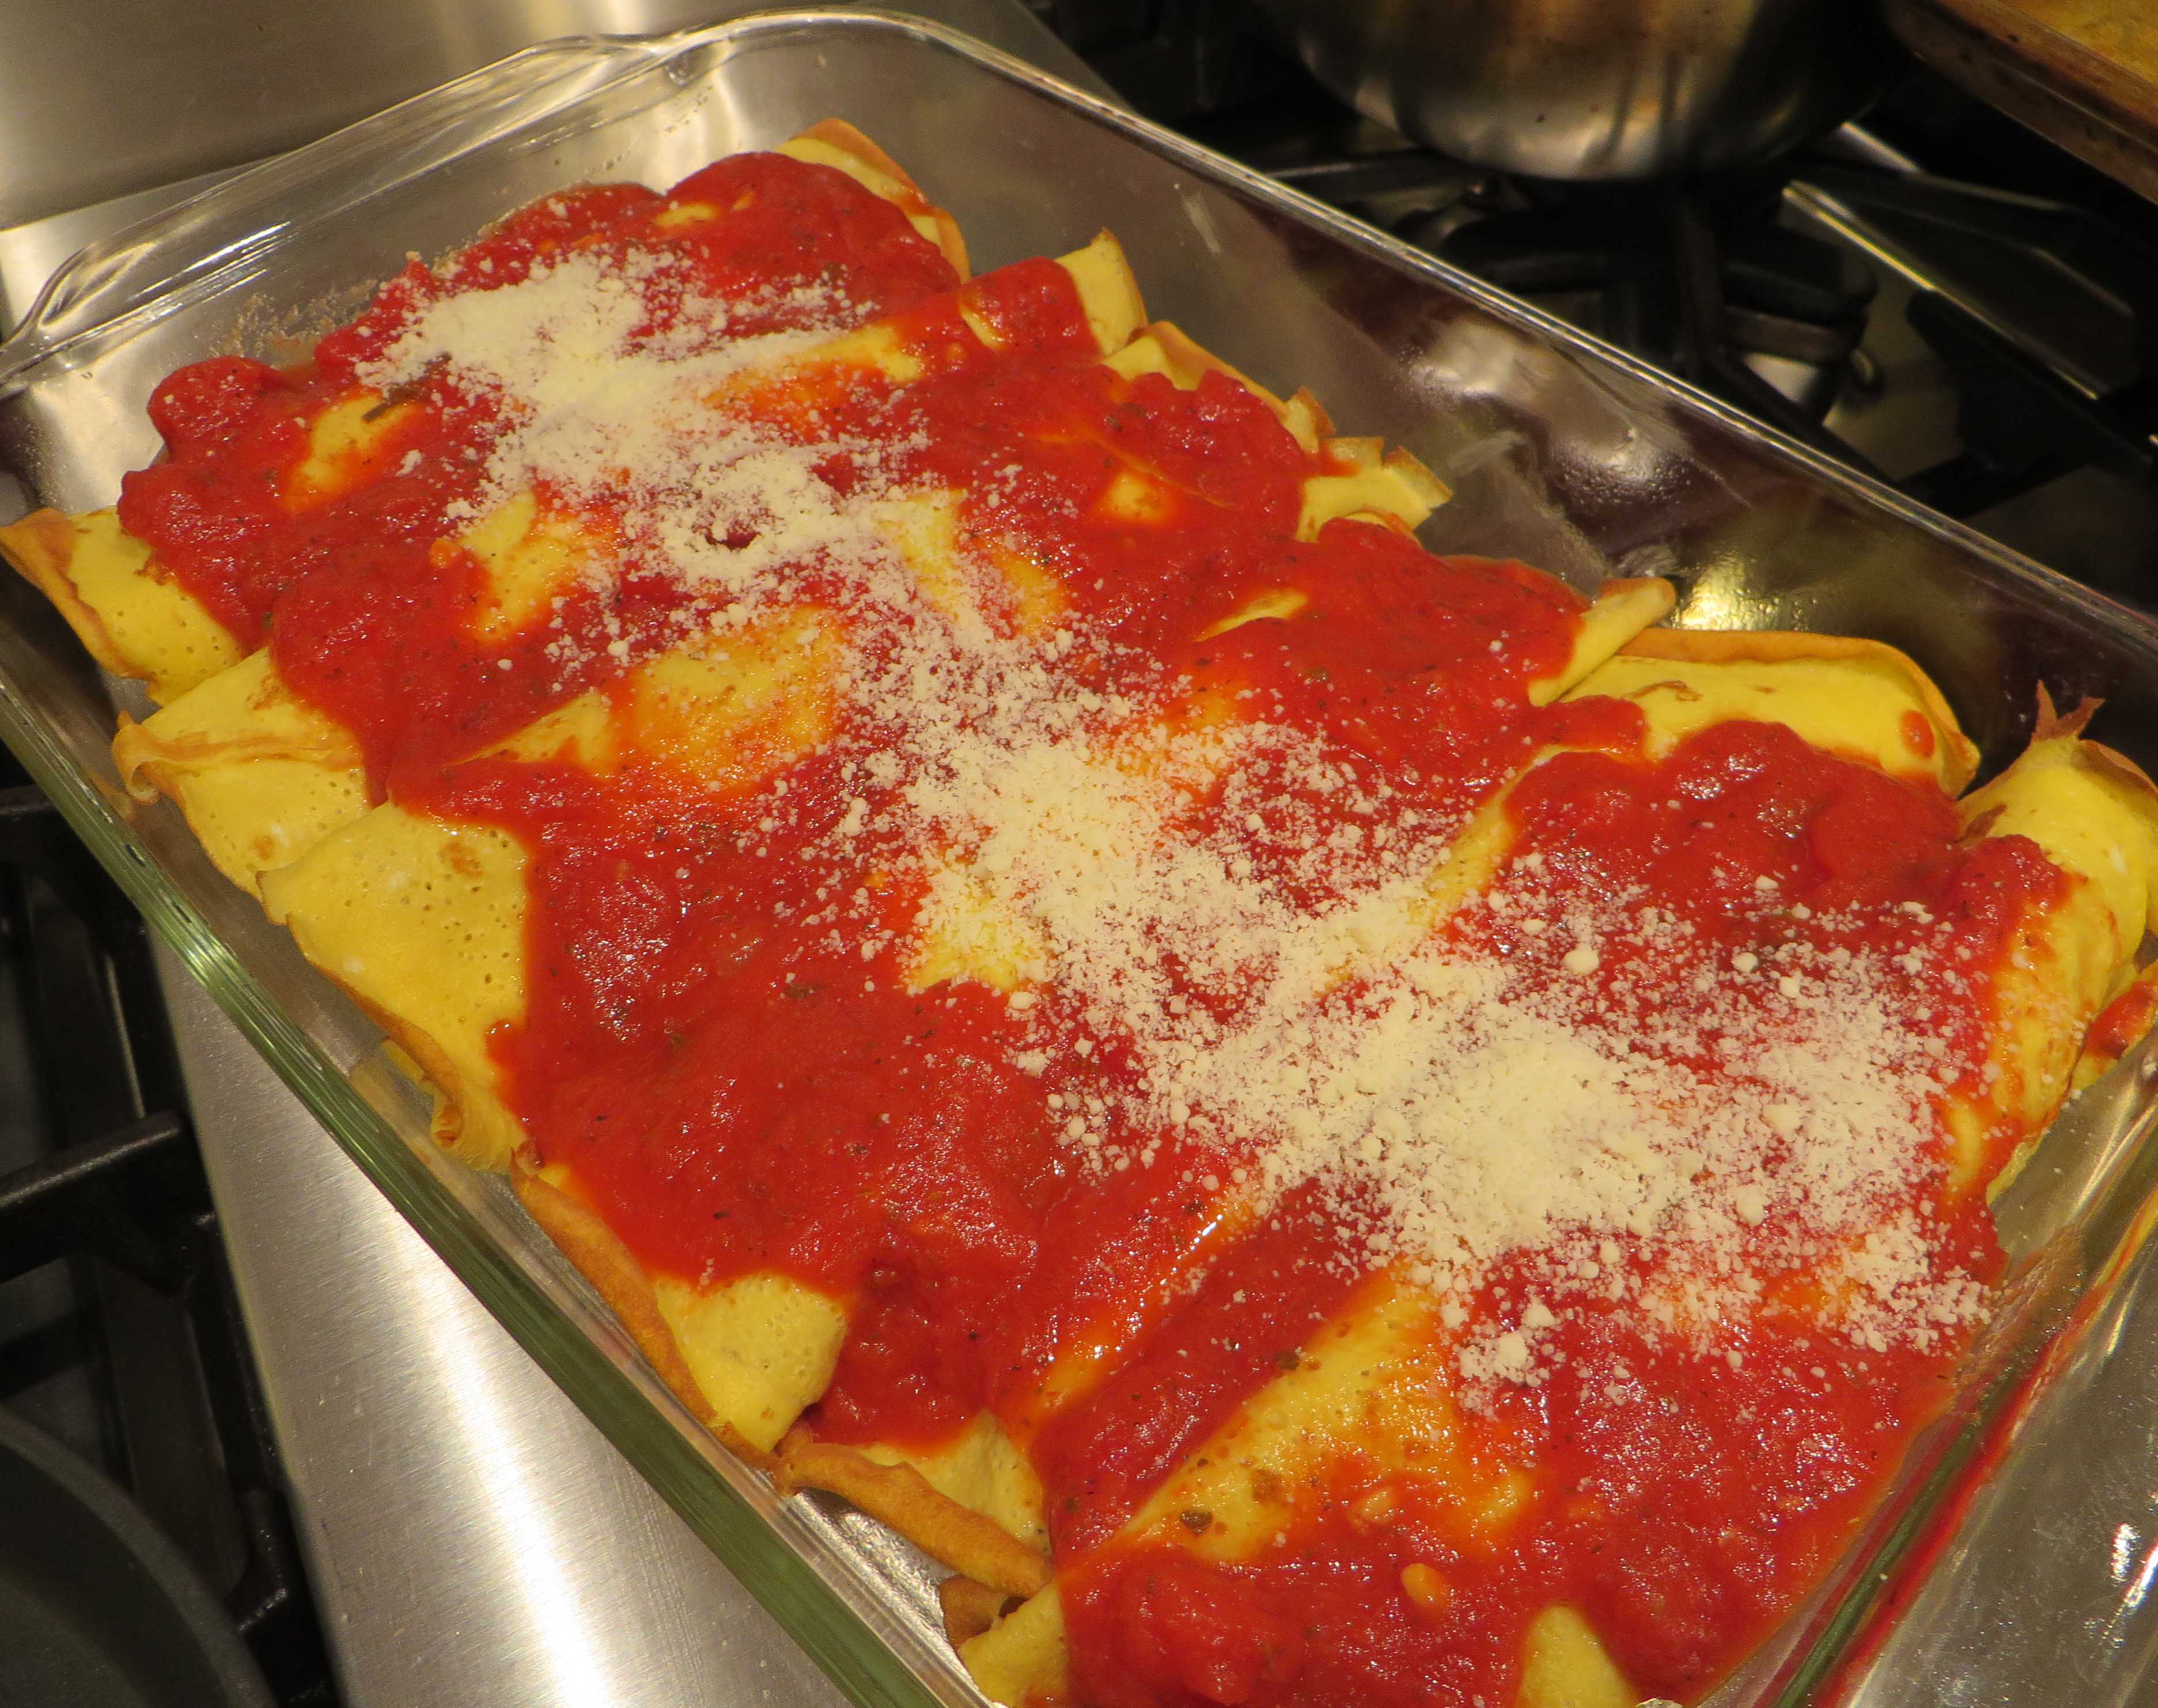 The crepes were easy to make, light and wonderful with the vegetable filling. You can also make these into easy strands for noodle dishes. My husband and I ate several filled cannelloni in one sitting. And this is a terrific way to get kids to eat their vegetables.
I can’t wait to try more of Robin’s recipes. For more, visit her web site robinasbell.com
I am giving away a copy of Gluten-Free Pasta to one lucky reader. Just leave a comment to this post or on my Facebook page to win.
Be sure to include your email address in the comment so I can contact you. the offer ends Sunday, March 30. Sorry, but it’s only open to US residents.
The following recipes are Reprinted with permission from Gluten-Free Pasta © 2014 by Robin Asbell, Running Press, a member of the Perseus Books Group.
Roasted Vegetable Egg Crêpe Cannelloni with Chèvre
Egg crêpes make a wonderful pasta stand-in in this delicious dish. Butter-soft roasted veggies are laced with tangy chèvre, rolled in tender crêpes, then topped with classic red sauce before being baked to crusty greatness. 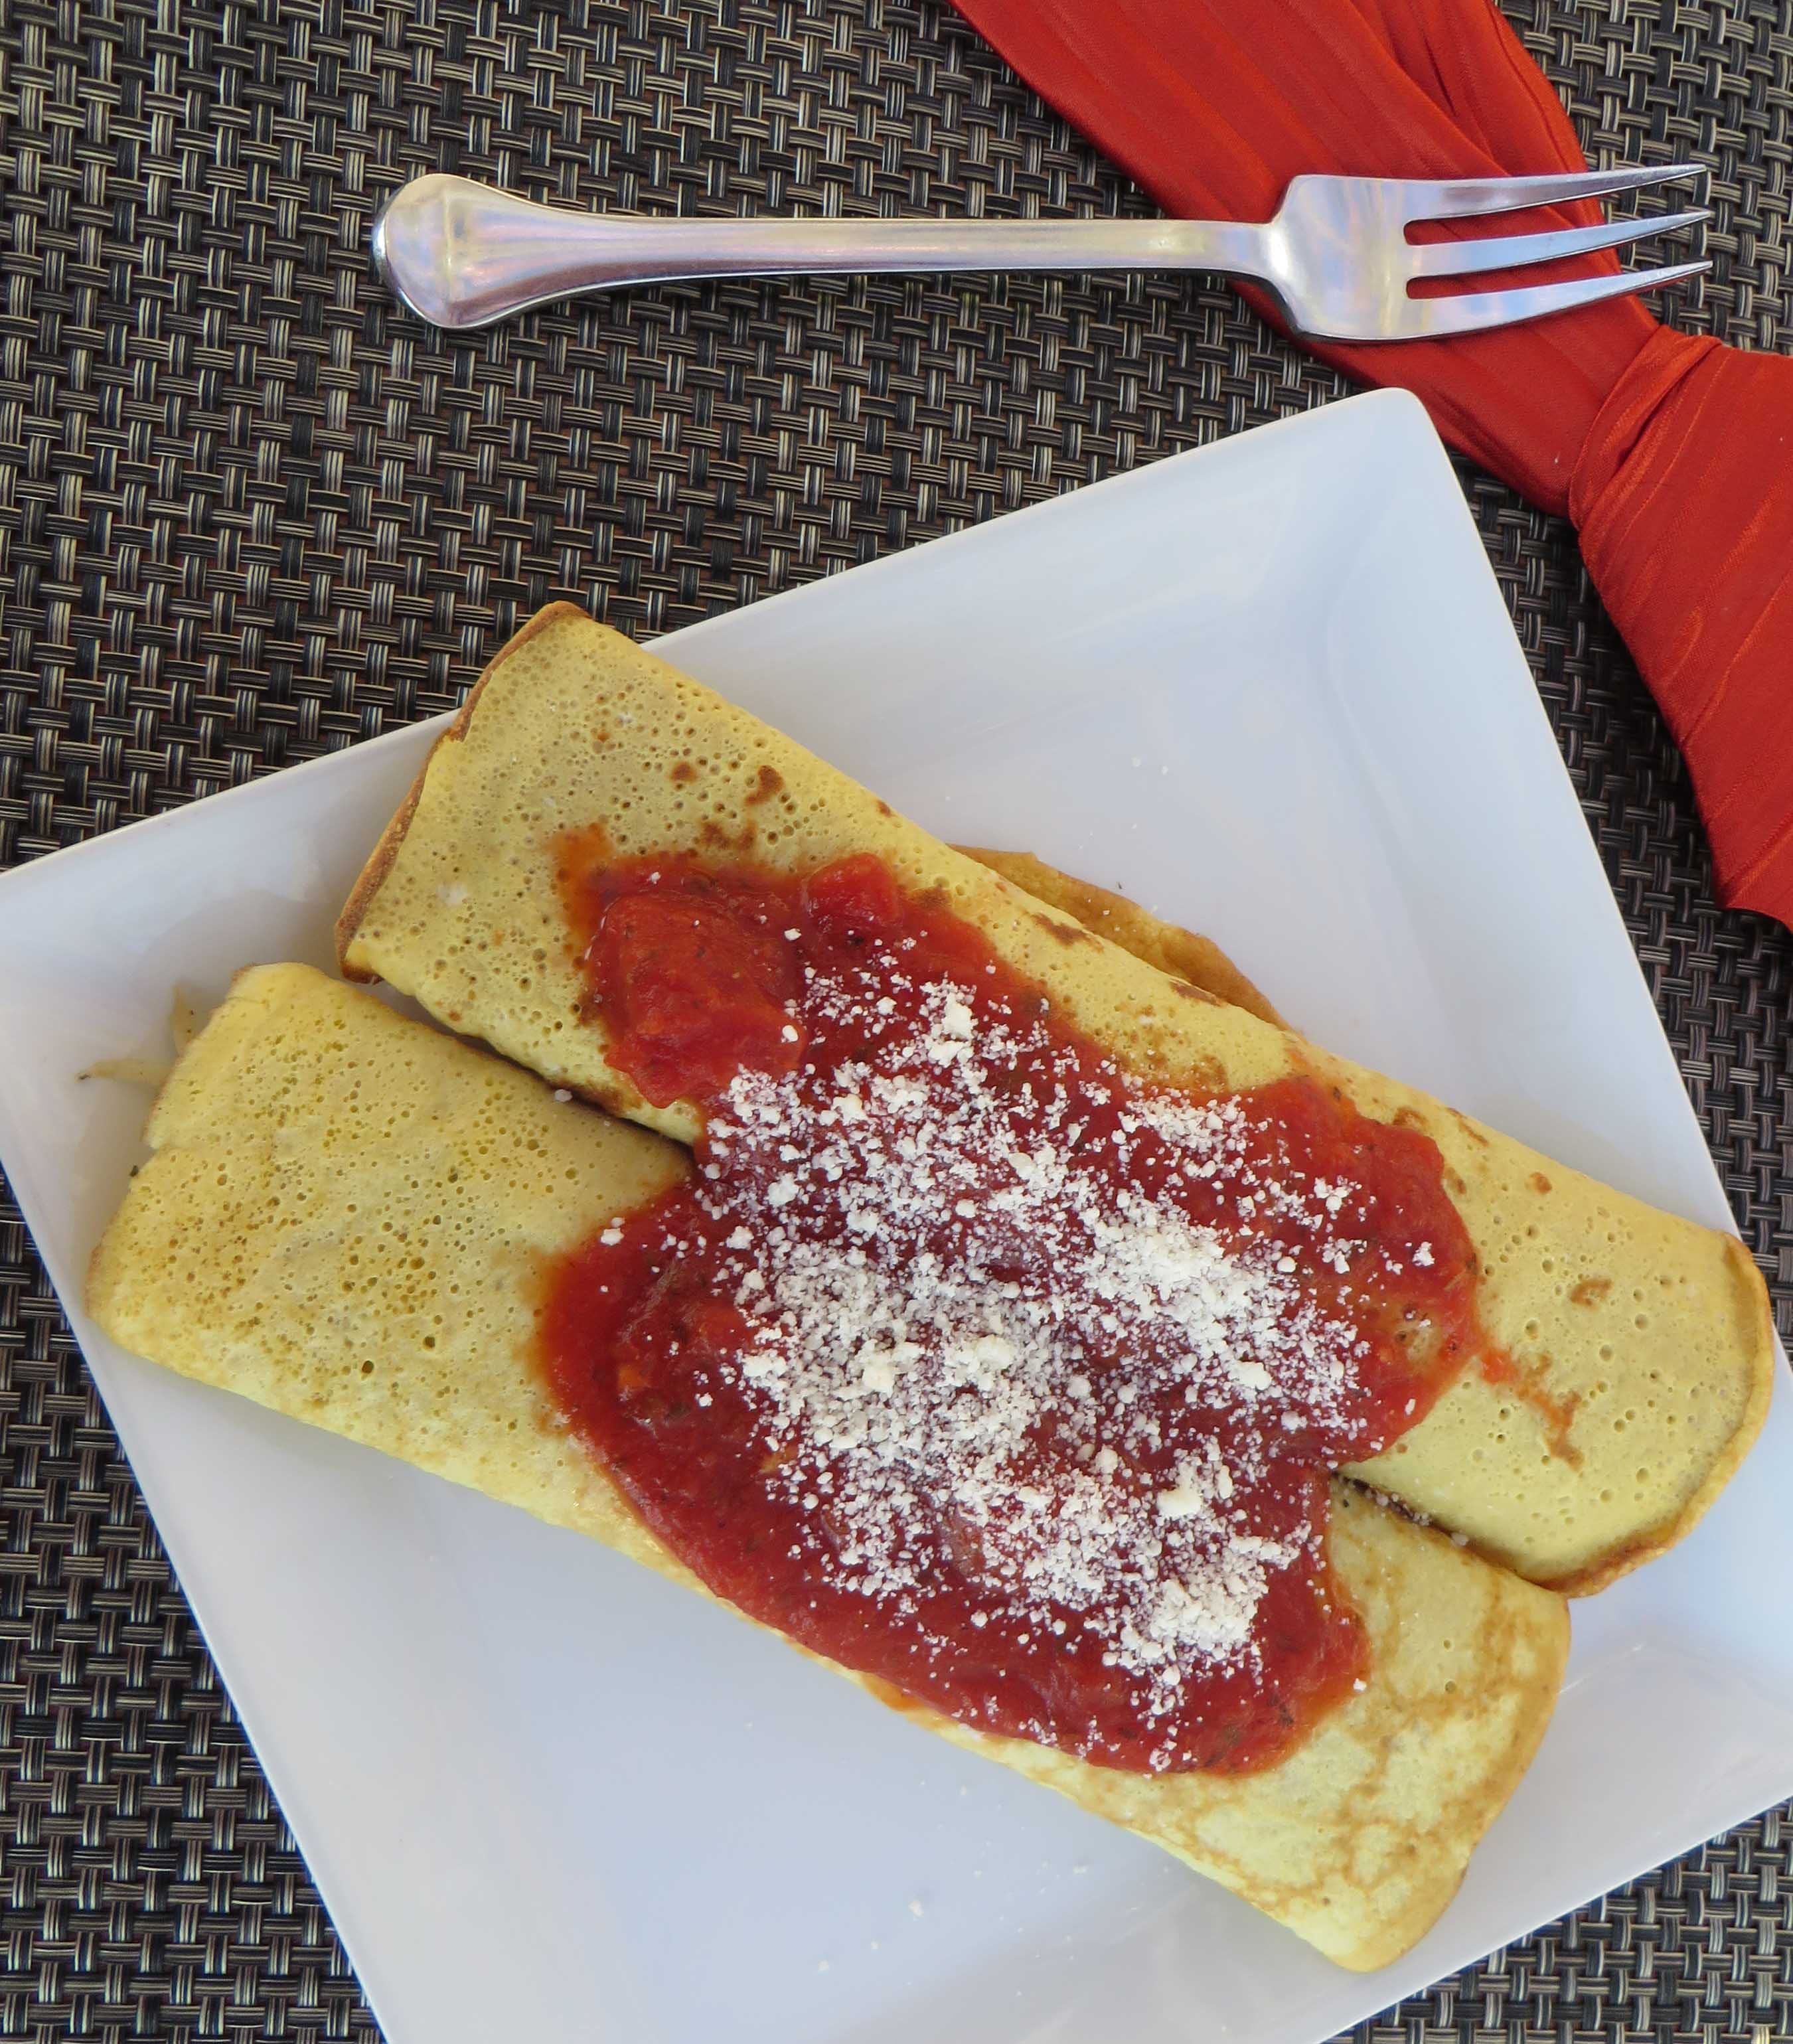
Serves 8
1 pound asparagus (tips and tender stalks only), cut into 2 to 3-inch pieces
1 pound zucchini (about 2 medium), cut into 2 to 3-inch sticks
1 medium yellow onion, thinly slivered
1 large red bell pepper, thinly sliced
1 tablespoon extra-virgin olive oil, plus more for the pan
1/2 teaspoon fine salt
1/2 teaspoon freshly cracked black pepper
3 garlic cloves, chopped
1/4 cup packed fresh basil leaves, chopped
6 ounces chèvre cheese
1 recipe Egg Crêpe “Noodles” (recipe as follows)
2 cups Veggie Spaghetti Sauce (recipe as follows), or use a good quality commercial sauce)
1/2 cup grated Parmesan cheese
Preheat the oven to 400°F. Combine the asparagus, zucchini, onion, and red bell pepper in a large bowl and add the olive oil, salt, pepper, and garlic. Toss to mix. Spread the veggies on 2 sheet pans and roast for 20 minutes, then stir, rotate the pans, and roast for 10 minutes more.
The veggies should be tender and browning. Let the pans cool to room temperature on racks. Leave the oven on. When cool, transfer the veggies to a medium bowl and add the basil, then toss to mix.
To assemble the cannelloni, lightly oil a 13 x 9-inch baking pan. Lay the crêpes out on a counter or cutting board. Divide the chèvre and veggies among the crêpes, then roll them up and place them in the baking pan, seam-side down. Cover with the veggie sauce and then sprinkle the Parmesan down the center of the crêpes.
Bake, uncovered, for 35 to 45 minutes, or until the sauce is bubbling and the cheese is melted and golden.
Egg Crêpe “Noodles”
Serves 4 to 6
1/2 cup (60 grams) garbanzo flour
3/4 cup milk
1 teaspoon fine salt
8 large eggs, whisked
Canola oil, for the pan
Whisk the garbanzo flour, milk, and salt in a large bowl until smooth. Add the eggs and whisk again.
Heat an 8-inch crêpe pan or a small sauté pan over medium-high heat. Brush or spray with oil.
Measure 1/4 cup of crêpe batter into the pan and quickly swirl to coat just the bottom of the pan. Cook for a minute or two, until set and flip over carefully. Cook the second side for only a couple of seconds and transfer the crêpe to a cutting board to cool. Continue with the remaining crêpe batter.
When all the crêpes are cooked and cooled to room temperature, you can either use them for cannelloni or roll them up and slice them thinly into strands. Toss to fluff. These can be stored, tightly covered, for up to 4 days.
Veggie Spaghetti Sauce
This is a simple sauce to use for everything. It is full of chunky vegetables but is delicious and tomatoey enough that kids love it. Make a double batch to freeze and use it for quick weeknight spaghetti, pizzas, and lasagna, or anywhere else a red sauce would be appropriate. I use Muir Glen canned tomatoes.
Serves 6 (Makes 6 Cups)
2 tablespoons extra-virgin olive oil
2 large yellow onions, chopped
1 pinch red pepper flakes (optional)
4 garlic cloves, minced
4 ribs celery, diced
2 large carrots, diced
2 tablespoons fresh thyme leaves, coarsely chopped
1/4 cup red wine dry Burgundy or chianti
1 (15-ounce) can tomato sauce
1 (15-ounce) can tomato purée
1 (14.5-ounce) can diced tomatoes
1 teaspoon fine salt, plus more as needed
Freshly ground black pepper
In a 4-quart pot, heat the olive oil over medium-high heat. Add the onion, pepper flakes, garlic, celery, carrot, and thyme. Once the mixture begins to sizzle, reduce the heat to medium-low. Cook, stirring often, for at least 10 minutes, and up to an hour if you have the time, to caramelize the onions and add more depth of flavor. Add the wine and bring to a boil, then stir in the tomato sauce and purée, diced tomatoes, salt, and pepper.
Bring the mixture to a boil, then reduce the heat to a simmer and cook for about 15 to 20 minutes, or until the sauce is thick and the vegetables are very tender. Season with more salt and pepper, if desired.
Categories: Uncategorized | | 21 Comments »
Lemon Poppy Seed Muffins

You’ll love these yummy, moist muffins for brunch, tea or anytime!
Makes 12 to 14 muffins
These moist and vibrant-tasting muffins add a touch of elegance to a brunch or tea. But don’t wait for a special occasion to whip up a batch. These muffins will be cause for celebration whenever you make them. I used silicone baking cups called “Baking Buddies” instead of muffin papers to test this recipe. I was a little concerned that the heavy dough would cause the cups to lose their shape and the muffins to spread rather than rise. (Gluten-free dough has a knack for doing that.) As you can see, they rose beautifully. I set half in muffin tins and half on a baking sheet just in case, but there was no perceptible difference between the two. These silicone cups wash easily, too. Fun to use and I love the colors. You can buy them on Amazon.
1 ¾ cups all-purpose flour blend (below)
1 ½ teaspoons xanthan gum
½ teaspoon salt
2 teaspoons baking powder
1/2 teaspoon baking soda
2 tablespoons poppy seeds
1 tablespoon grated lemon zest
6 tablespoons unsalted butter or non-dairy buttery spread, softened
2/3 cup sugar, extra to sprinkle on top of muffins
2 large eggs
1 cup buttermilk or milk of choice
3 tablespoons lemon juice
1 teaspoon vanilla
Preheat oven to 375°F. Line a muffin tin with muffin papers or use Baking Buddies. (No need to oil these silicone cups.)
In a medium bowl, mix together flour blend ingredients (below), xanthan gum, salt, baking powder, and baking soda. Add poppy seeds and lemon zest and blend well. Set aside.
In a large bowl, cream the butter and sugar until fluffy. Add the eggs, beating well.
On low speed, add the dry ingredients to the creamed mixture. Add the buttermilk, lemon juice and vanilla. Beat just until smooth.
Spoon the batter into the prepared pan, 3/4-full. Sprinkle sugar over the tops of the muffins just before baking.
Bake for 20 to 22 minutes or until a toothpick inserted in the center comes out clean.
Cool for 5 minutes before removing to cool completely. These can be frozen.
All/Purpose Flour Blend
1 cup white rice flour
1/2 cup corn starch
1/4 cup tapioca starch
By Beth Hillson
Serves 8 to 12
During the bone-chilling winter months, I make hearty gluten-free soups for lunch and dinner. Here’s a chowder that is a favorite in our house. It is a wholesome soup with big chunks of veggies suspended in a milk-based broth. But, instead of milk, I use coconut milk. It creates a wonderful creaminess and a filling potage. Puree half the vegetables and add them back to make this soup both creamy and chunky. Light a fire, warm up some gluten free biscuits and enjoy. This keeps for 3 to 5 days in the refrigerator. 
3 ounces hickory-smoked bacon, chopped
2 to 3 tablespoons olive oil, divided
1 large leek, chopped
3 medium carrots, peeled, roughly chopped
1 medium red bell pepper, cored, roughly chopped
3 pounds of sweet potatoes, peeled and cubed
5 cloves garlic, chopped
½ teaspoon chipotle chili powder
4 – 6 cups gluten-free chicken broth
Salt and freshly ground pepper to taste
1 (13.6 ounce) can light coconut milk
Garnish
2 tablespoons olive oil
2 ½ cups corn kernels, frozen and thawed, or fresh
Salt and freshly ground pepper to taste
½ cup finely chopped red pepper
Heat 1 tablespoon of the oil in a very large Dutch oven or stockpot. Add the bacon and sauté until it begins to brown. Remove the bacon with a slotted spoon and reserve. Add remaining oil and sauté the leeks, carrots, and bell pepper. Cook over medium-high until vegetables begin to soften, about 5 minutes. Add sweet potatoes, garlic and chipotle. Cook and stir for about 5 minutes.
Add enough broth to cover the vegetables. Check seasonings and add salt and pepper and the cooked bacon. Simmer, partly covered, over low heat, stirring often, until sweet potato is very tender, 15 to 20 minutes. Remove from heat. Use a slotted spoon to scoop out 3-4 cups of vegetables and set aside.
Use an immersion blender to puree remaining soup or ladle some of the soup into a blender and puree in batches. Add back the chunks of vegetables and stir in coconut milk. Return the soup to low heat. Check seasonings and add more salt and pepper if desired. If the chowder is thicker than you like, add additional chicken broth until you reach desired consistency.
For the garnish, heat olive oil in a large cast-iron skillet over medium-high heat. Add the corn and sauté until the corn is lightly charred, about 5 minutes. Add salt and pepper. Stir into chowder.
To serve, heat the chowder until hot. Ladle into bowls; top with diced red pepper.
Categories: Uncategorized | Tags: gluten free hearty winter soup, gluten free soup, gluten-free recipes | 2 Comments »
For my birthday, I couldn’t decide between chocolate and vanilla. I solved the problem by making a marble cake. That way I didn’t have to choose! Orange juice and orange zest added a special brightness to this treat. Instead of a layer cake with lots of frosting and lots of extra calories, I made a Bundt cake and topped it with thin layer of orange glaze. The results were yummy.
Now, here’s the best part. I made this from chocolate and a vanilla gluten-free cake mixes. Quick, delicious and such a nice gift!
Orange Marble Birthday Cake 
Serves 10 to 12
1 box (15 ounces) Gluten-Free Yellow or White Cake Mix*
1 box (15 ounces) Gluten-Free Chocolate Cake Mix*
2 sticks unsalted butter or dairy-free alternative, softened, divided
4 large eggs, divided
3 teaspoons vanilla extract, divided
2 cups buttermilk, divided (a tad less than 2 cups, really)
Juice and zest of one orange
Preheat oven to 350 degrees. Lightly oil a 10-cup Bundt cake pan.
Make the Yellow Cake. Cream 1 stick of butter until light and fluffy. Add yellow cake mix and beat until crumbly. Add 2 large eggs and beat until smooth. Beat in 1 ½ teaspoons vanilla and 1 cup buttermilk. Beat until smooth. Set aside.
Make the Chocolate Cake. Cream 1 stick of butter until light and fluffy. Add chocolate cake mix and beat until crumbly. Add 2 large eggs and beat until smooth. Pour orange juice into a 1 cup measure. Add enough buttermilk to measure 1 cup. Add 1 ½ teaspoons vanilla and 1 cup buttermilk mixture to the cake mix. Fold in zest. Beat until smooth. Set aside.
To Assemble. Start with dollops of yellow cake batter, then chocolate cake batter and keep alternating until both batters are used up. Use a sharp knife, swirl the batter to create a marble effect. Set on middle rack in preheated oven. Bake 50-60 minutes or until toothpick comes out clean. Rest 10 minutes on rack then invert, remove pan, and cool completely.
Orange Glaze
3 tablespoons orange juice
¾ to 1 cup confectioners’ sugar
Grated peel of half an orange
Combine juice and sugar and blend until smooth. Add grated peel and mix to combine. Drizzle over the top of the cake before serving.
*Hodgson Mill, Betty Crocker, and Gluten-Free Pantry cake mixes are all good choices as they all weigh 15 ounces. Many other gluten-free cake mixes will work, too. Just weigh out 15 ounces of each mix before using.
Categories: Uncategorized | Tags: easy gluten free recipes, gluten free baking, gluten free birthday cake, gluten free diet | 7 Comments »
Quick, Delicious Chicken and Rice
I went to culinary school in the seventies when classic techniques were still in vogue. We whisked egg whites in copper bowls, boned whole fish, and removed chicken from its skeleton leaving meat and skin intact. But, Auguste Escoffier forgive me. There is more than one way to skin a chicken. As a modern chef and cook, I take shortcuts. Besides, being gluten-free, I cook to eat. I can’t wait all day to enjoy a meal.
In that same era, I took a cooking class in Indian Cuisine. We toasted and ground aromatic spices and made our own customized garam masala, a blend that’s used to flavor every dish. We peeled and grated ginger, poached tomatoes to remove the skin, and fried onions until they were a perfect golden hue. The end results were amazing; but, come on, who has the time to cook this way?
I did meet my future husband in this class and we fell in love over Biryani and Vindaloo. But, I confess we rarely made Indian food together. (It’s still one of my favorites to eat in restaurants and is a decidedly gluten-free-friendly cuisine.) Then I fell in love again – – with Passage Foods Simmer Sauces, aromatic blends of exotic spices, ginger, onion, and garlic, that simmer for hours before they are packaged. These sauces brought Indian food back into my kitchen. All I do is add a protein (chicken or lamb) and some veggies like eggplant, okra. tomato or potato. (Veggies aren’t even necessary if I’m in a rush.) In the time it takes to cook basmati rice in my rice steamer, I have a full meal.
Today, I added a few extra steps so I could justify calling this a recipe instead of a tip. With these additions, I turned Passage Foods Tikka Masala Simmer Sauce into Chicken Biryani and it tastes just like the meal we made in my Indian cooking class years ago.
In case you don’t know about Biryani, it’s a flavorful rice dish filled with aromatic Indian flavors, pieces of chicken or lamb and chunks of potato. There are four hallmarks of a good Biryani. (1) The grains of rice should not clump but be separate and easy to spread apart. (2) The aroma should fill the room with a sweetish fragrance that is not overpowering or reminiscent of any one specific spice. (3) The taste should be flavorful and roll off the tongue and the flavor should fill the meat. (4) There must be nicely browned potatoes and they should be as flavorful as the meat . Without potatoes, it is not Biryani.
So there you have it – – a perfect Biryani. And here’s the recipe. I think you’ll agree it’s easy and delicious. And thanks to simmer sauces, I’ve found a better way to skin a chicken.
Easy and Delicious Chicken Biryani
1 pouch Passage Foods Tikka Masala Simmer Sauce, divided (or other Indian simmer sauce)
1 pound boneless, skinless chicken breast cut in 1 inch cubes
3 tablespoons olive oil
2 large russet potatoes, peeled and cubed
1 large onion, peeled and cut into thin strips
1 ½ cups raw Basmati rice
3 cups gluten-free chicken broth
¾ cup dark raisins
1 ¼ cups shredded carrots (commercial product like Dole brand)
Reserve 1/2 cup of simmer sauce. Marinate chicken in the remaining simmer sauce for 30 to 90 minutes.
In a large skillet, heat 2 tablespoons of the oil and sauté the potatoes and onion until brown and potatoes are fork tender. Remove from skillet and set aside.
In a medium pot, combine the rice, reserved simmer sauce and chicken broth. Bring to a boil. Cover and simmer until most of the liquid is absorbed. Add raisins and carrots. Simmer until liquid is absorbed (about 18 to 20 minutes). The rice should be slightly chewy, not too soft. (Remember – it should not clump.)
While the rice is cooking, heat remaining oil in skillet. Sauté the chicken until browned and cooked through.
When rice is done, fold in the potato and onion mixture. Reheat briefly (about 1 minute). Spread mixture over a serving platter and top with chicken.
Serves 4.
Now For Some Deals!
Want a sample of Passage Foods Tikka Masala? Sign up for our newsletter in the upper right hand corner of this site. We’ll send five lucky people sample packs of Indian, Thai, and Moroccan Simmer Sauces. Or go to Passage Foods for information on where you can find their sauces.
Blender Girl Giveaway
I love this community of bloggers. So much energy! Look at this. My new best blogging friend Tess Masters aka Blender Girl is making April gluten-free month with great recipes from all your gluten free blogger friends and a KitchenAid Giveaway. Check it out.

Categories: Recipes, Uncategorized | Tags: chicken and rice, dinner in minutes, easy, gluten free, Indian cooking, quick, recipes | 3 Comments »
In late September we bicycled through the cranberry bogs in Cape Cod. The weather was gloriously sunny – -spectacular in fact. I could not get enough of the sparkling late summer air – – the sun on my face, a faint, salty breeze tussling my hair, an apple-picking crispness brushing cobwebs from my brain.
What could be better than a lazy Saturday afternoon on a relatively flat bike trail? But, as I peddled, I realized something was missing. The cranberry bogs beside the trail were dry and empty. Don’t cranberries grow in water? And where are the plants, anyway? I expected to see seas of red as we bicycled.
“What happened to all the cranberries?” I asked the store owner when we returned the bikes.
“Harvested,” he said. (Cape Codders are not known for using more words than needed.) “Headed for market, ” he added.
“Oh,” I said, trying to emulate his frugality.
Sure enough. Two weeks later, fresh cranberries began appearing in the produce aisle of my favorite grocery stores. Now, I realize that fresh cranberries are frozen and sold all year long. But I had never quite appreciated the relationship between the harvest and the availability of fresh produce. Who thinks about these things when they are pushing a grocery cart through a crowded supermarket?
In celebration, I bought three bags of fresh cranberries. It seemed fitting to honor the cranberry harvest with something sweet, and slightly sour. I came up with a Chocolate Cranberry Mousse Tart that I served for a recent gathering. I’ve made it twice since and the balance of tart and sweet, like the late summer sun, always amazes me.
You may find more superlatives to describe this easy dessert. But, in keeping with the Cape Cod tradition, I’ll just say, “Wow.”
The graham cracker crumb crust with a layer of chocolate can be used for many mousse-like pies. I keep a supply of Kinnikinnick graham-style crumbs on hand to make this dessert. And now I will keep a supply of fresh and frozen cranberries at the ready, too.
Chocolate Cranberry Mousse Tart
This is as festive as it is delicious. Decorate with whipped topping and chocolate shavings and garnish with cranberries.
One chocolate graham crumb crust (below) in a 9-inch tart or springform pan.
12-ounce bag fresh or frozen cranberries, rinsed and drained
¾ cup sugar, divided
6 tablespoons orange juice
2 ½ teaspoons dried orange peel
1/3 teaspoon ground ginger
3 tablespoons Triple Sec or other orange liqueur or additional orange juice
1 tablespoon unflavored gelatin softened in 1 1/2 tablespoon orange juice
1 ½ cup whipping cream or non-dairy whipped topping
In a medium saucepan, combine cranberries, 6 tablespoons sugar, orange juice,
orange peel, and ground ginger. Bring to a boil, stirring frequently. Lower heat
to medium low and cook, stirring frequently until cranberries break down, about
15 minutes. Remove from heat. Add Triple Sec and stir. Let cool slightly. Press mixture through a mesh sieve, scraping puree into a bowl. Do this until all the liquid has been pressed out of the fruit. Discard pulp. Warm the gelatin in a microwave for 10
seconds or until it liquefies. Pour into the cranberry mixture in a steady stream, stirring while adding. Scrape into a bowl and chill about 20 minutes.
Beat the cream and remaining 6 tablespoons sugar until stiff. Fold into cranberry mixture and spoon into prepared crust. Chill at least 3 hours. Cut and serve with additional
whipped cream if desired. Garnish with chocolate shavings.
Chocolate Graham Cracker Crust
This easy and tasty crust can be made several days ahead and stored in refrigerator
until ready to use.
1 cup gluten-free graham cracker style crumbs (such as Kinnikinnick brand)
3 teaspoons unsweetened cocoa
¼ cup sugar
3 tablespoons melted butter or non-dairy spread
½ cup semi-sweet chocolate chips, for dairy-free chips visit enjoylifefoods.com
2 tablespoons light cream or coconut milk
Preheat oven to 325 degrees. Lightly oil the bottom of a 9-inch springform pan.
Combine cookie crumbs, cocoa and sugar. Add the melted butter and stir until crumbs are moistened. Press into the bottom of the prepared pan. Bake in the center of a preheated oven, 12 minutes. Remove and cool.
In a microwave safe bowl, combine chocolate chips and cream or coconut milk. Heat on medium for 1 minutes or until chips are softened. Blend together until smooth. Spread mixture over cooled crust. Chill until set. Fill with cranberry mousse filling above.
Categories: Recipes, Uncategorized | Tags: dairy-free, dessert, gluten free, holiday | 5 Comments »
Follow Us Online
More Cookbook Stuff
Gluten-Free Makeovers - - Nearly 200 recipe makeovers for everyone to enjoy. Buy it at glutenfreeandmore.com, Amazon.com and barnesandnoble.com.
About This Blog
 Baking guru, Beth Hillson, transforms favorite foods into recipes that are safe for your gluten-free diet.


